DevOps Hands-On Project - Jenkins Declarative Pipeline

Cloud Engineer and DevOps enthusiast, just talking about AWS, Docker, Linux, Kubernetes, Python, and automation.
Project Description
Automate the entire web application development process using Jenkins and GitHub. Our goal is to build a powerful Jenkins pipeline for continuous integration and continuous deployment (CI/CD). Leverage Jenkins' automation capabilities and GitHub's version control to achieve seamless software delivery.
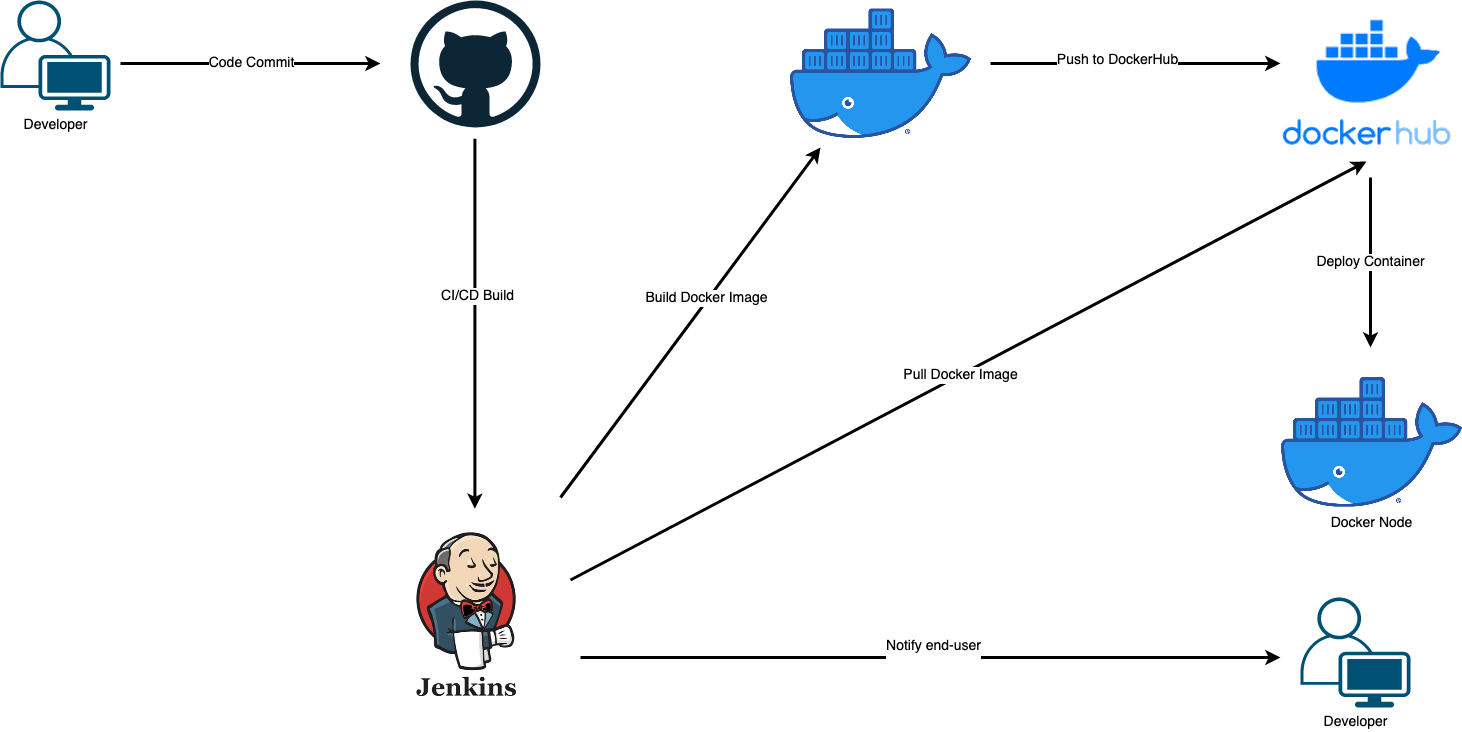
Project Workflow:
Code Changes Detection: The pipeline automatically detects code changes in the GitHub repository.
Build Stage: Jenkins initiates the build stage, compiling code and generating artifacts.
Deployment Stage: After a successful build stage, the application goes live for users.
Notifications and Alerts:
To stay informed about the pipeline's status and any critical issues, we'll configure notifications and alerts. Jenkins will send notifications to relevant team members through various communication channels, such as email, Slack, or other messaging platforms. This proactive approach ensures swift resolution of any potential problems.
Resolution
Step 1: Set Up Jenkins
Ensure you have Jenkins installed and running. If not, follow the installation instructions for your specific platform. I'll use an Ubuntu EC2 instance and the below User Data file.
 #!/bin/bash

 echo "Docker installation"
 echo "------------------------------------------------------------------"
 sudo apt update
 sudo apt install -y apt-transport-https ca-certificates curl software-properties-common
 curl -fsSL https://download.docker.com/linux/ubuntu/gpg | sudo gpg --dearmor -o /usr/share/keyrings/docker-archive-keyring.gpg
 echo "deb [arch=amd64 signed-by=/usr/share/keyrings/docker-archive-keyring.gpg] https://download.docker.com/linux/ubuntu $(lsb_release -cs) stable" | sudo tee /etc/apt/sources.list.d/docker.list > /dev/null
 sudo apt update
 sudo apt install -y docker-ce docker-ce-cli containerd.io
 sudo systemctl start docker
 sudo systemctl enable docker
 sudo usermod -aG docker $USER

 echo "Jenkins installation"
 echo "------------------------------------------------------------------"
 sudo apt update
 sudo apt install -y openjdk-17-jre
 curl -fsSL https://pkg.jenkins.io/debian-stable/jenkins.io-2023.key | sudo tee \
   /usr/share/keyrings/jenkins-keyring.asc > /dev/null
 echo deb [signed-by=/usr/share/keyrings/jenkins-keyring.asc] \
   https://pkg.jenkins.io/debian-stable binary/ | sudo tee \
   /etc/apt/sources.list.d/jenkins.list > /dev/null
 sudo apt-get update
 sudo apt-get install -y jenkins

 echo "Add Jenkins to Docker Group"
 echo "------------------------------------------------------------------"
 sudo usermod -aG docker jenkins
Access the Jenkins web interface by navigating to
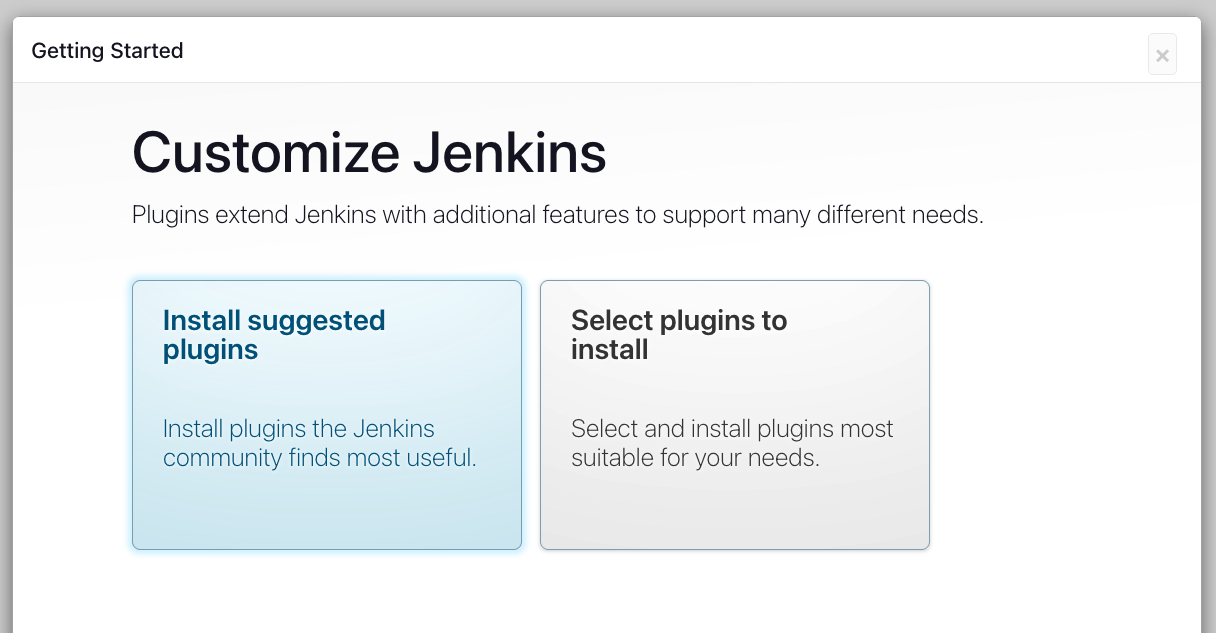
http://localhost:8080or the URL where Jenkins is hosted.Once logged in, proceed to install the suggested plugins.
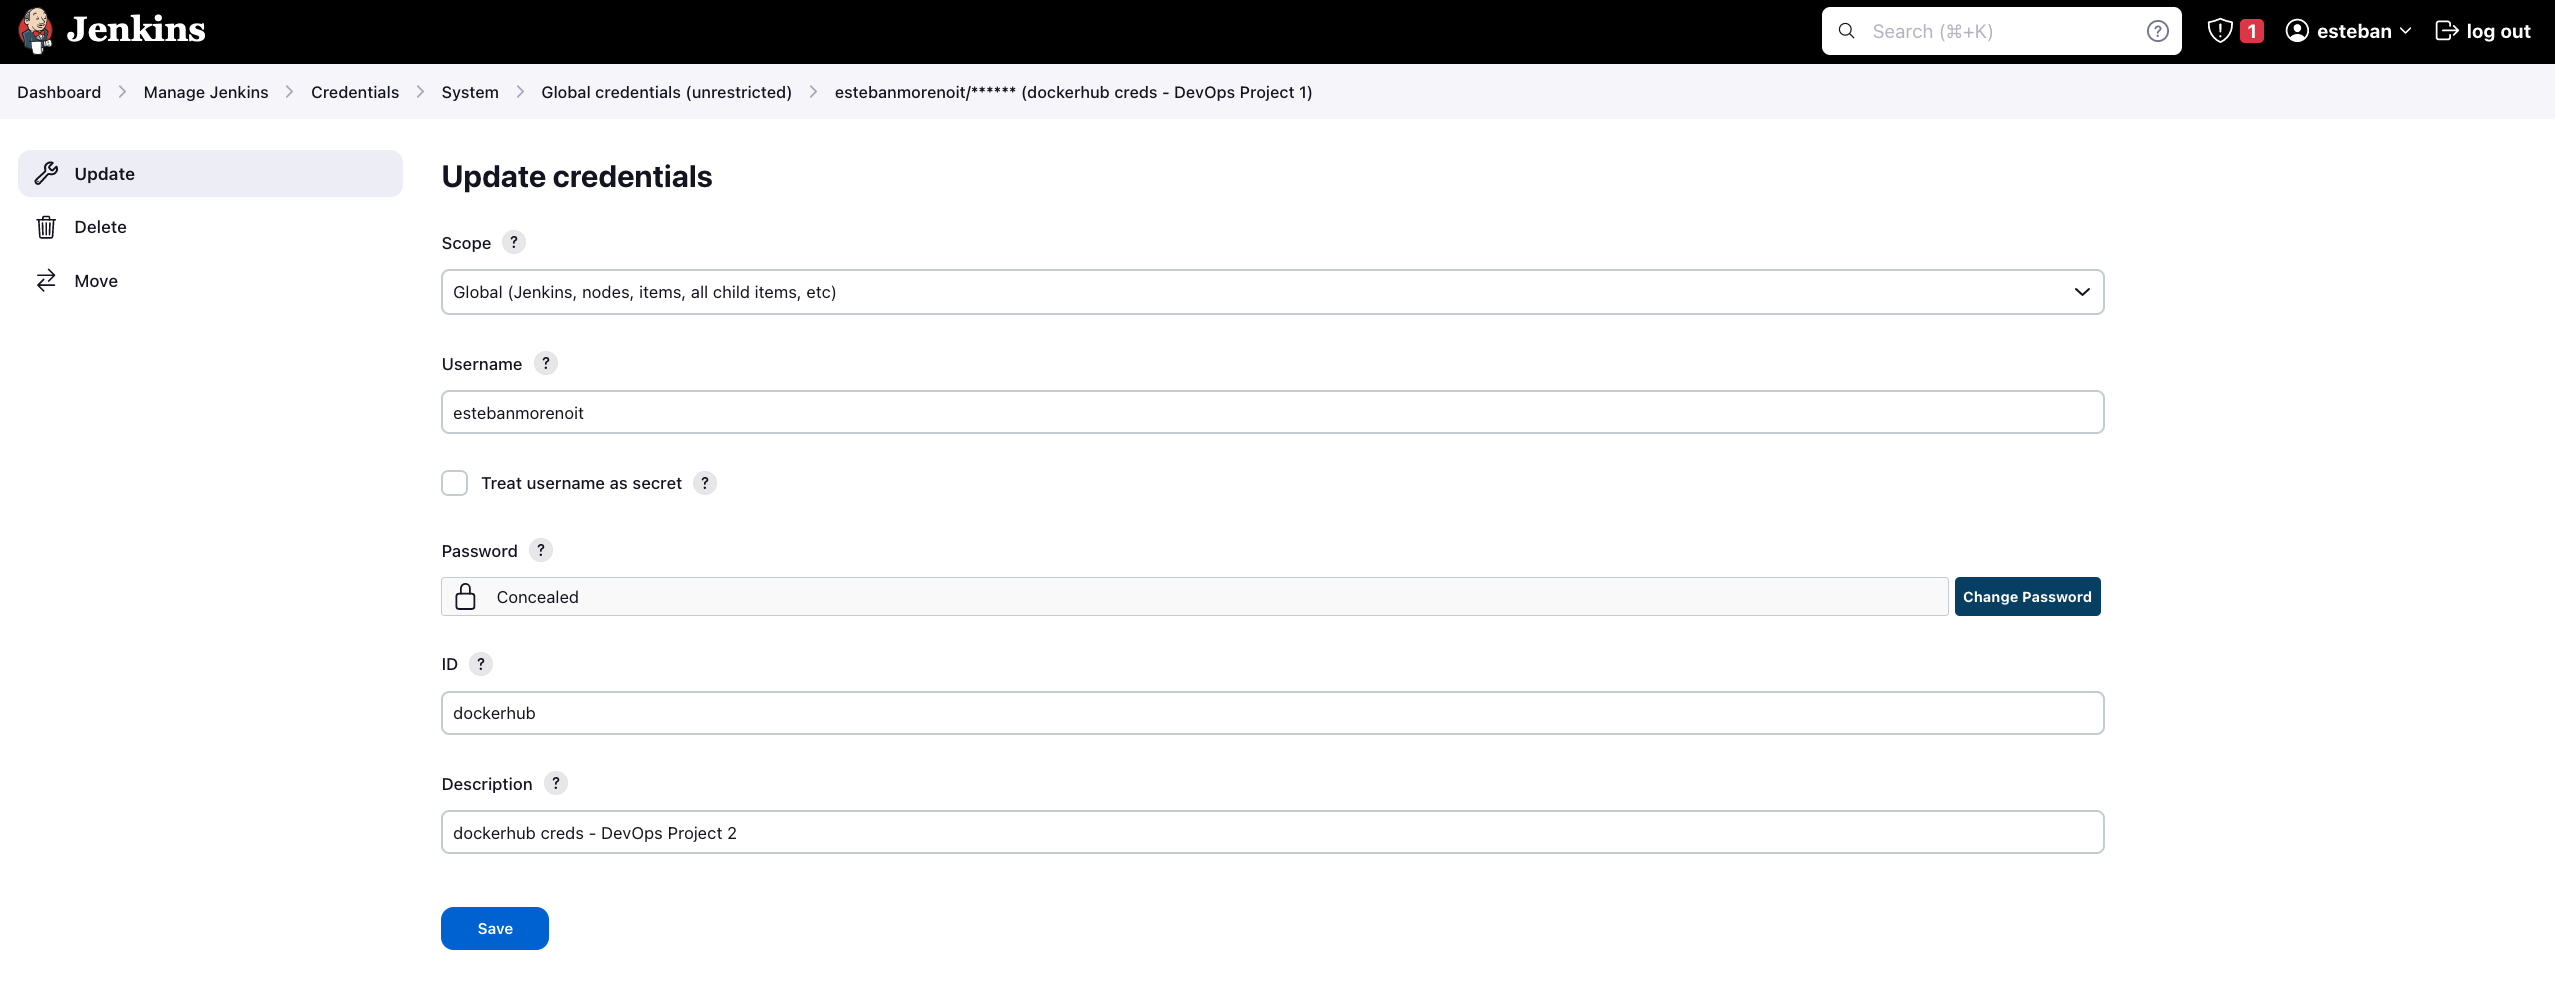
Set up the necessary global configurations, such as DockerHub credentials and email notification settings, in Jenkins.
Step 2: Create a New Jenkins Job
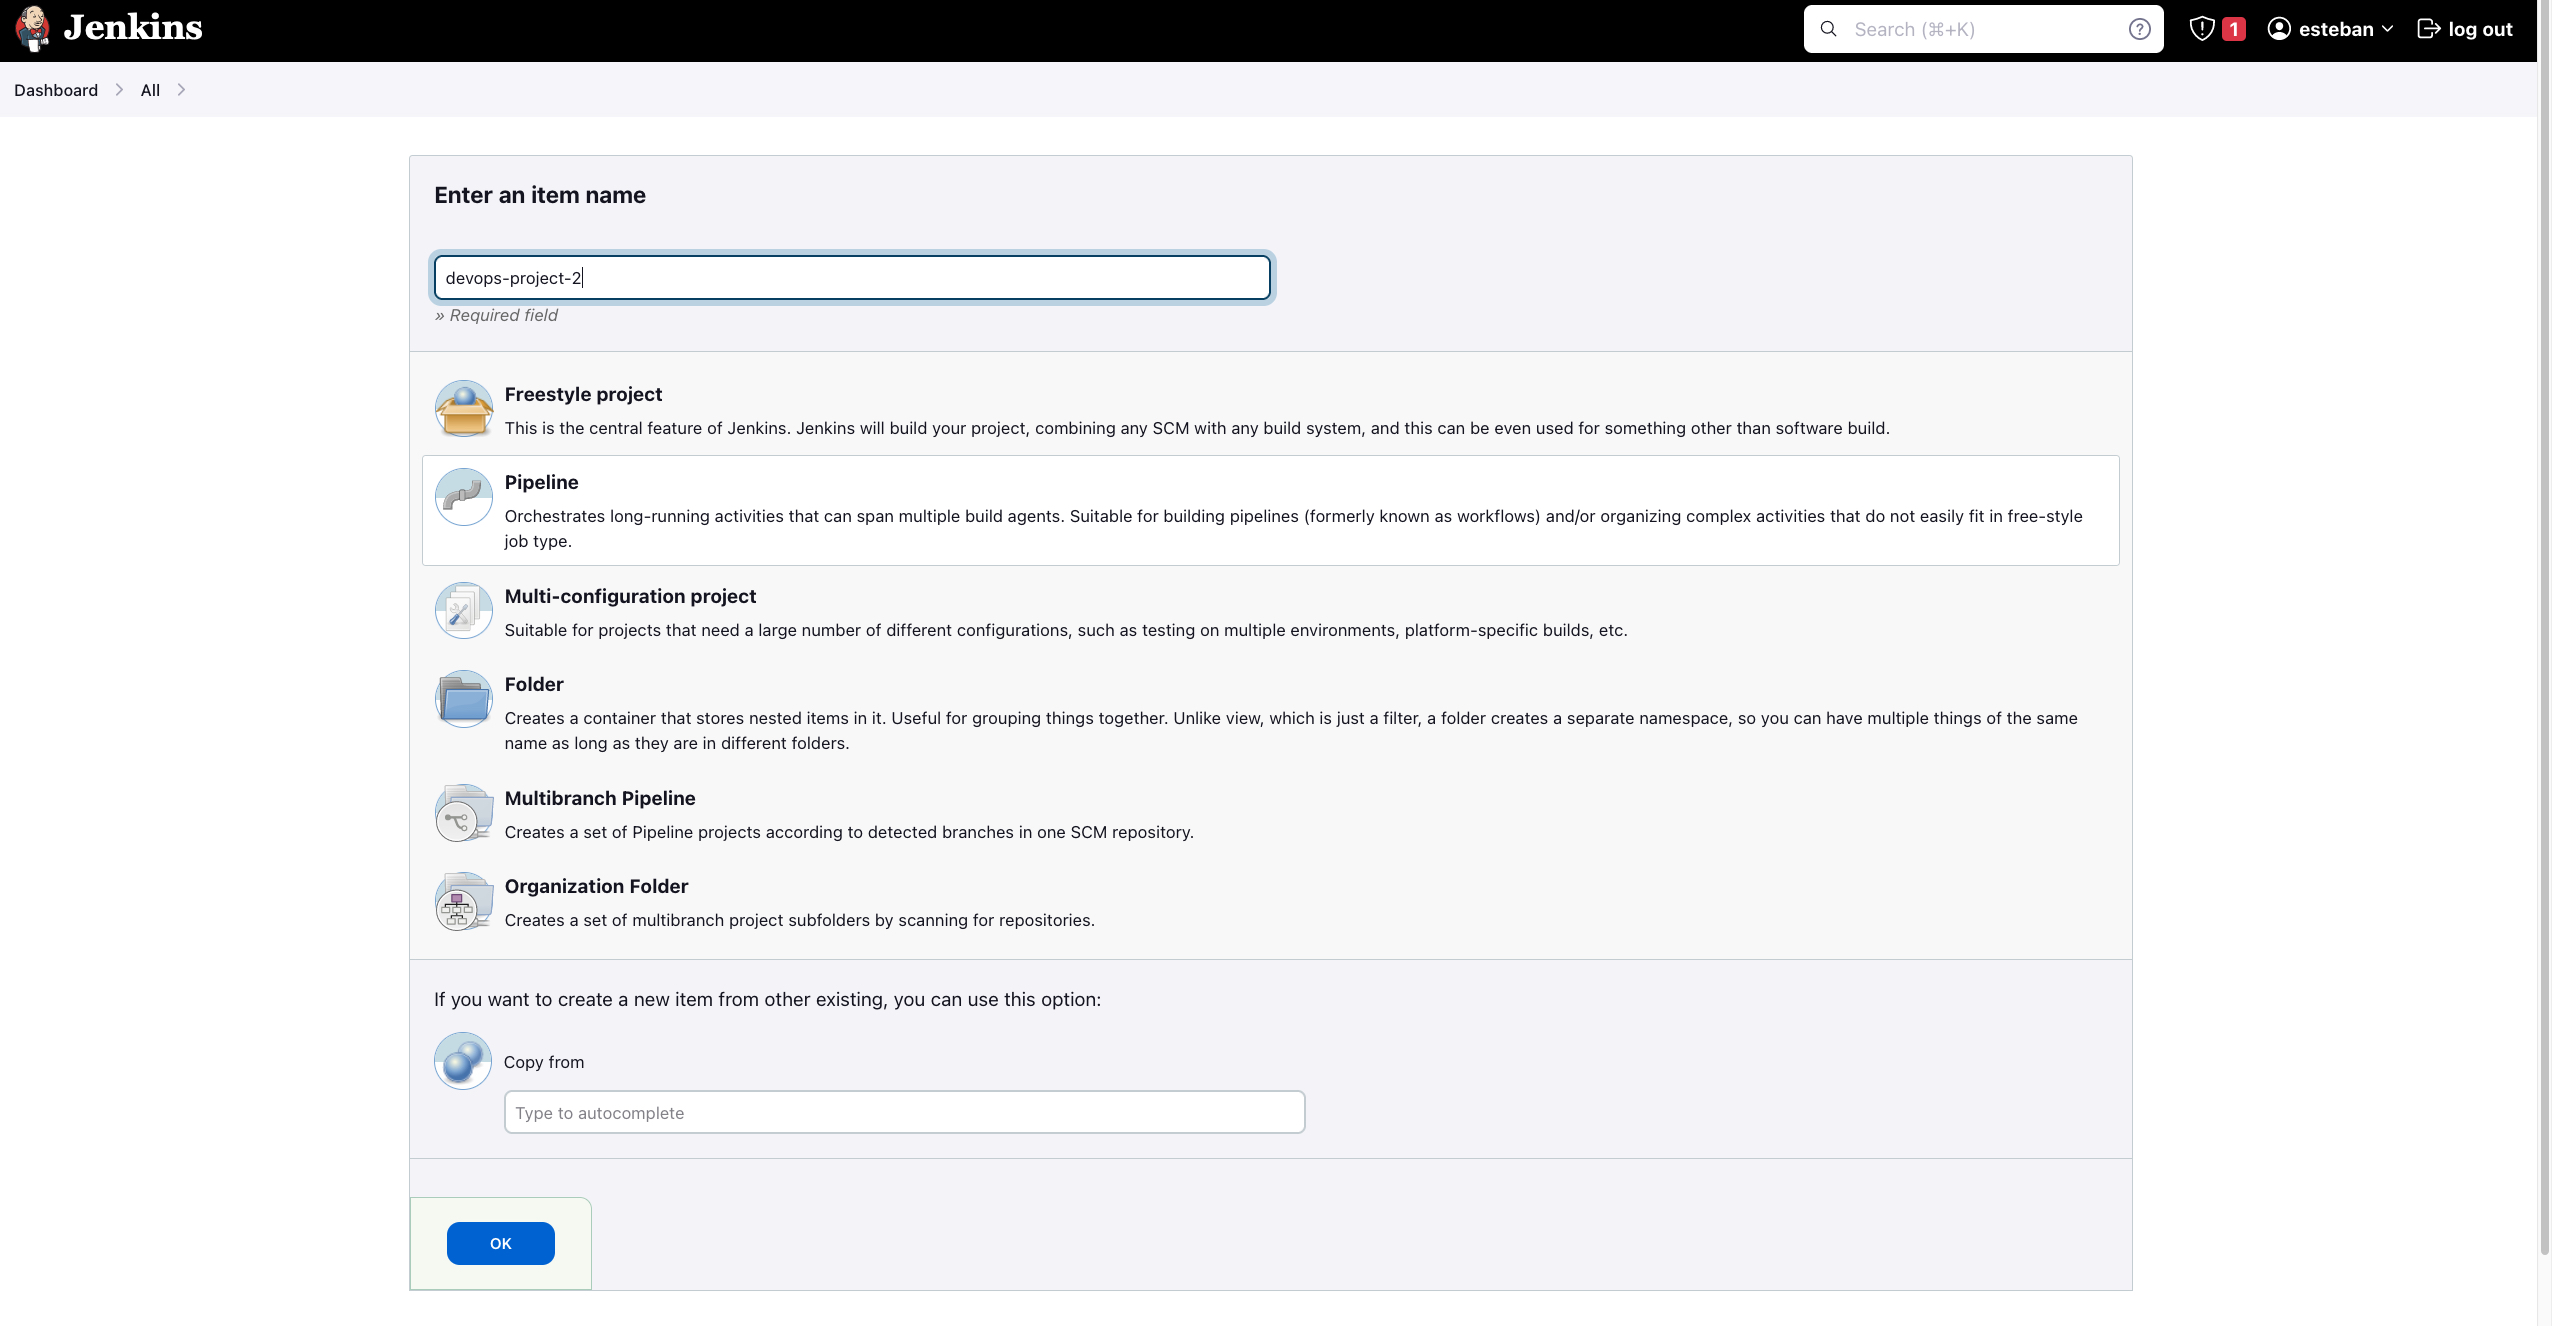
Click on "New Item" on the Jenkins dashboard to create a new Jenkins job.
Enter a suitable name for the job (e.g., "DevOps Project 2").
Choose the "Pipeline" option and click "OK" to create the job.
Step 3: Configure the Jenkins Pipeline
In the General Section, tick the
GitHub projectbox and provide your repository URL.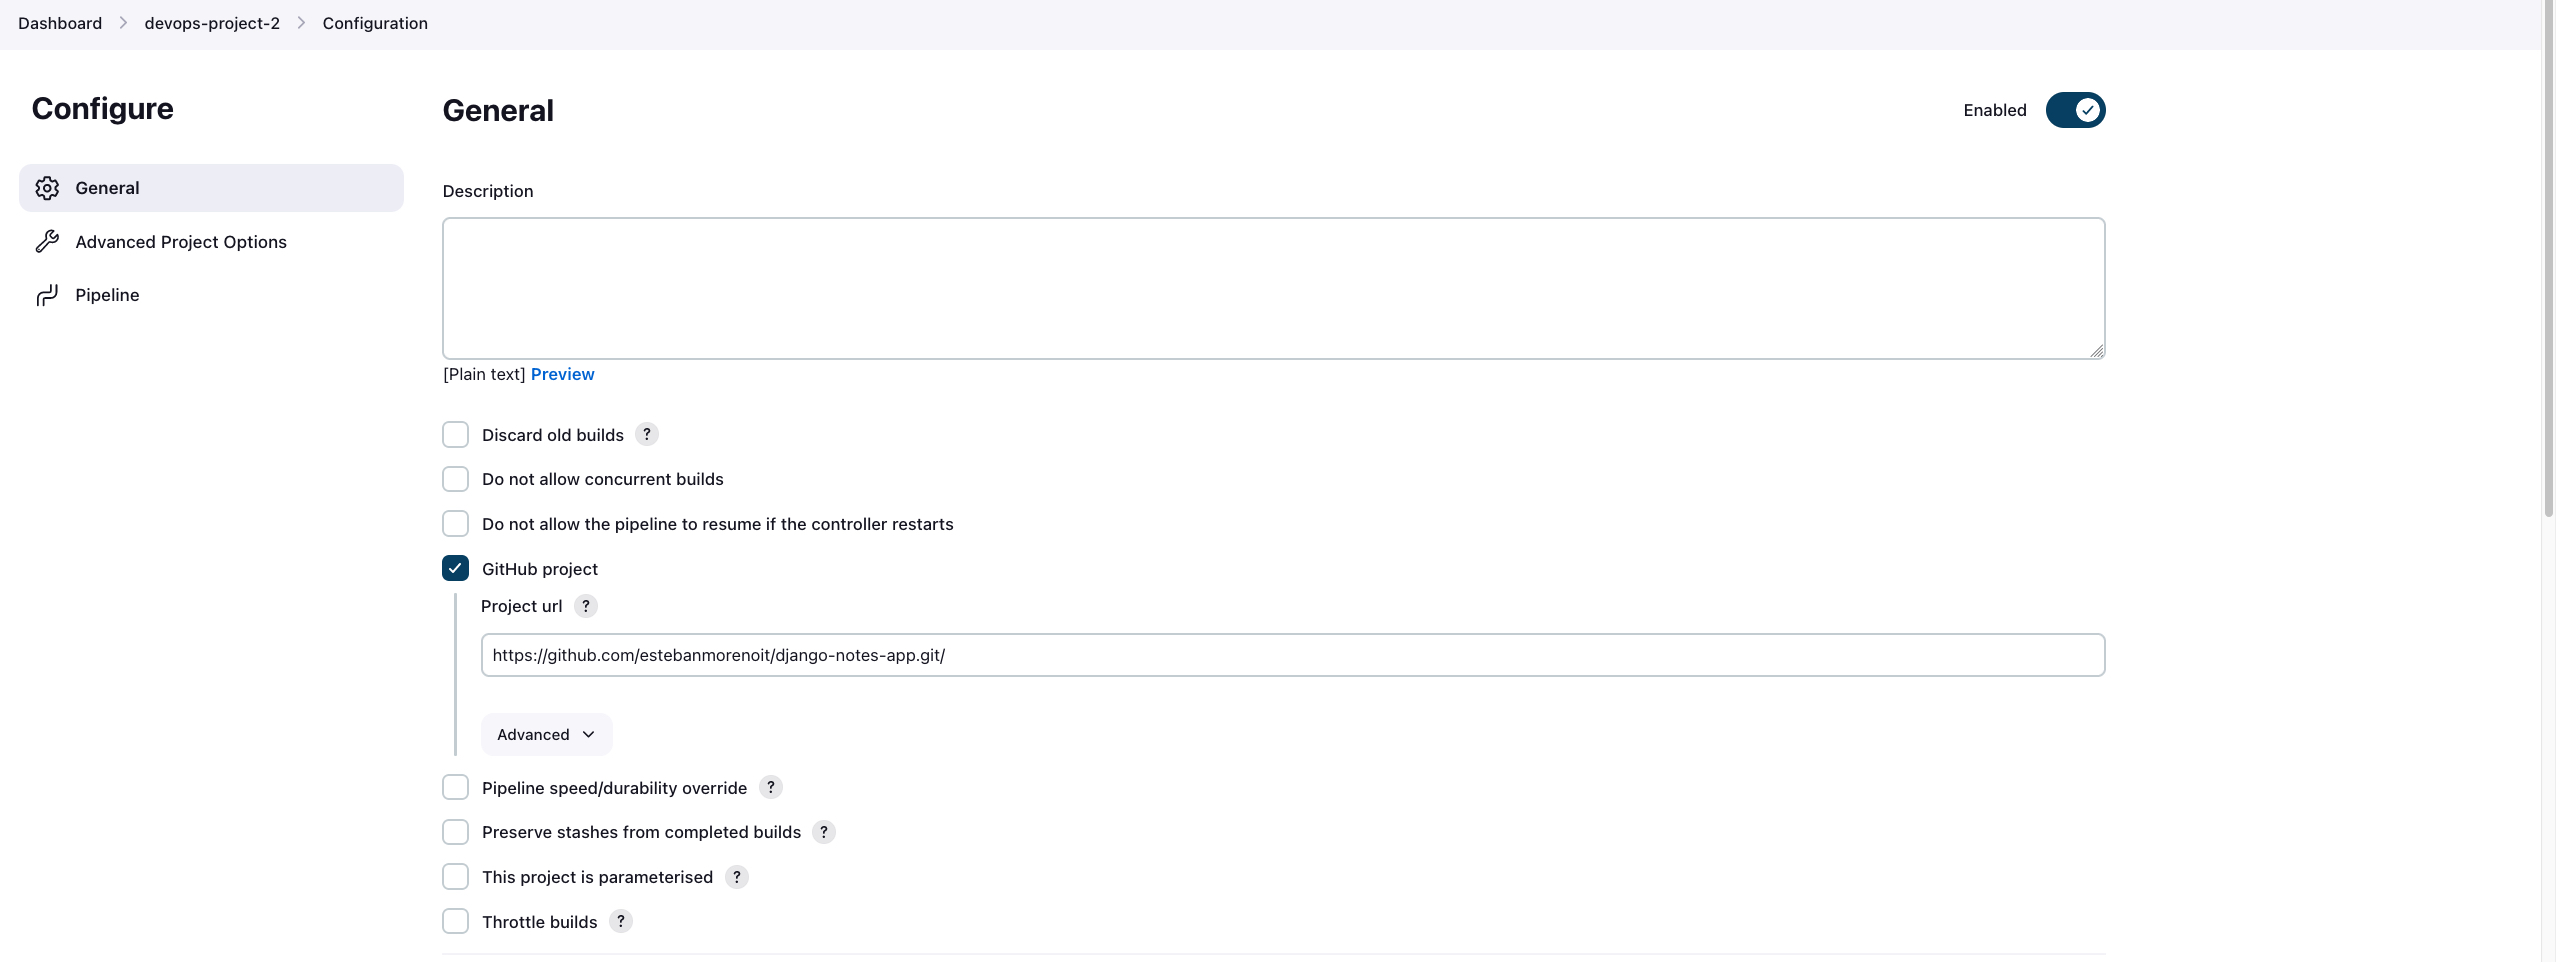
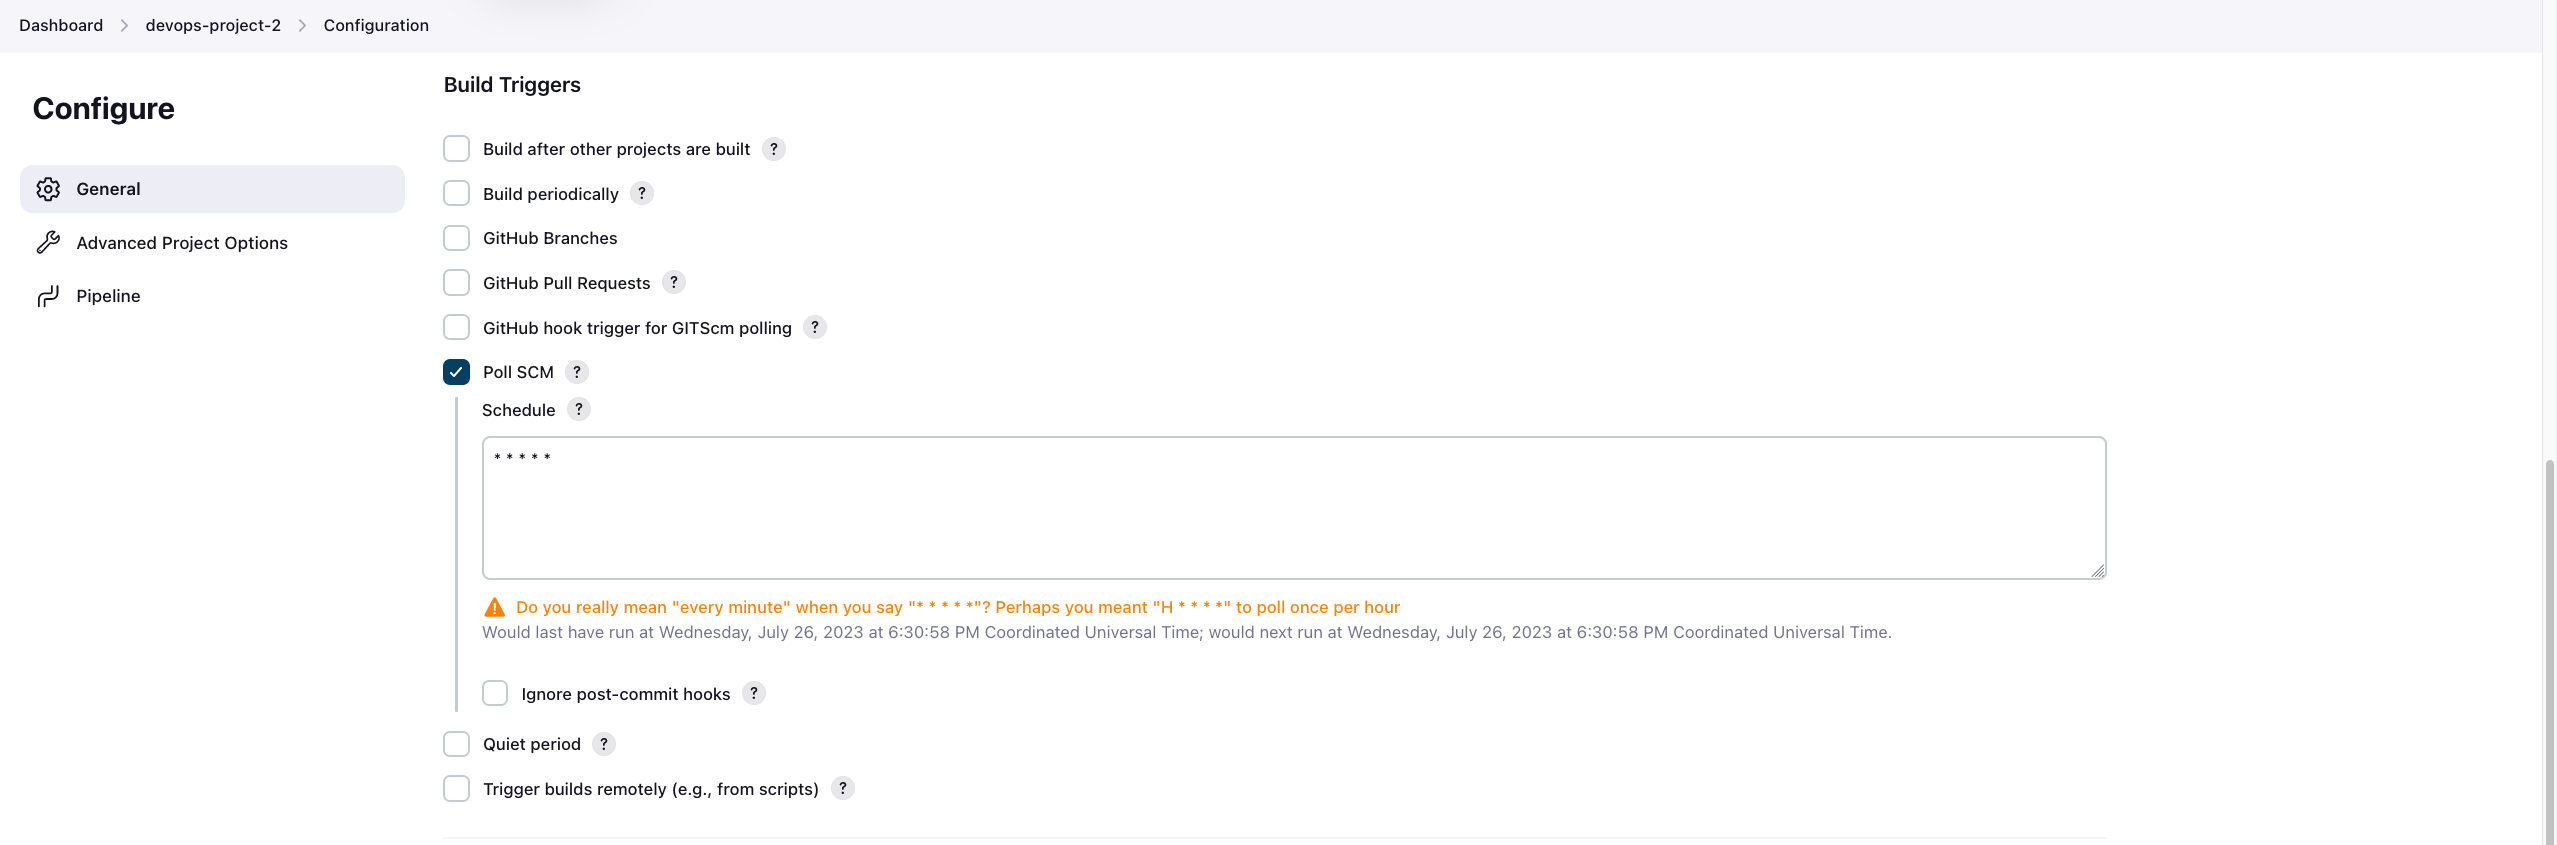
Move to the "Build Triggers" section, and select Poll SCM to trigger the Jenkins Pipeline when changes are discovered. We'll schedule it to run a scan every minute.
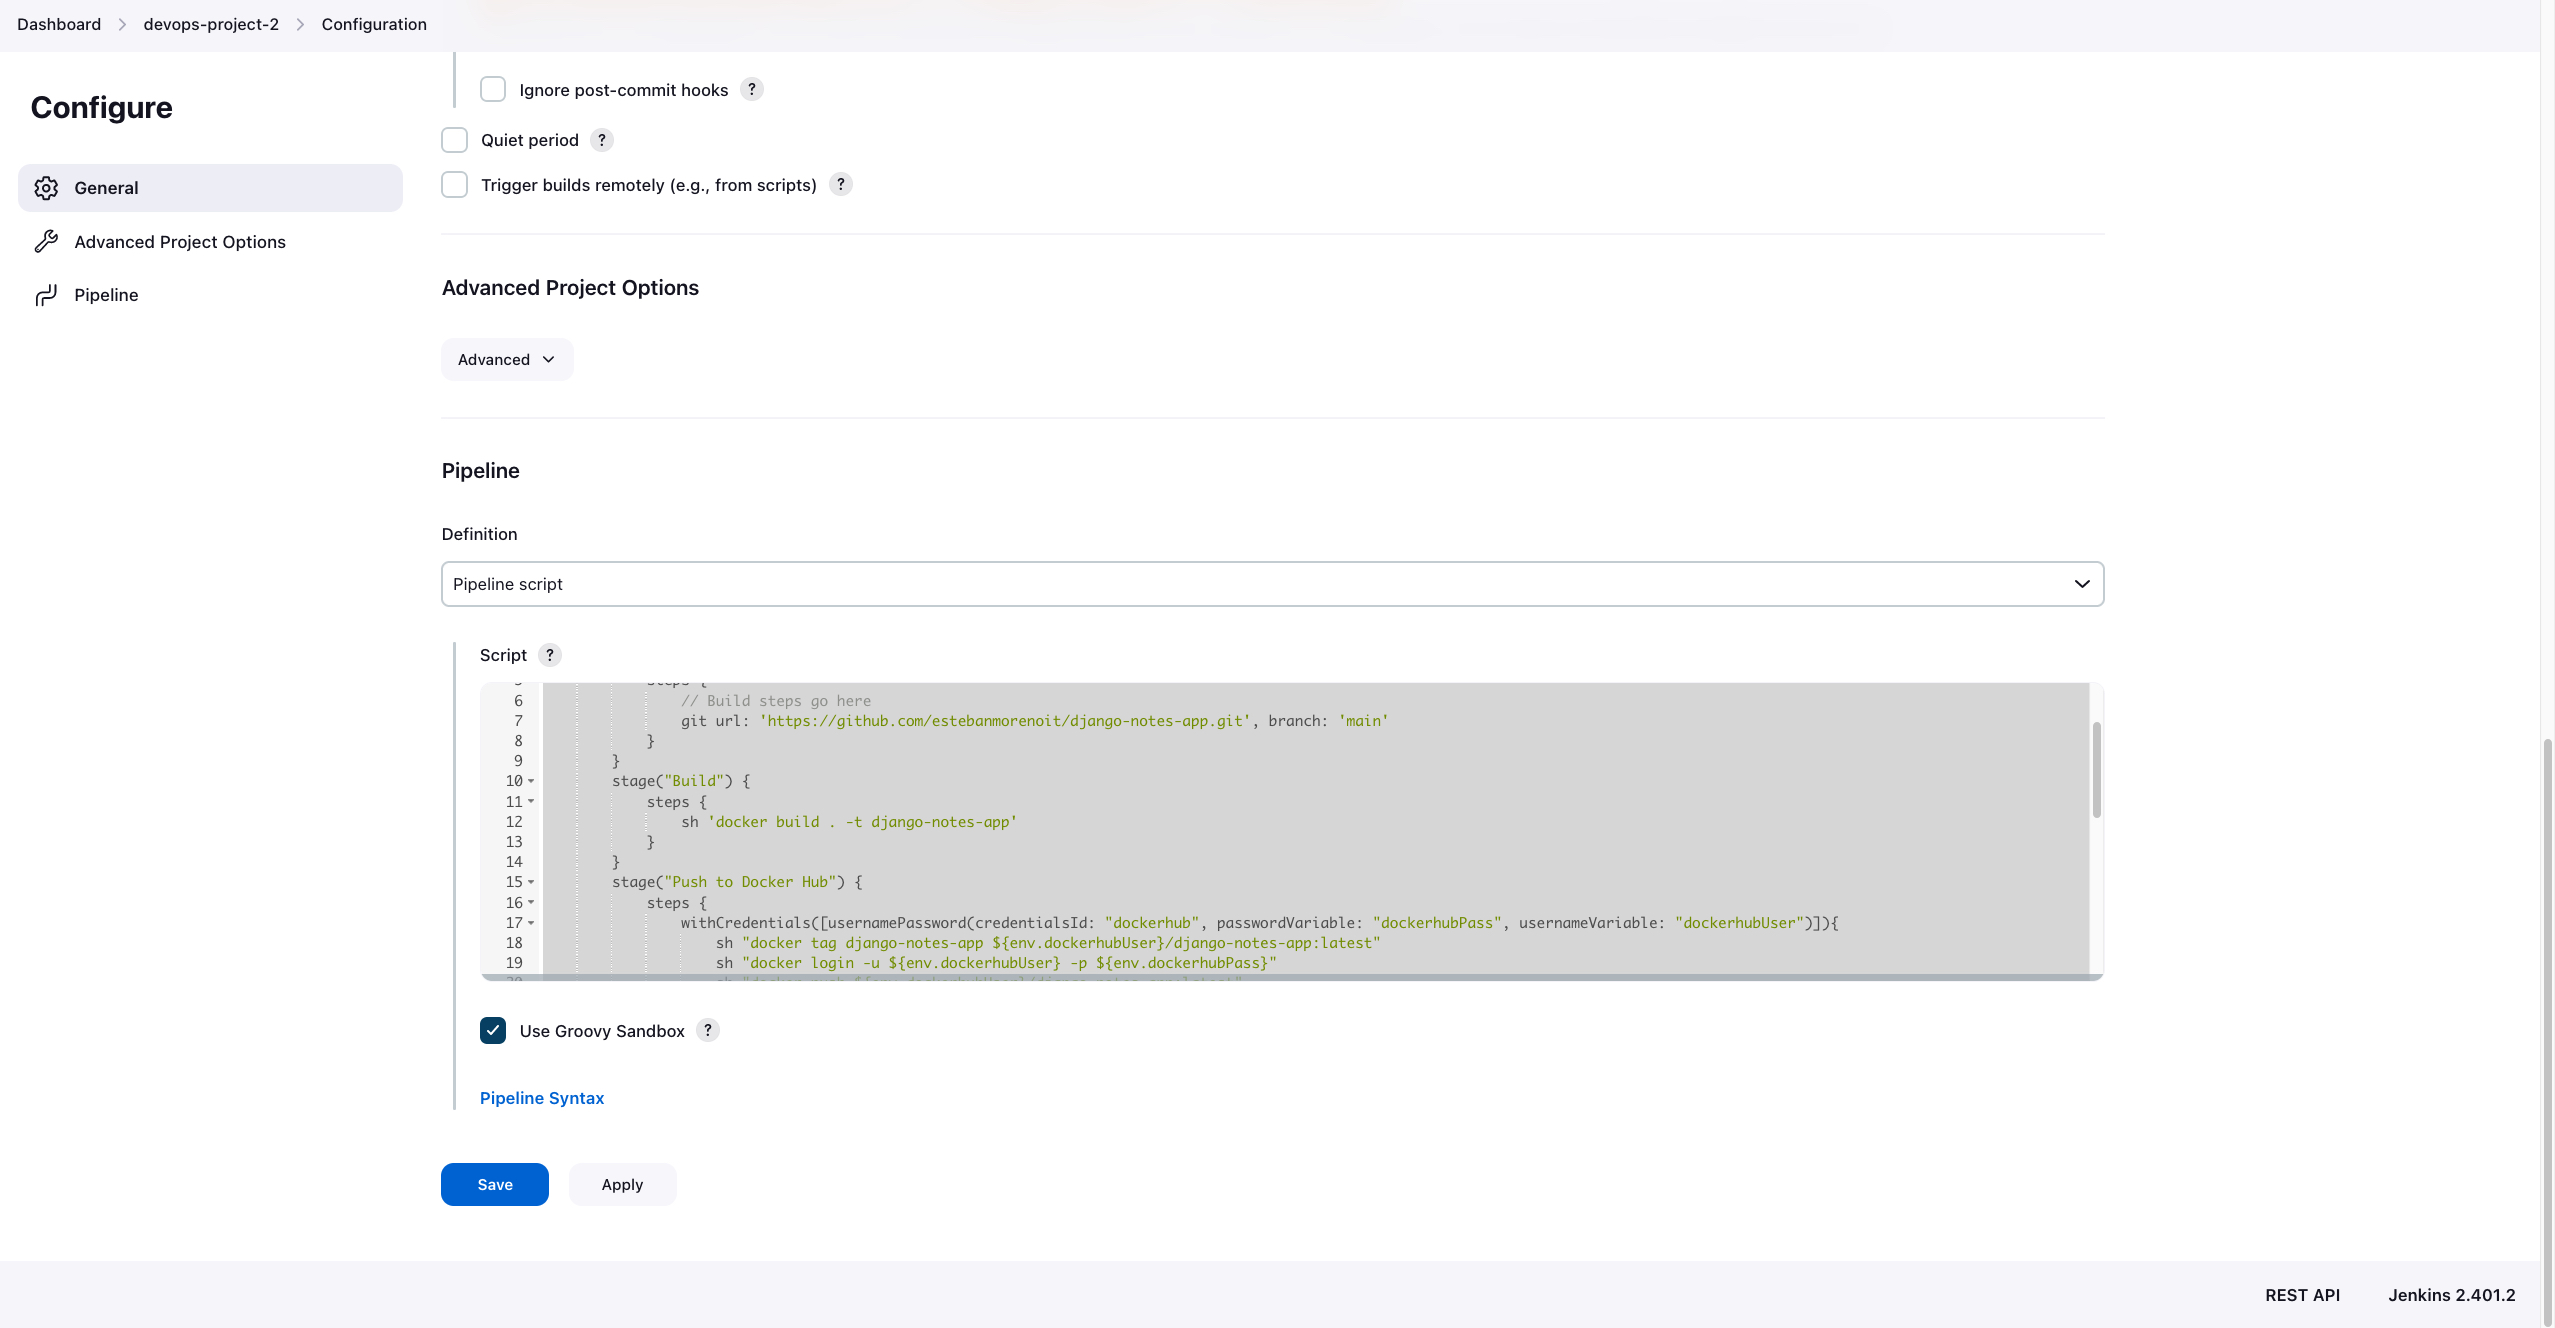
Navigate to the "Pipeline" section.
Select the "Pipeline script" option and enter the declarative pipeline syntax for your project.
 pipeline {
     agent any
     stages {
         stage('Clone Code') {
             steps {
                 // Build steps go here
                 git url: 'https://github.com/estebanmorenoit/django-notes-app.git', branch: 'main'
             }
         }
         stage("Build") {
             steps {
                 sh 'docker build . -t django-notes-app'
             }
         }
         stage("Push to Docker Hub") {
             steps {
                 withCredentials([usernamePassword(credentialsId: "dockerhub", passwordVariable: "dockerhubPass", usernameVariable: "dockerhubUser")]) {
                     sh "docker tag django-notes-app ${env.dockerhubUser}/django-notes-app:latest"
                     sh "docker login -u ${env.dockerhubUser} -p ${env.dockerhubPass}"
                     sh "docker push ${env.dockerhubUser}/django-notes-app:latest"
                 }
             }
         }
         stage("Cleanup") {
             steps {
                 // Stop and remove the container if it exists
                 sh 'docker stop django-notes-app || true'
                 sh 'docker rm django-notes-app || true'
             }
         }
         stage("Deploy") {
             steps {
                 // Run the container and bind port 8000
                 sh 'docker run -d -p 8000:8000 --name django-notes-app django-notes-app'
             }
         }
     }
     post {
         success {
             emailext (
                 to: 'morenoramirezesteban@gmail.com',
                 subject: 'Deployment Successful',
                 body: 'The deployment to production was successful. You can access the application at http://<ec2-instance-public-ip-address>:8000',
             )
         }
         failure {
             emailext (
                 to: 'morenoramirezesteban@gmail.com',
                 subject: 'Deployment Failed',
                 body: 'The deployment to production failed. Please check the Jenkins console output for more details.',
             )
         }
     }
 }
Apply the changes and save the Pipeline.
Step 4: Configure Notifications and Alerts:
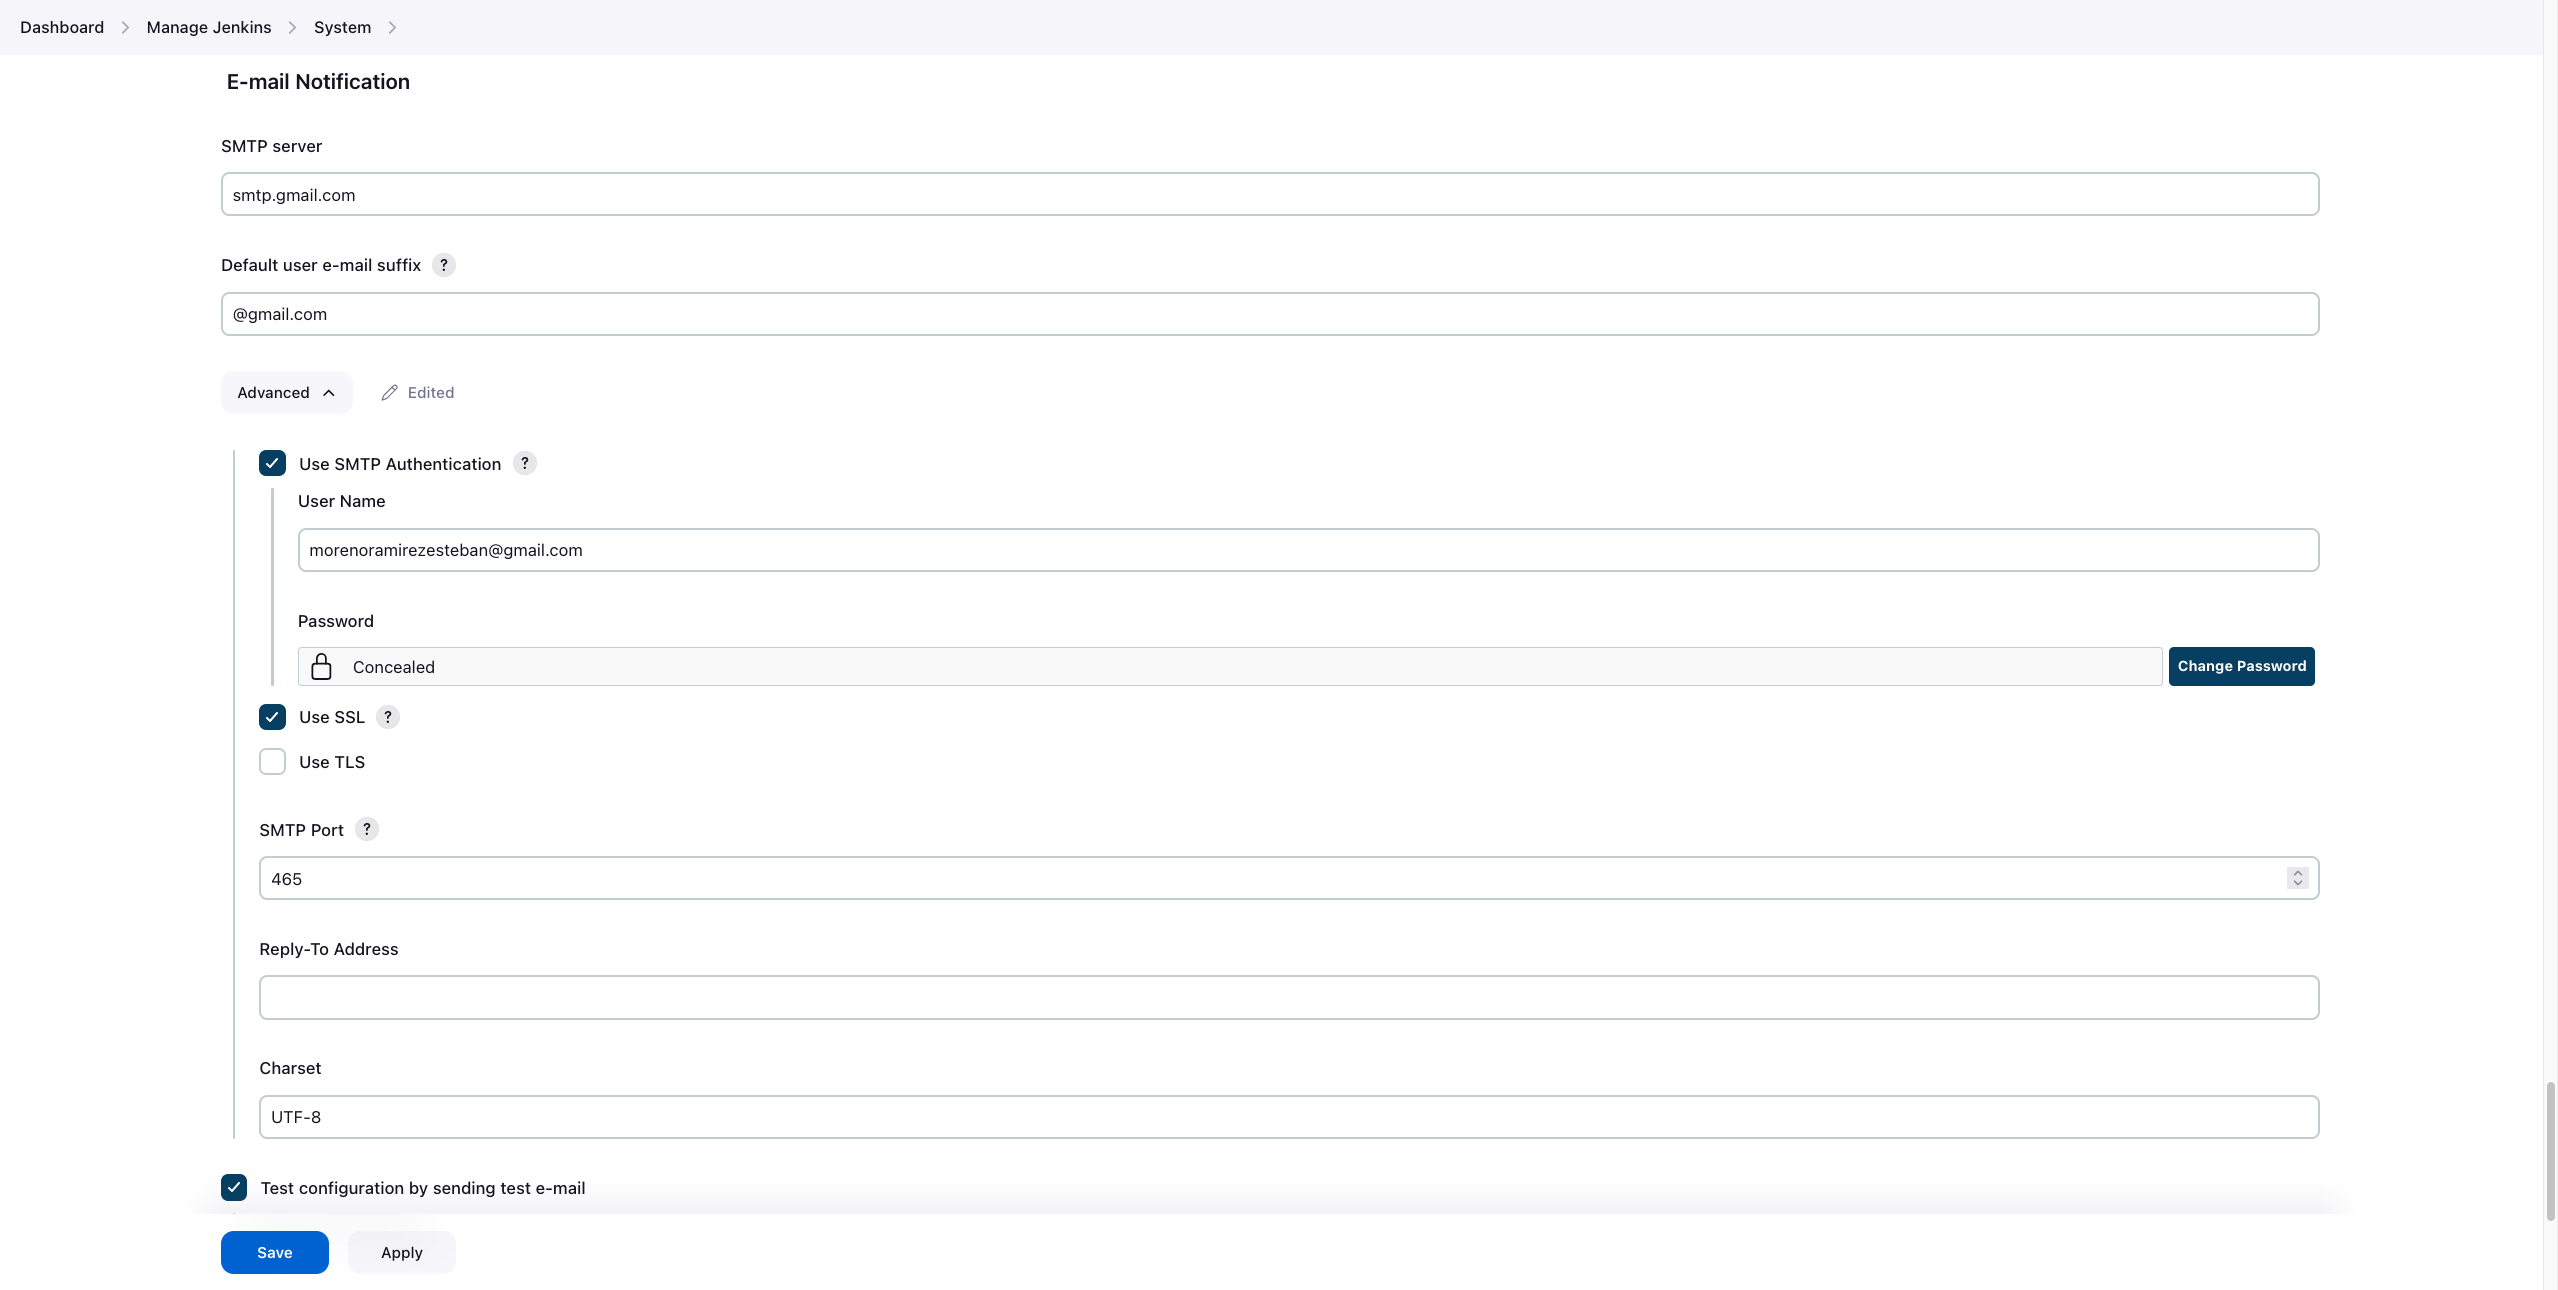
To set up email notifications using Gmail as the SMTP server in Jenkins, follow these steps:
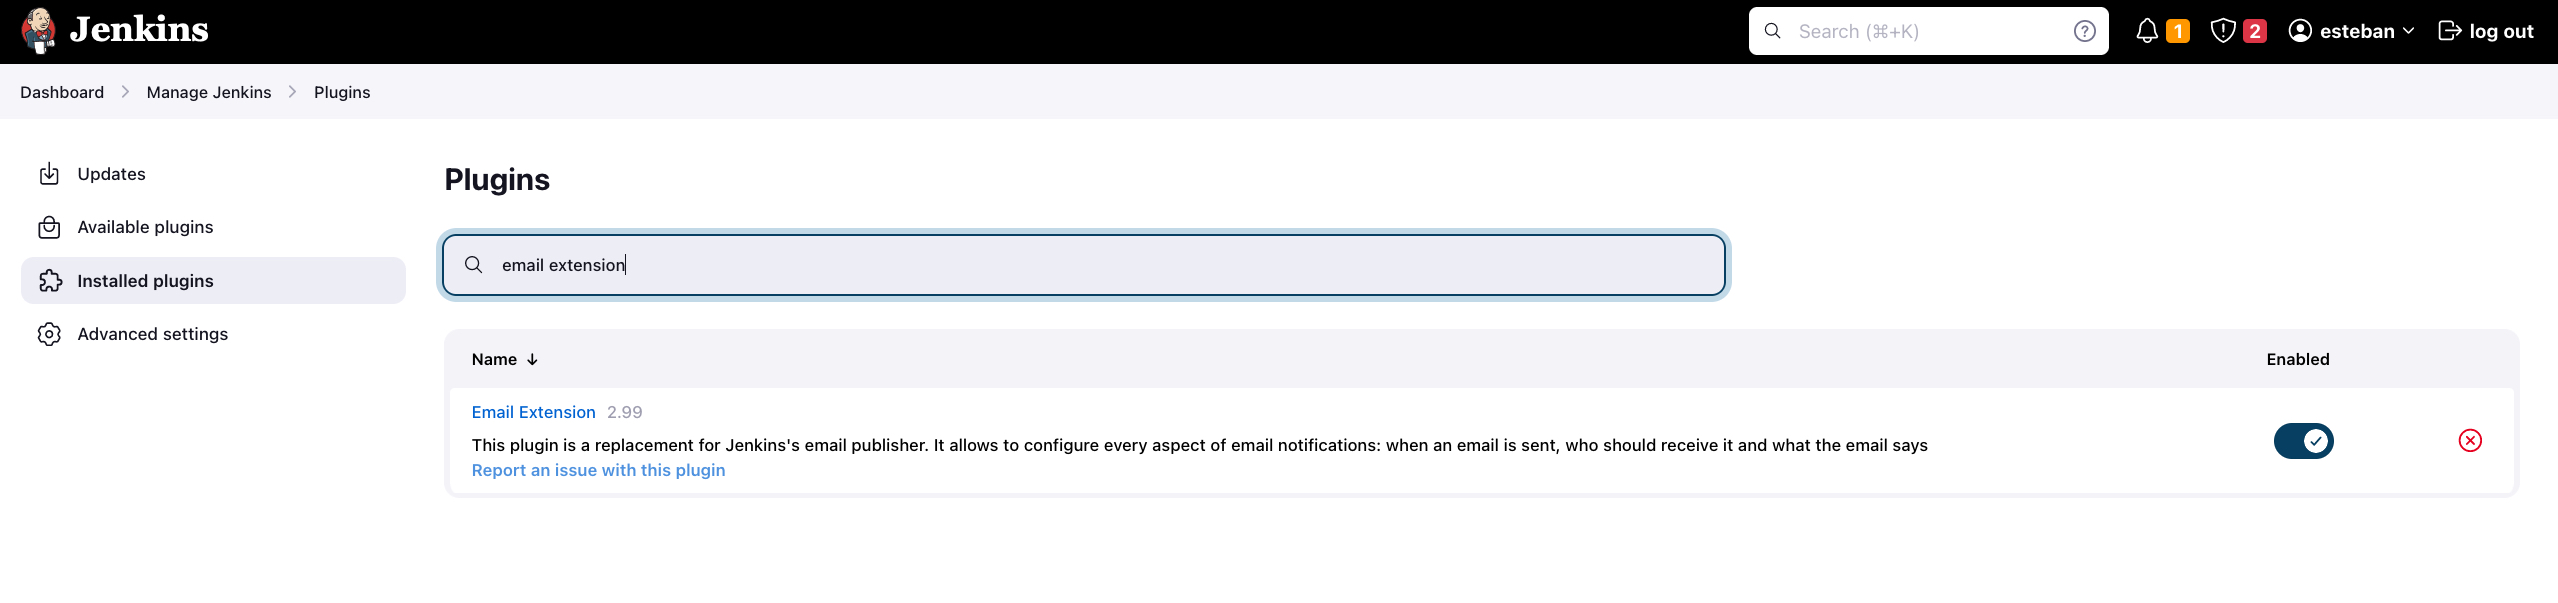
Install the Email Extension Plugin:
Go to "Manage Jenkins" > "Manage Plugins" > "Available" tab.
Search for "Email Extension" in the filter box.
Check the checkbox next to "Email Extension" and click "Install without restart."
Configure Gmail SMTP Server in Jenkins:
Go to "Manage Jenkins" > "Configure System."
Scroll down to the "Extended E-mail Notification" section.
In the "SMTP server" field, enter Gmail's SMTP server address:
smtp.gmail.comSet the "Default user e-mail suffix" to
@gmail.comClick "Advanced" to expand additional settings.
Set "SMTP port" to
465.Check the "Use SMTP Authentication" box.
Enter your Gmail email address in the "User Name" field.
Click "Add" to add a new "Password" and enter your Gmail account's password.
Check the "Use SSL" box.
Save the configuration.
Enable "Less Secure Apps" in Gmail (Only if required):
If you encounter authentication issues, you may need to enable "Less Secure Apps" in your Gmail account settings.
Under "Signing in to Google," click "App passwords."
Sign in to your Google account if prompted.
Scroll down to "Allow less secure apps" and turn it ON.
Generate an app password and use it in the Jenkins email configuration instead of your regular Gmail password.

Step 5: Trigger the Jenkins Job
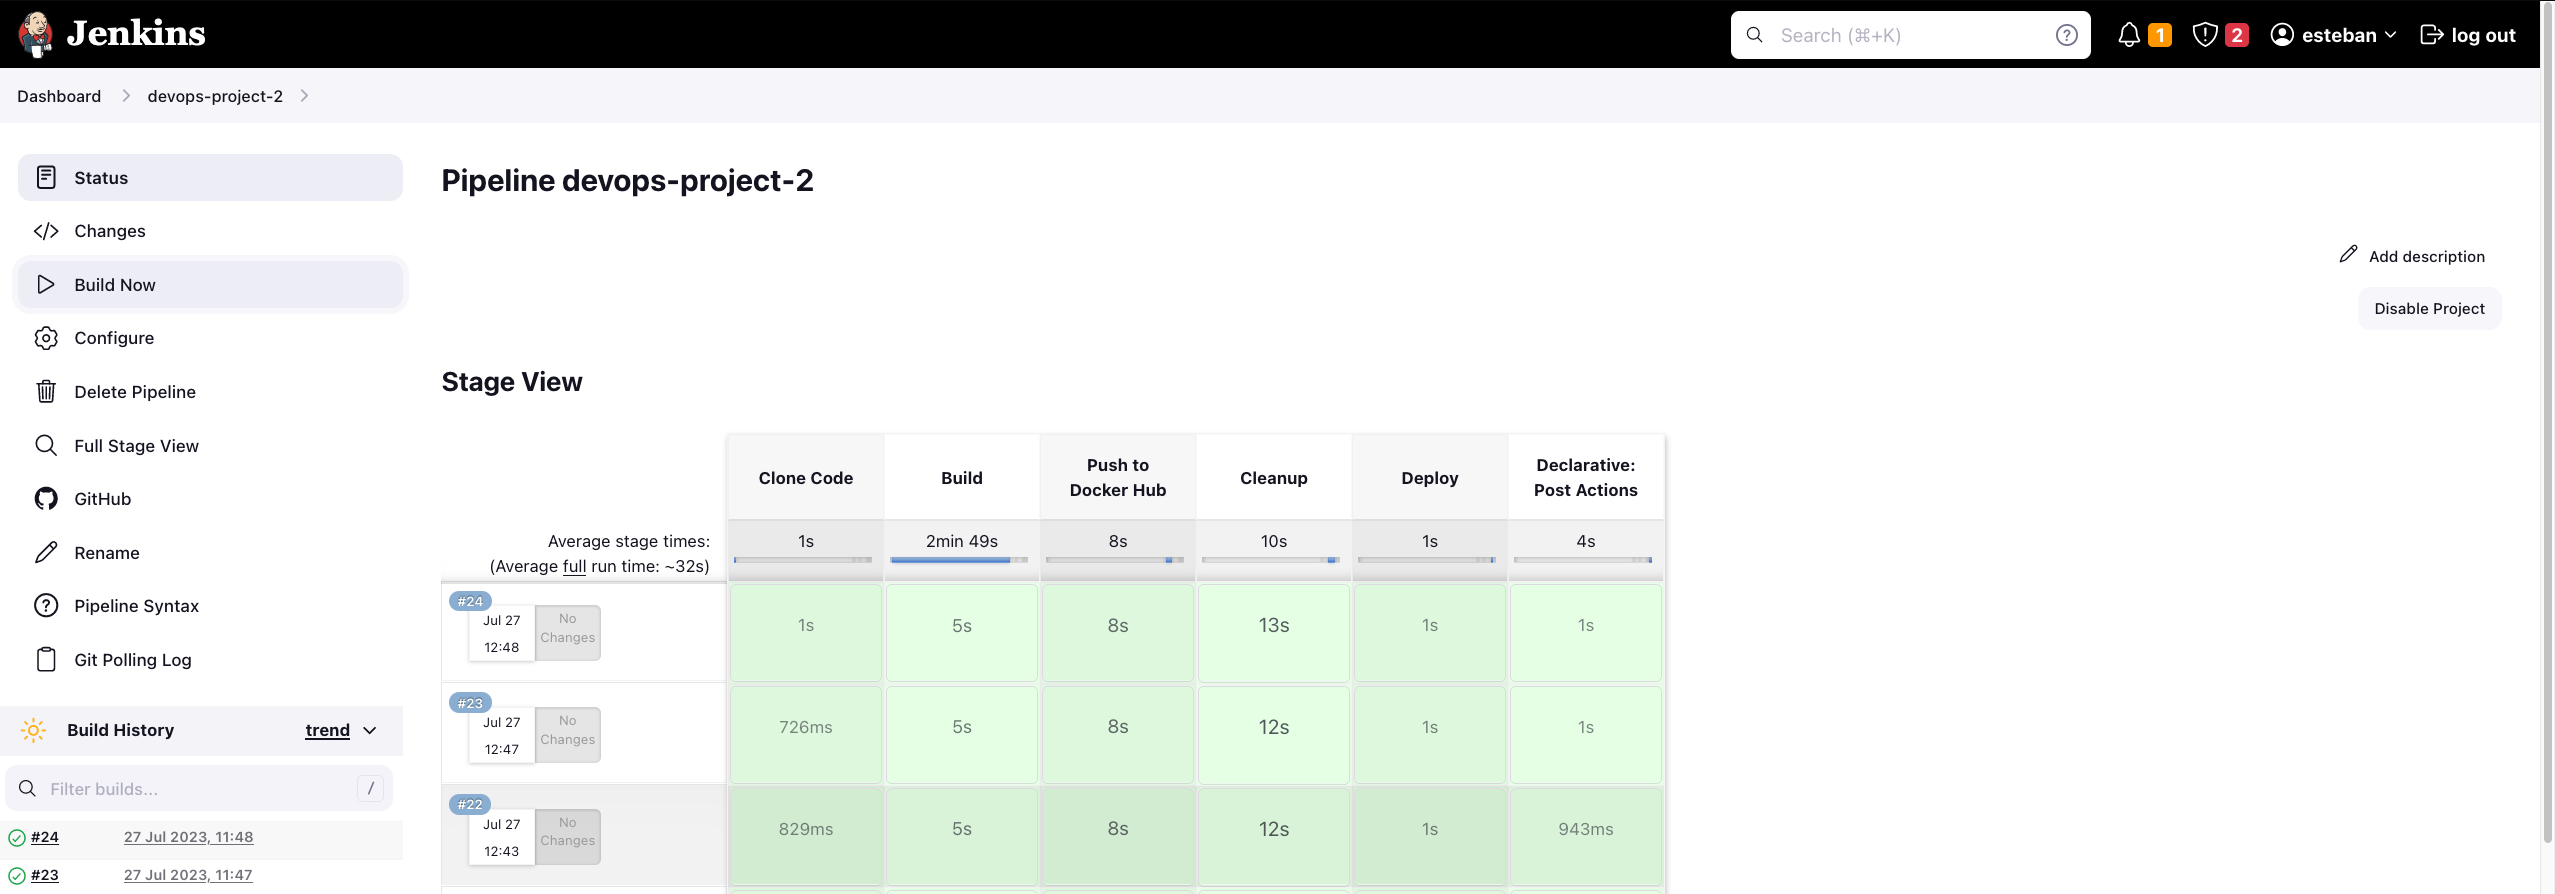
Push changes to your project's repository on GitHub to trigger the Jenkins job.
Jenkins will automatically detect the changes and start running the pipeline.
Step 6: Monitor and Verify the Pipeline
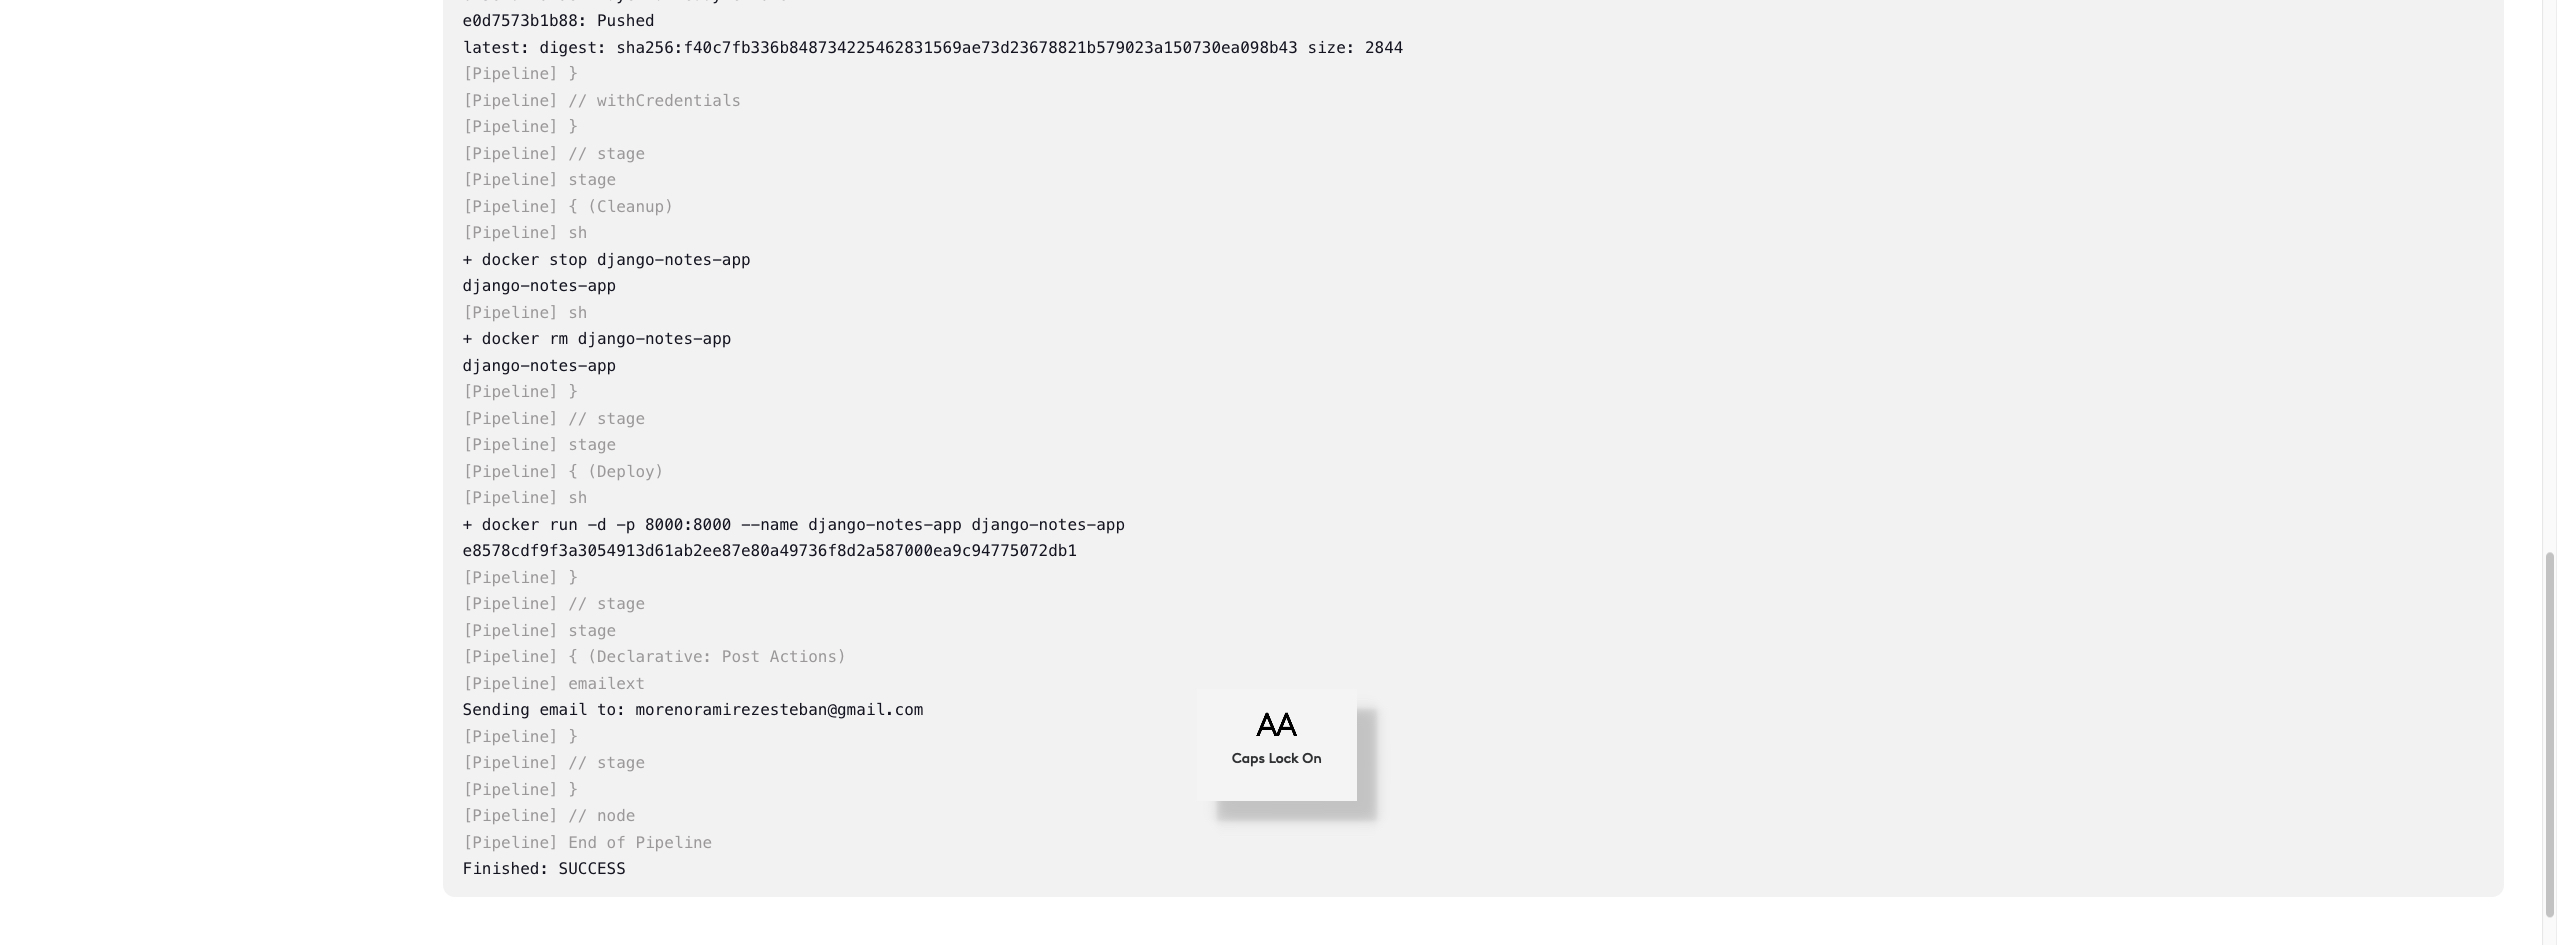
Monitor the progress of the pipeline execution in the Jenkins web interface. Check the console output for any errors or issues.
Navigate to
http://<ec2-instance-public-ip-address>:8000and access your newly deployed app.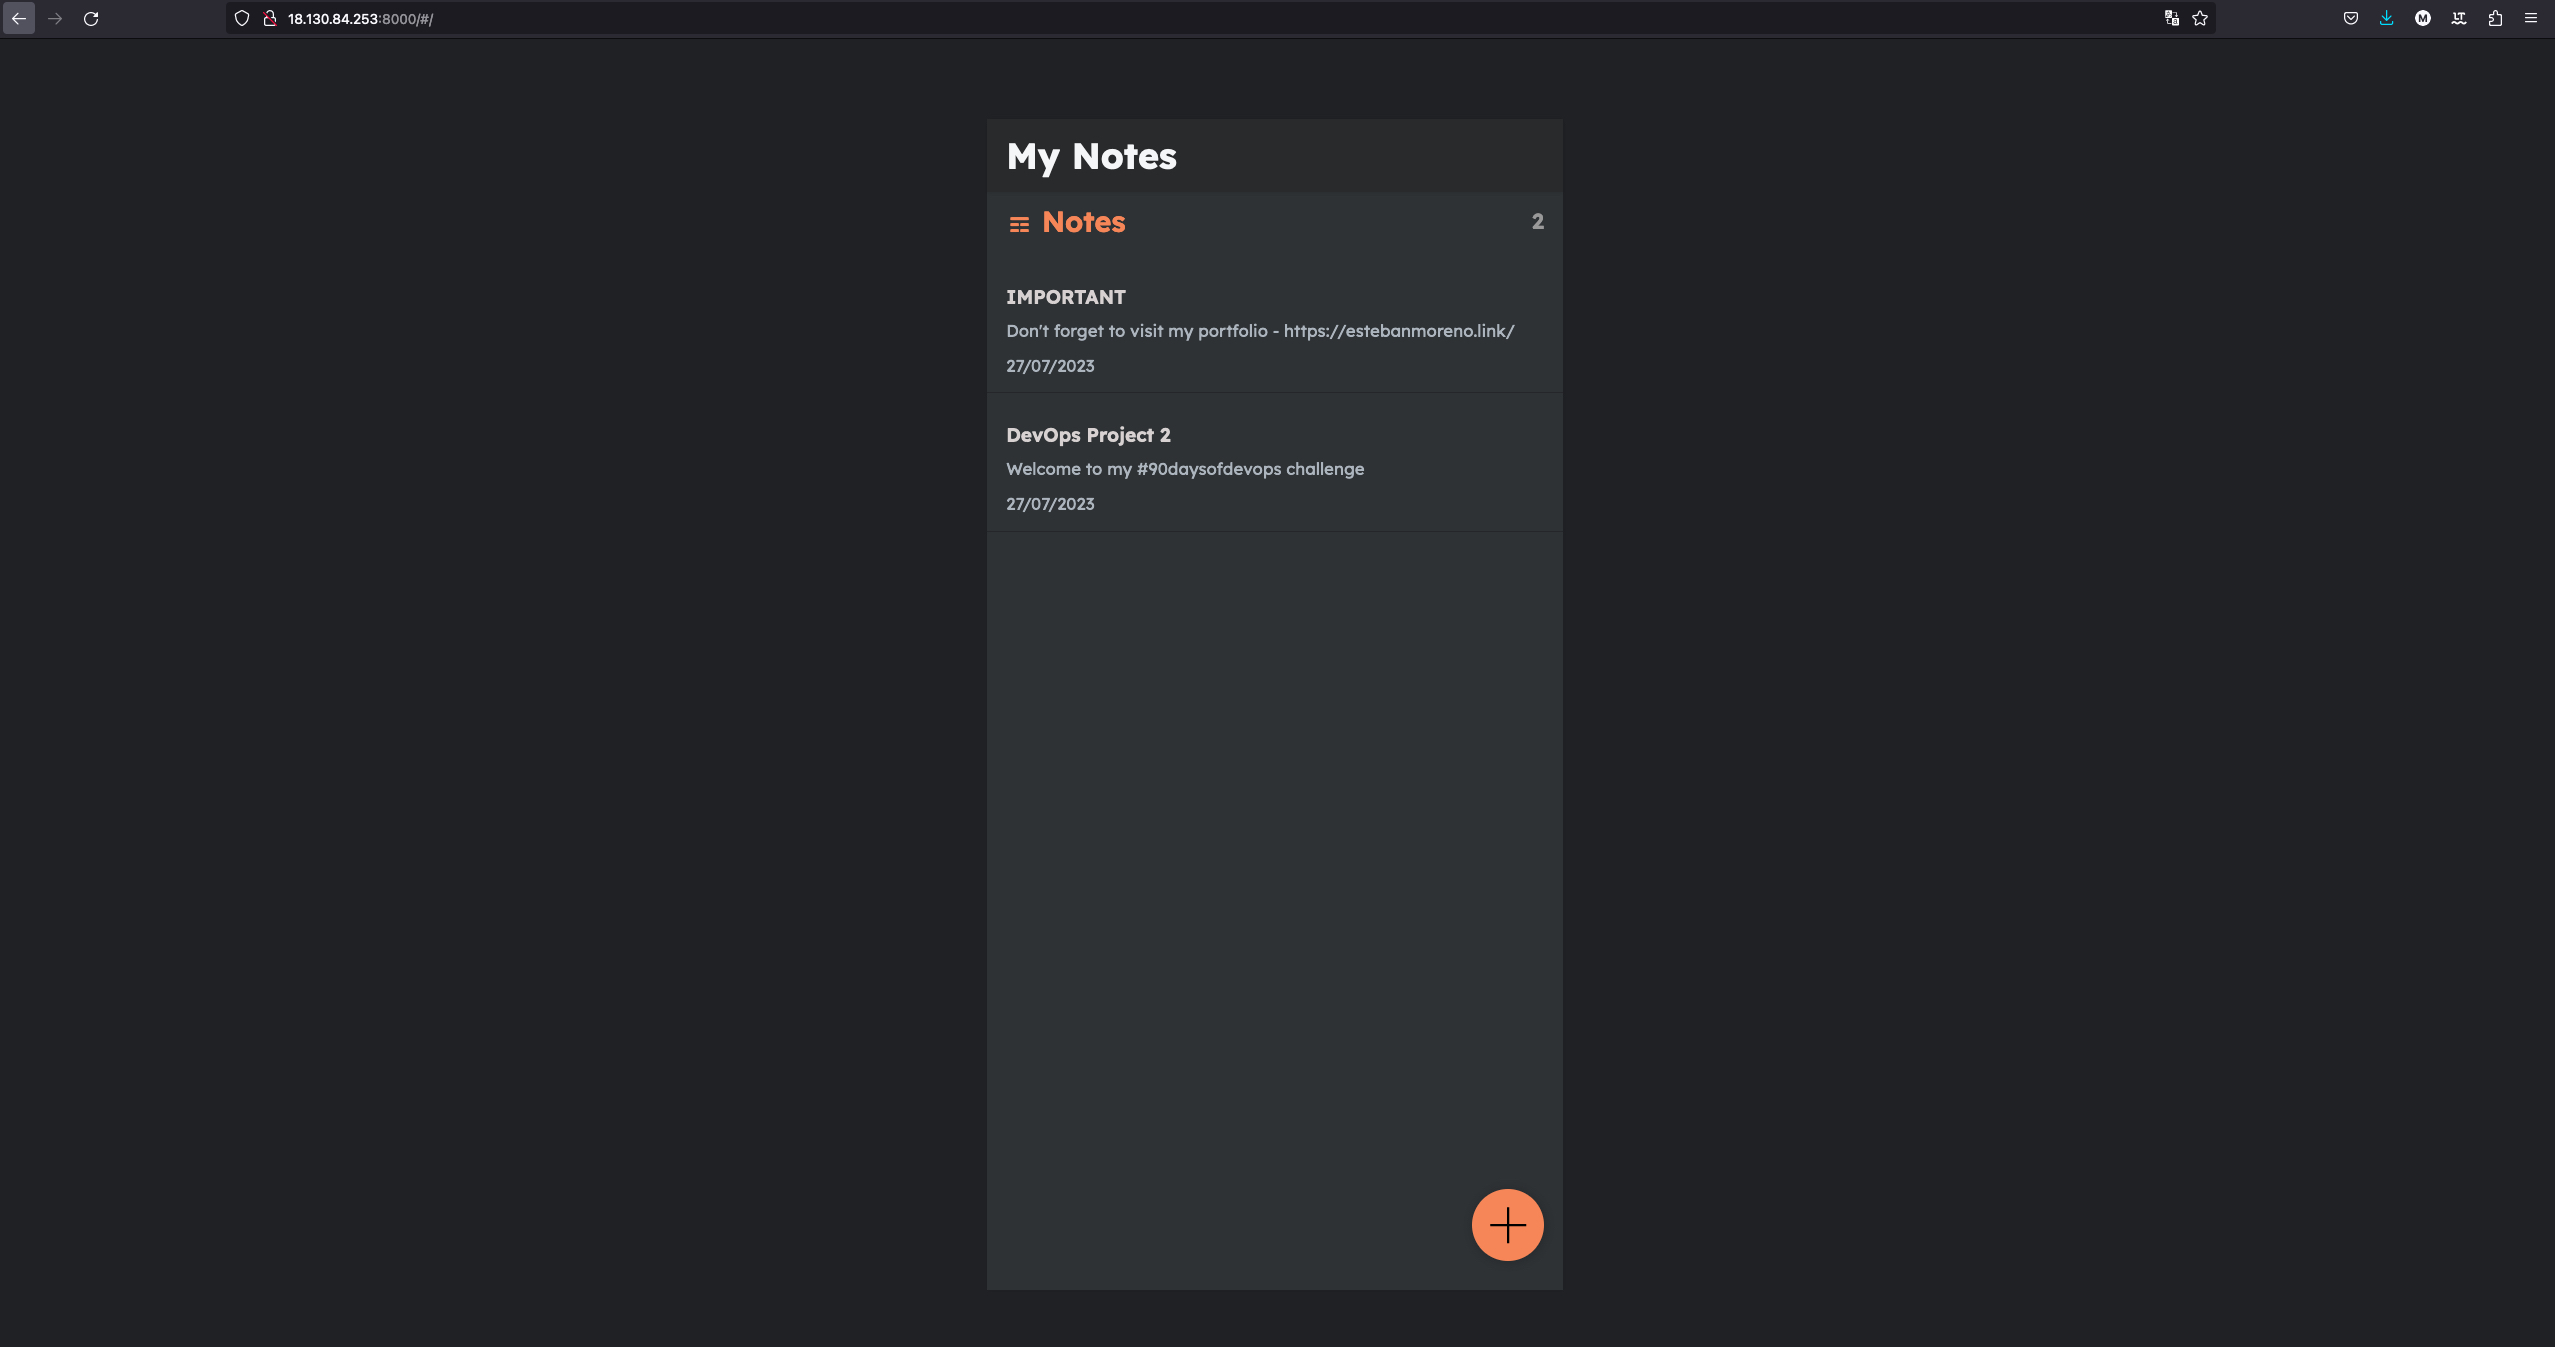
Wait for an email notification to land in your inbox

Conclusion
This project has given me a solid grasp of DevOps principles, as I've explored automating web application deployment using Jenkins. By seamlessly integrating Jenkins with GitHub, I've crafted a robust pipeline that effectively manages the various stages of the development process.
Throughout this journey, I've gained practical expertise in setting up Jenkins, creating efficient pipelines, and orchestrating controlled deployments. Beyond technical skills, I've embraced the collaborative essence inherent to DevOps. This project highlights the significance of automation and the continuous quest for improvement in software delivery.


