Hybrid Directory between AWS and Simulated On-Premises
Cloud Engineer and DevOps enthusiast, just talking about AWS, Docker, Linux, Kubernetes, Python, and automation.
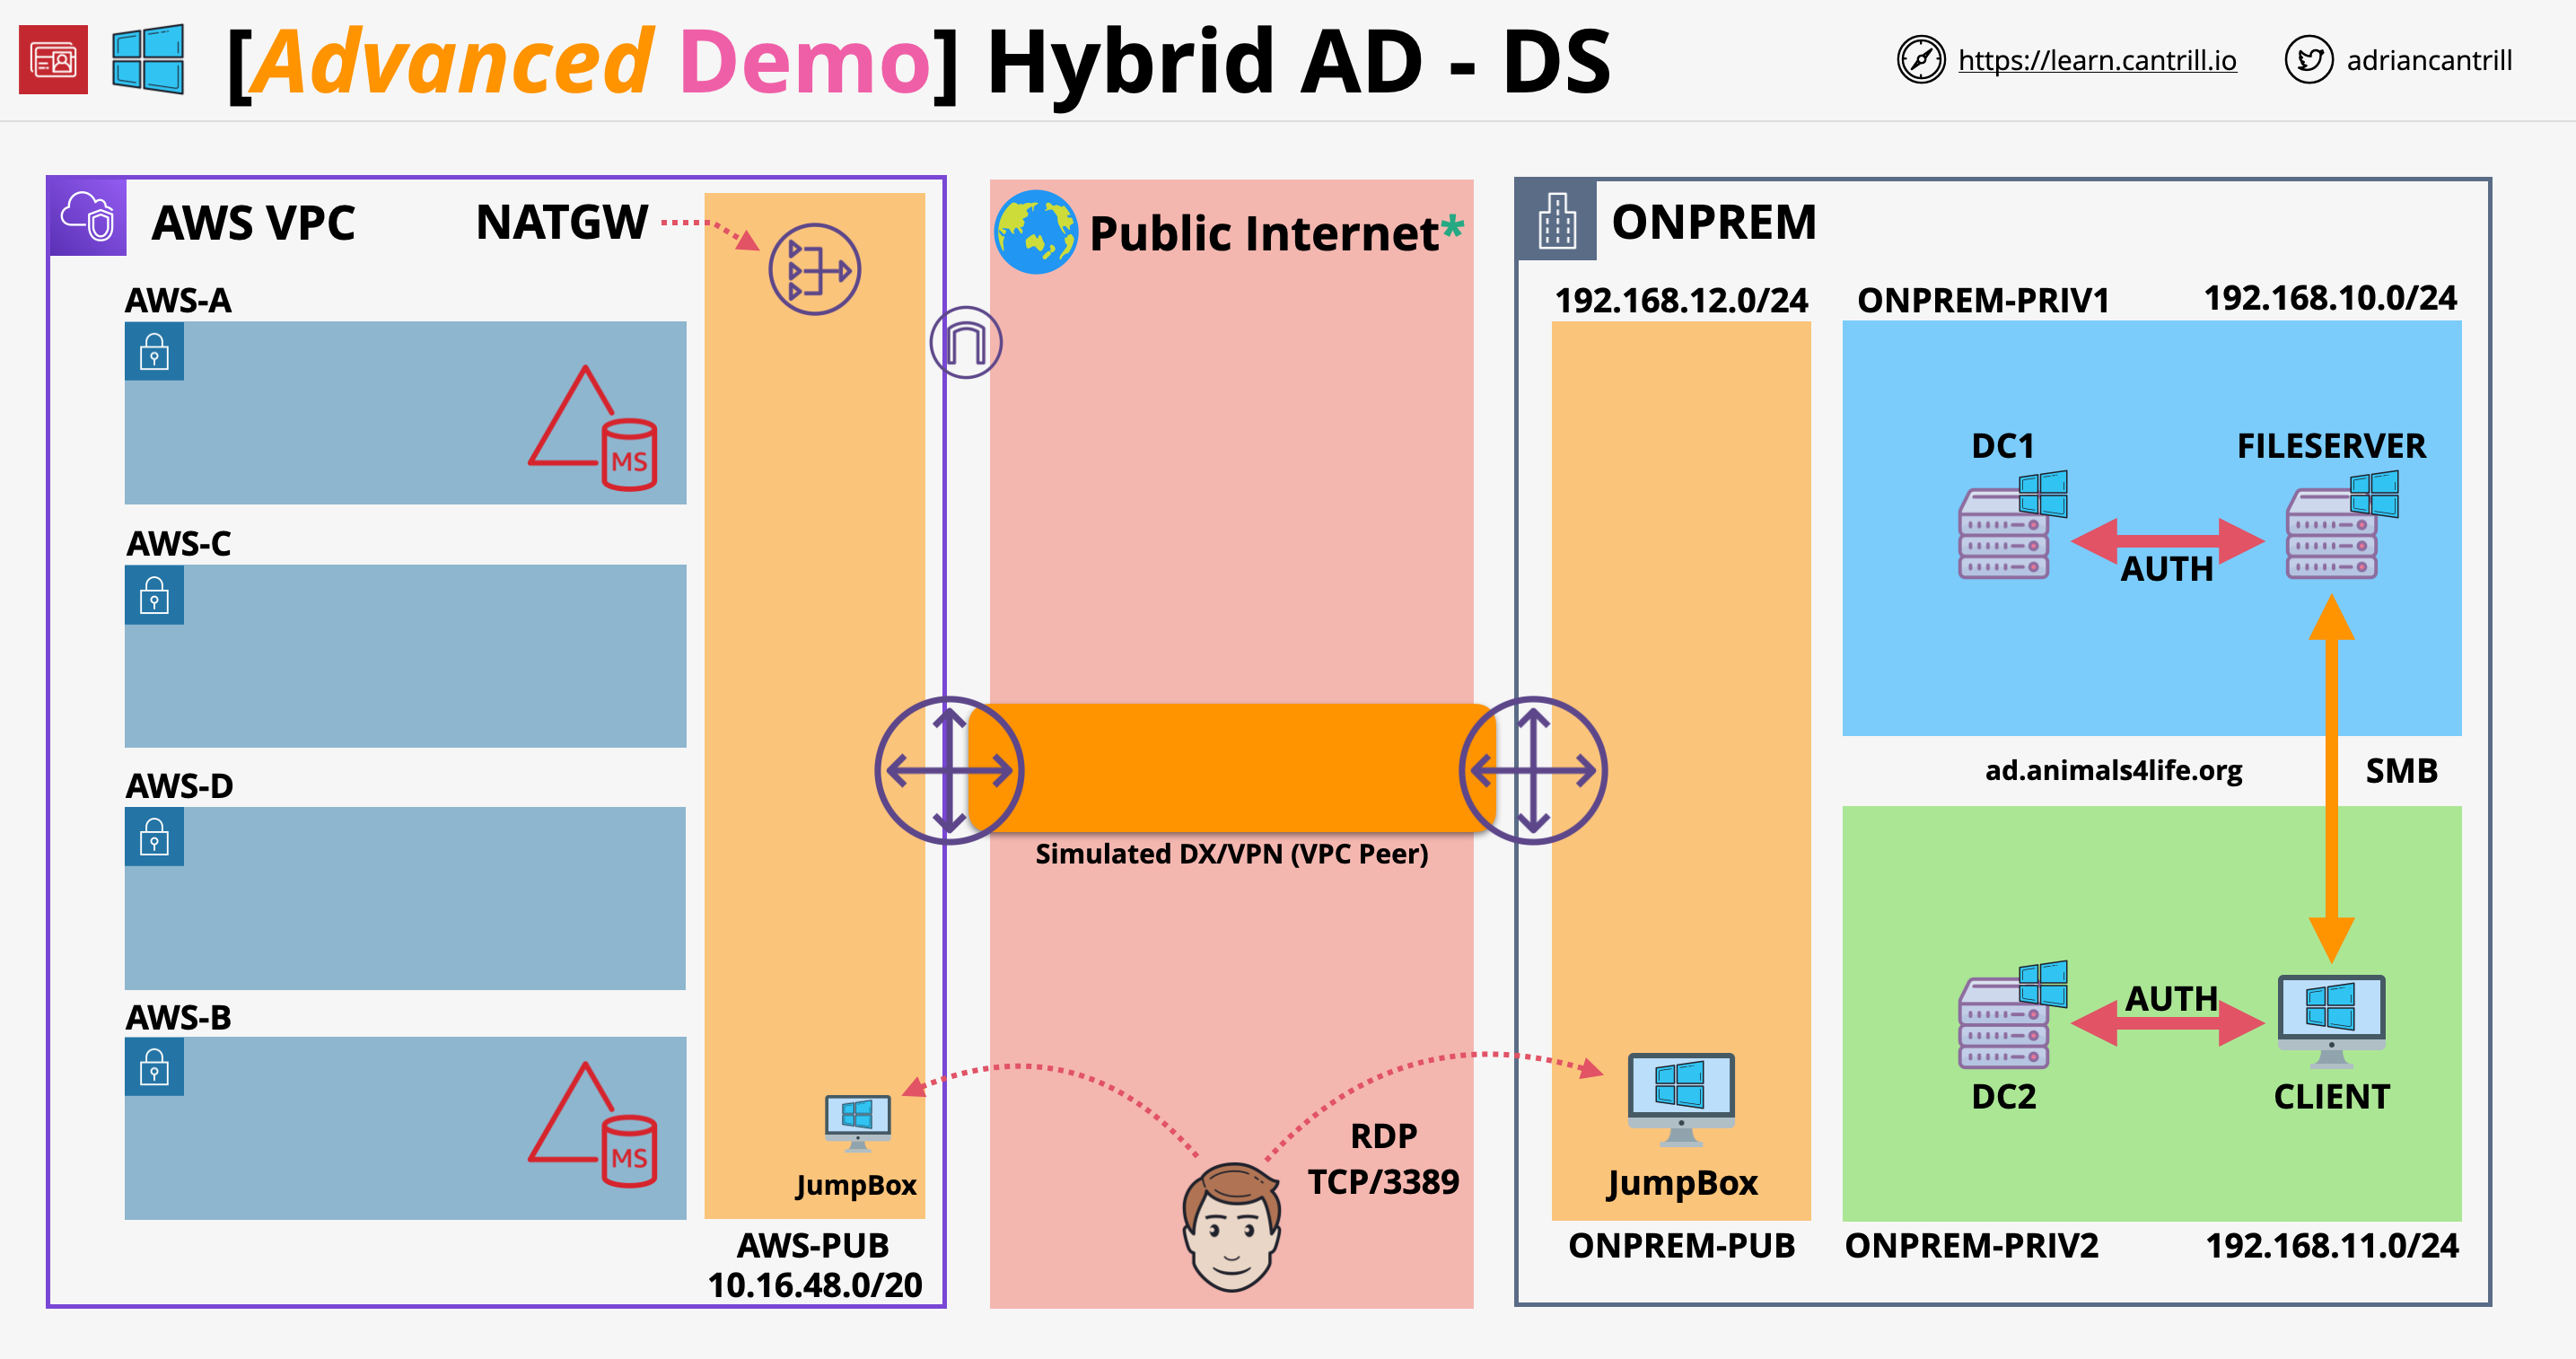
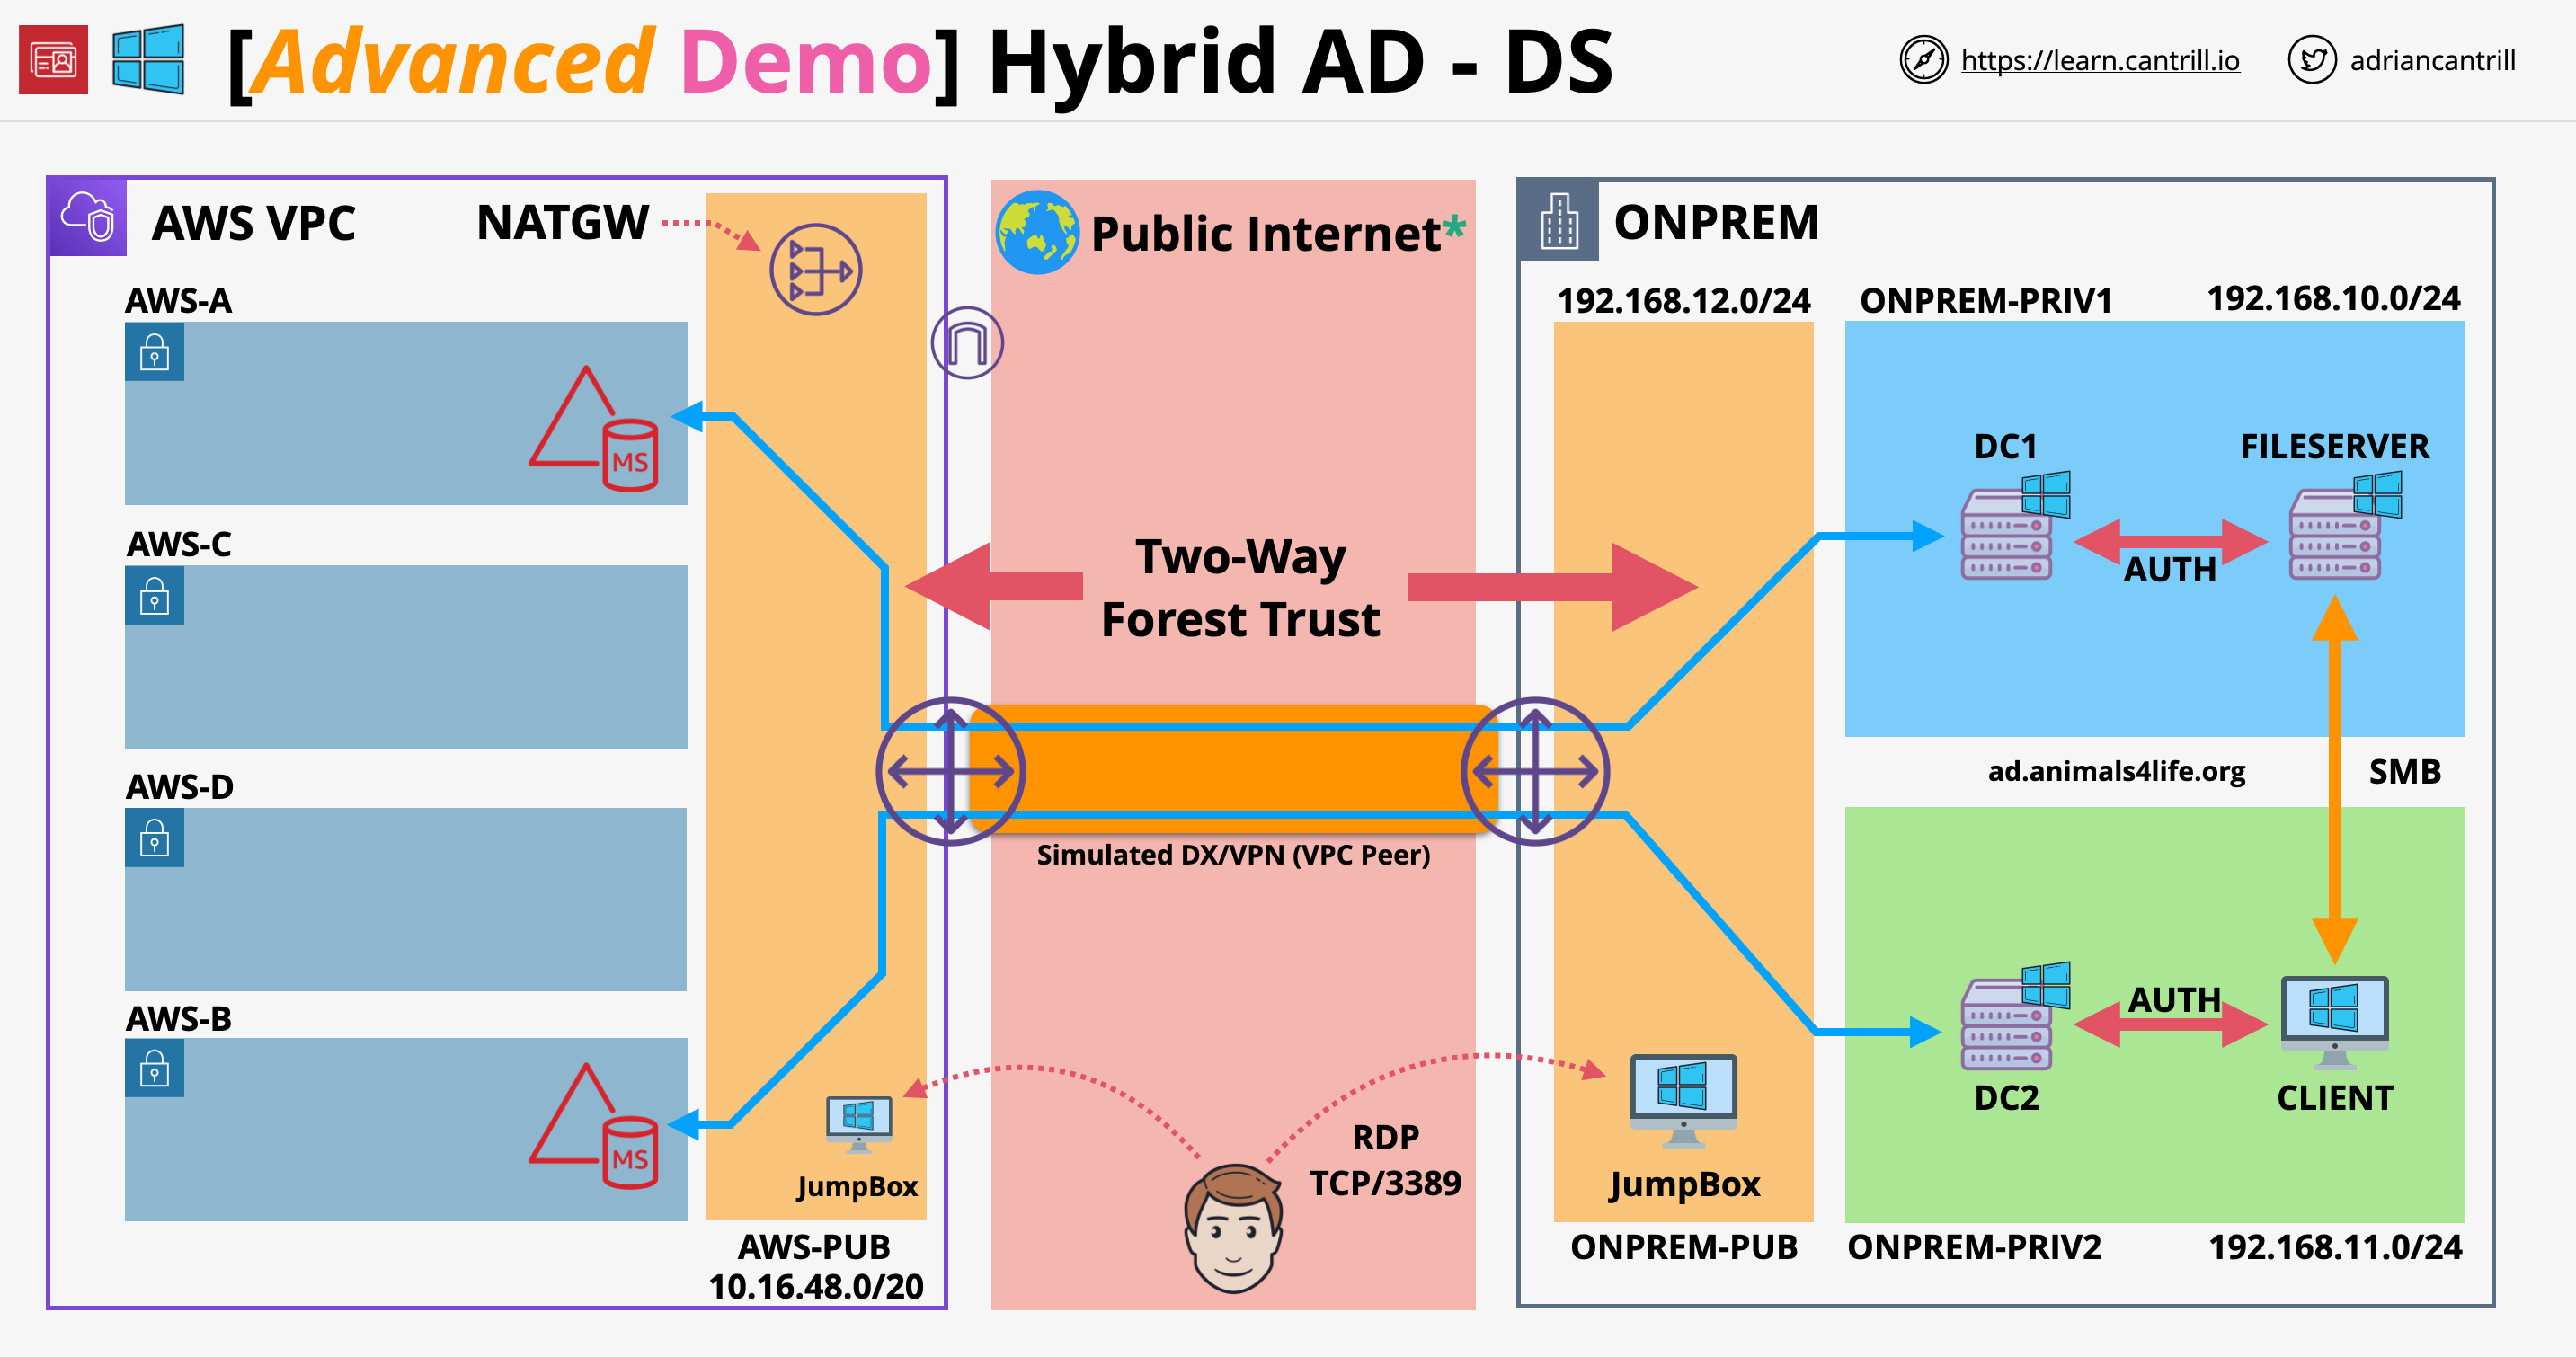
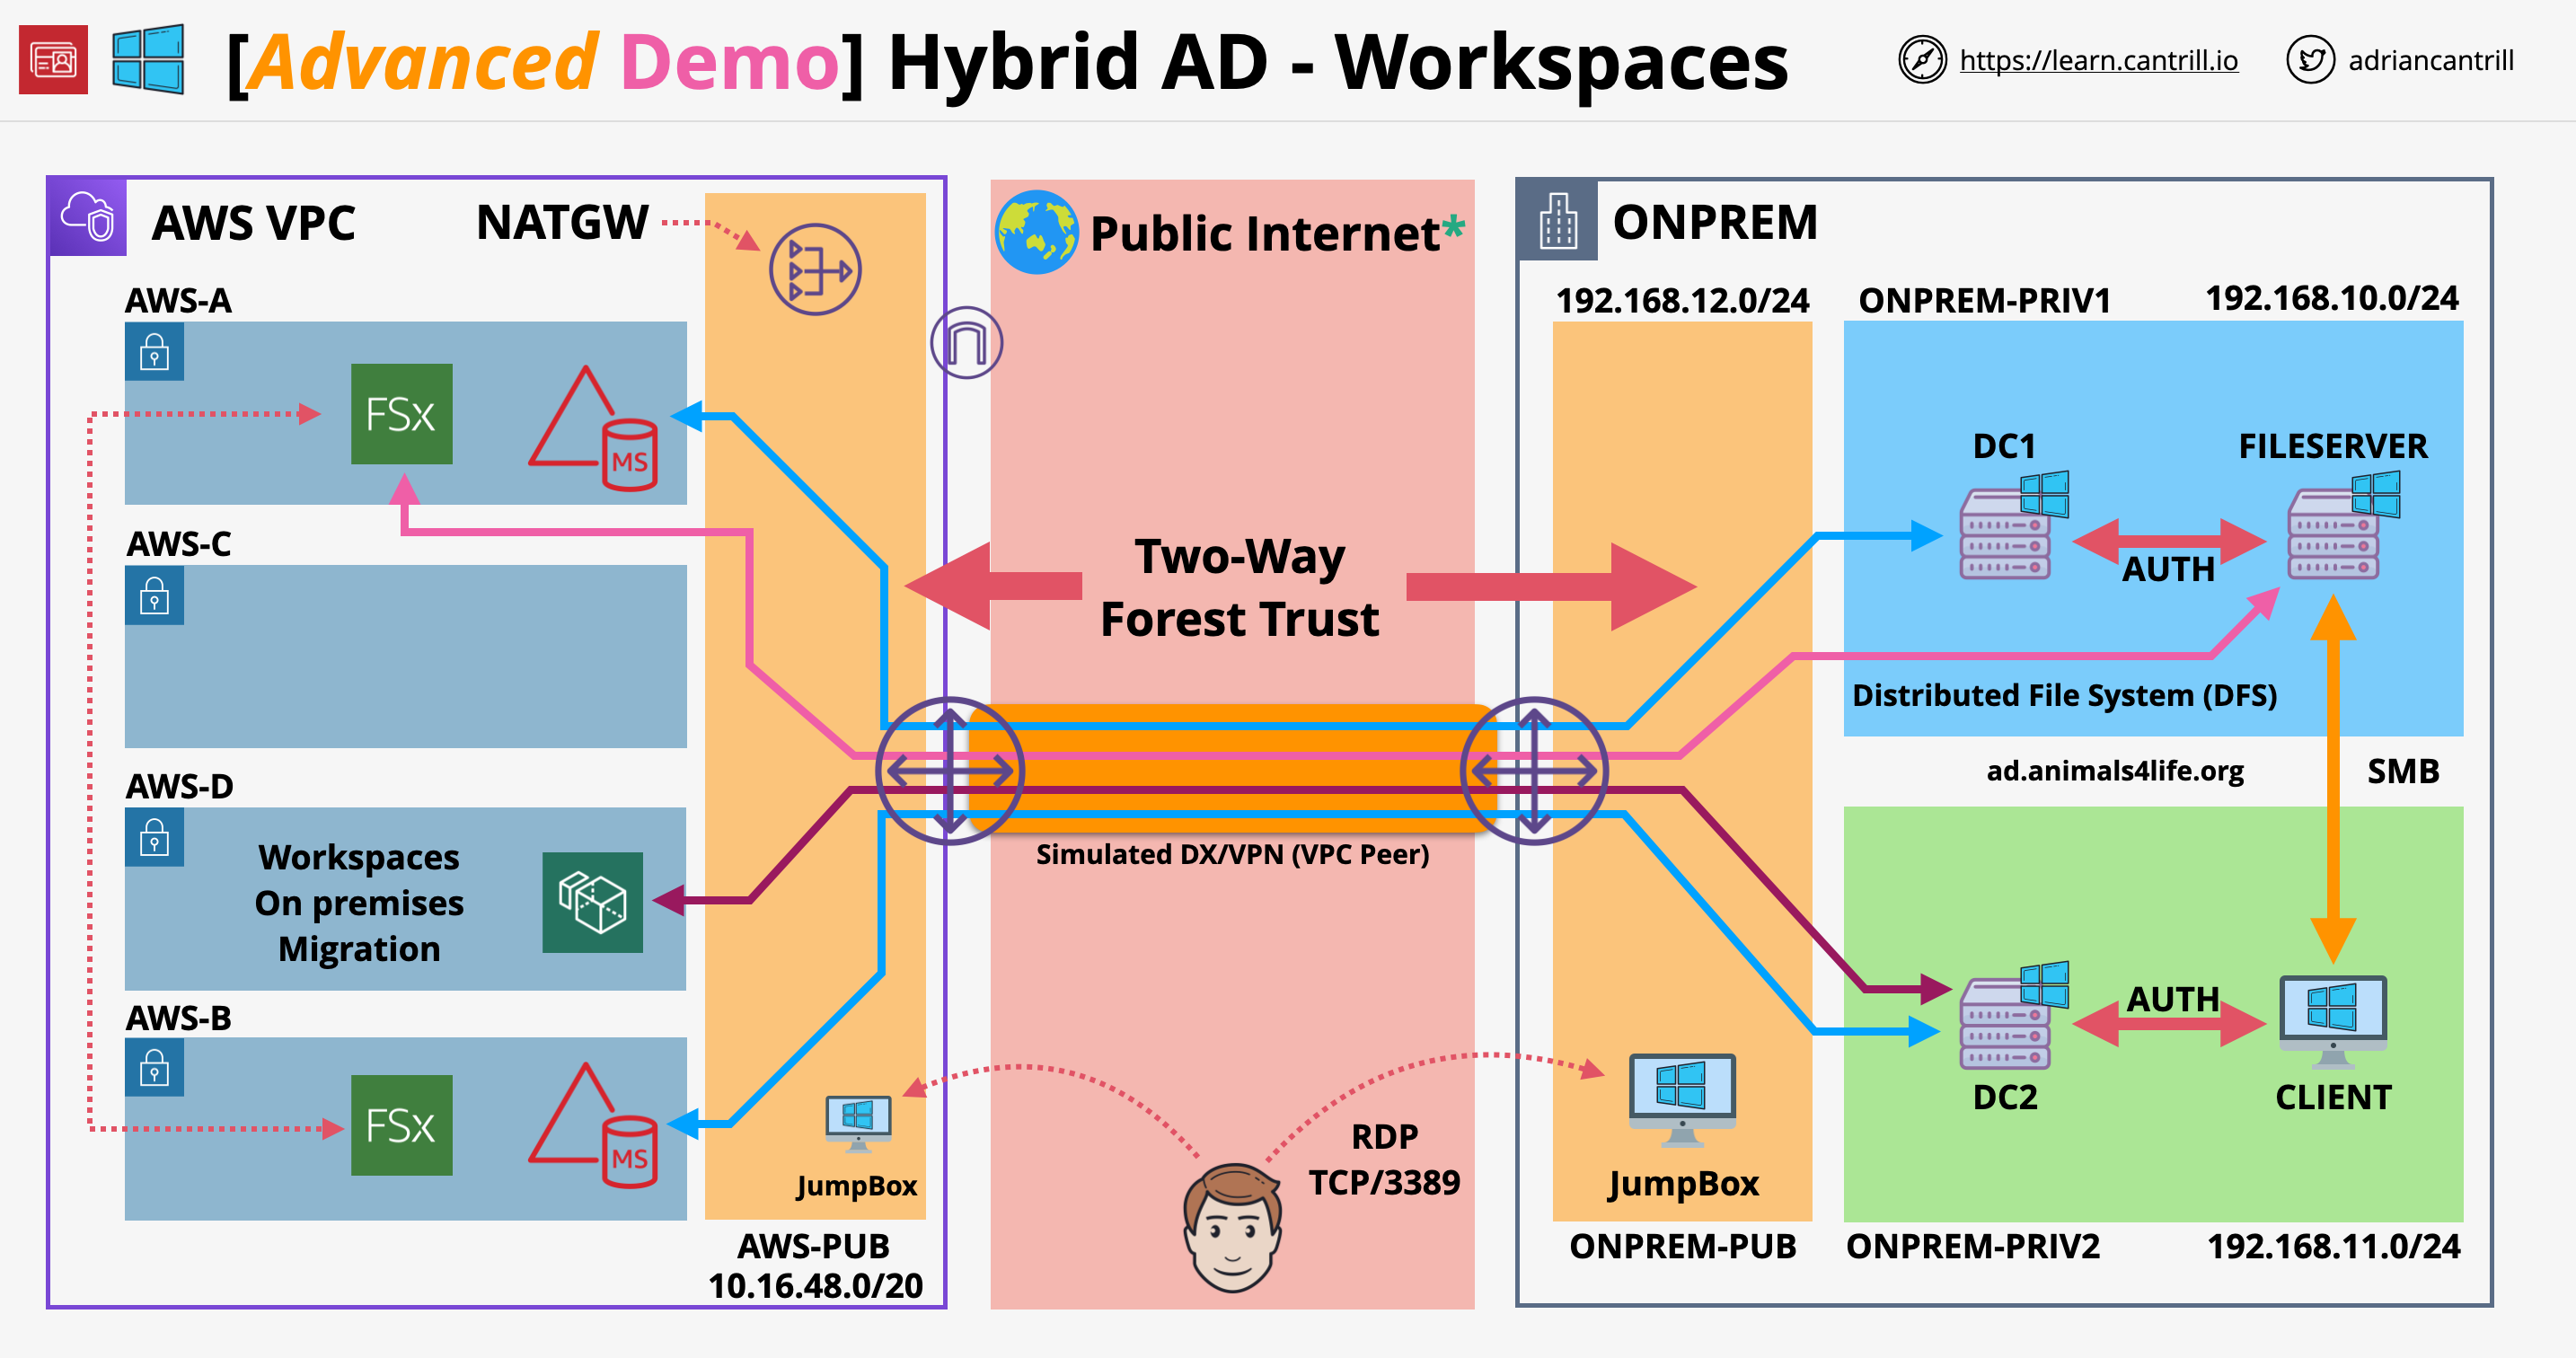
Welcome to an advanced hybrid directory demo where we'll guide you through setting up a hybrid environment, connecting to simulated on-premises infrastructure, creating a managed Microsoft AD within AWS, establishing a two-way forest trust, and integrating file systems seamlessly.
Before we dive into the details, a special mention to Adrian Cantrill for his amazing AWS courses and labs. The demo is based on his insightful content, and you can find the complete project on GitHub.
Let's dive into the details of each stage.
Stage 1: Provisioning the Hybrid Environment

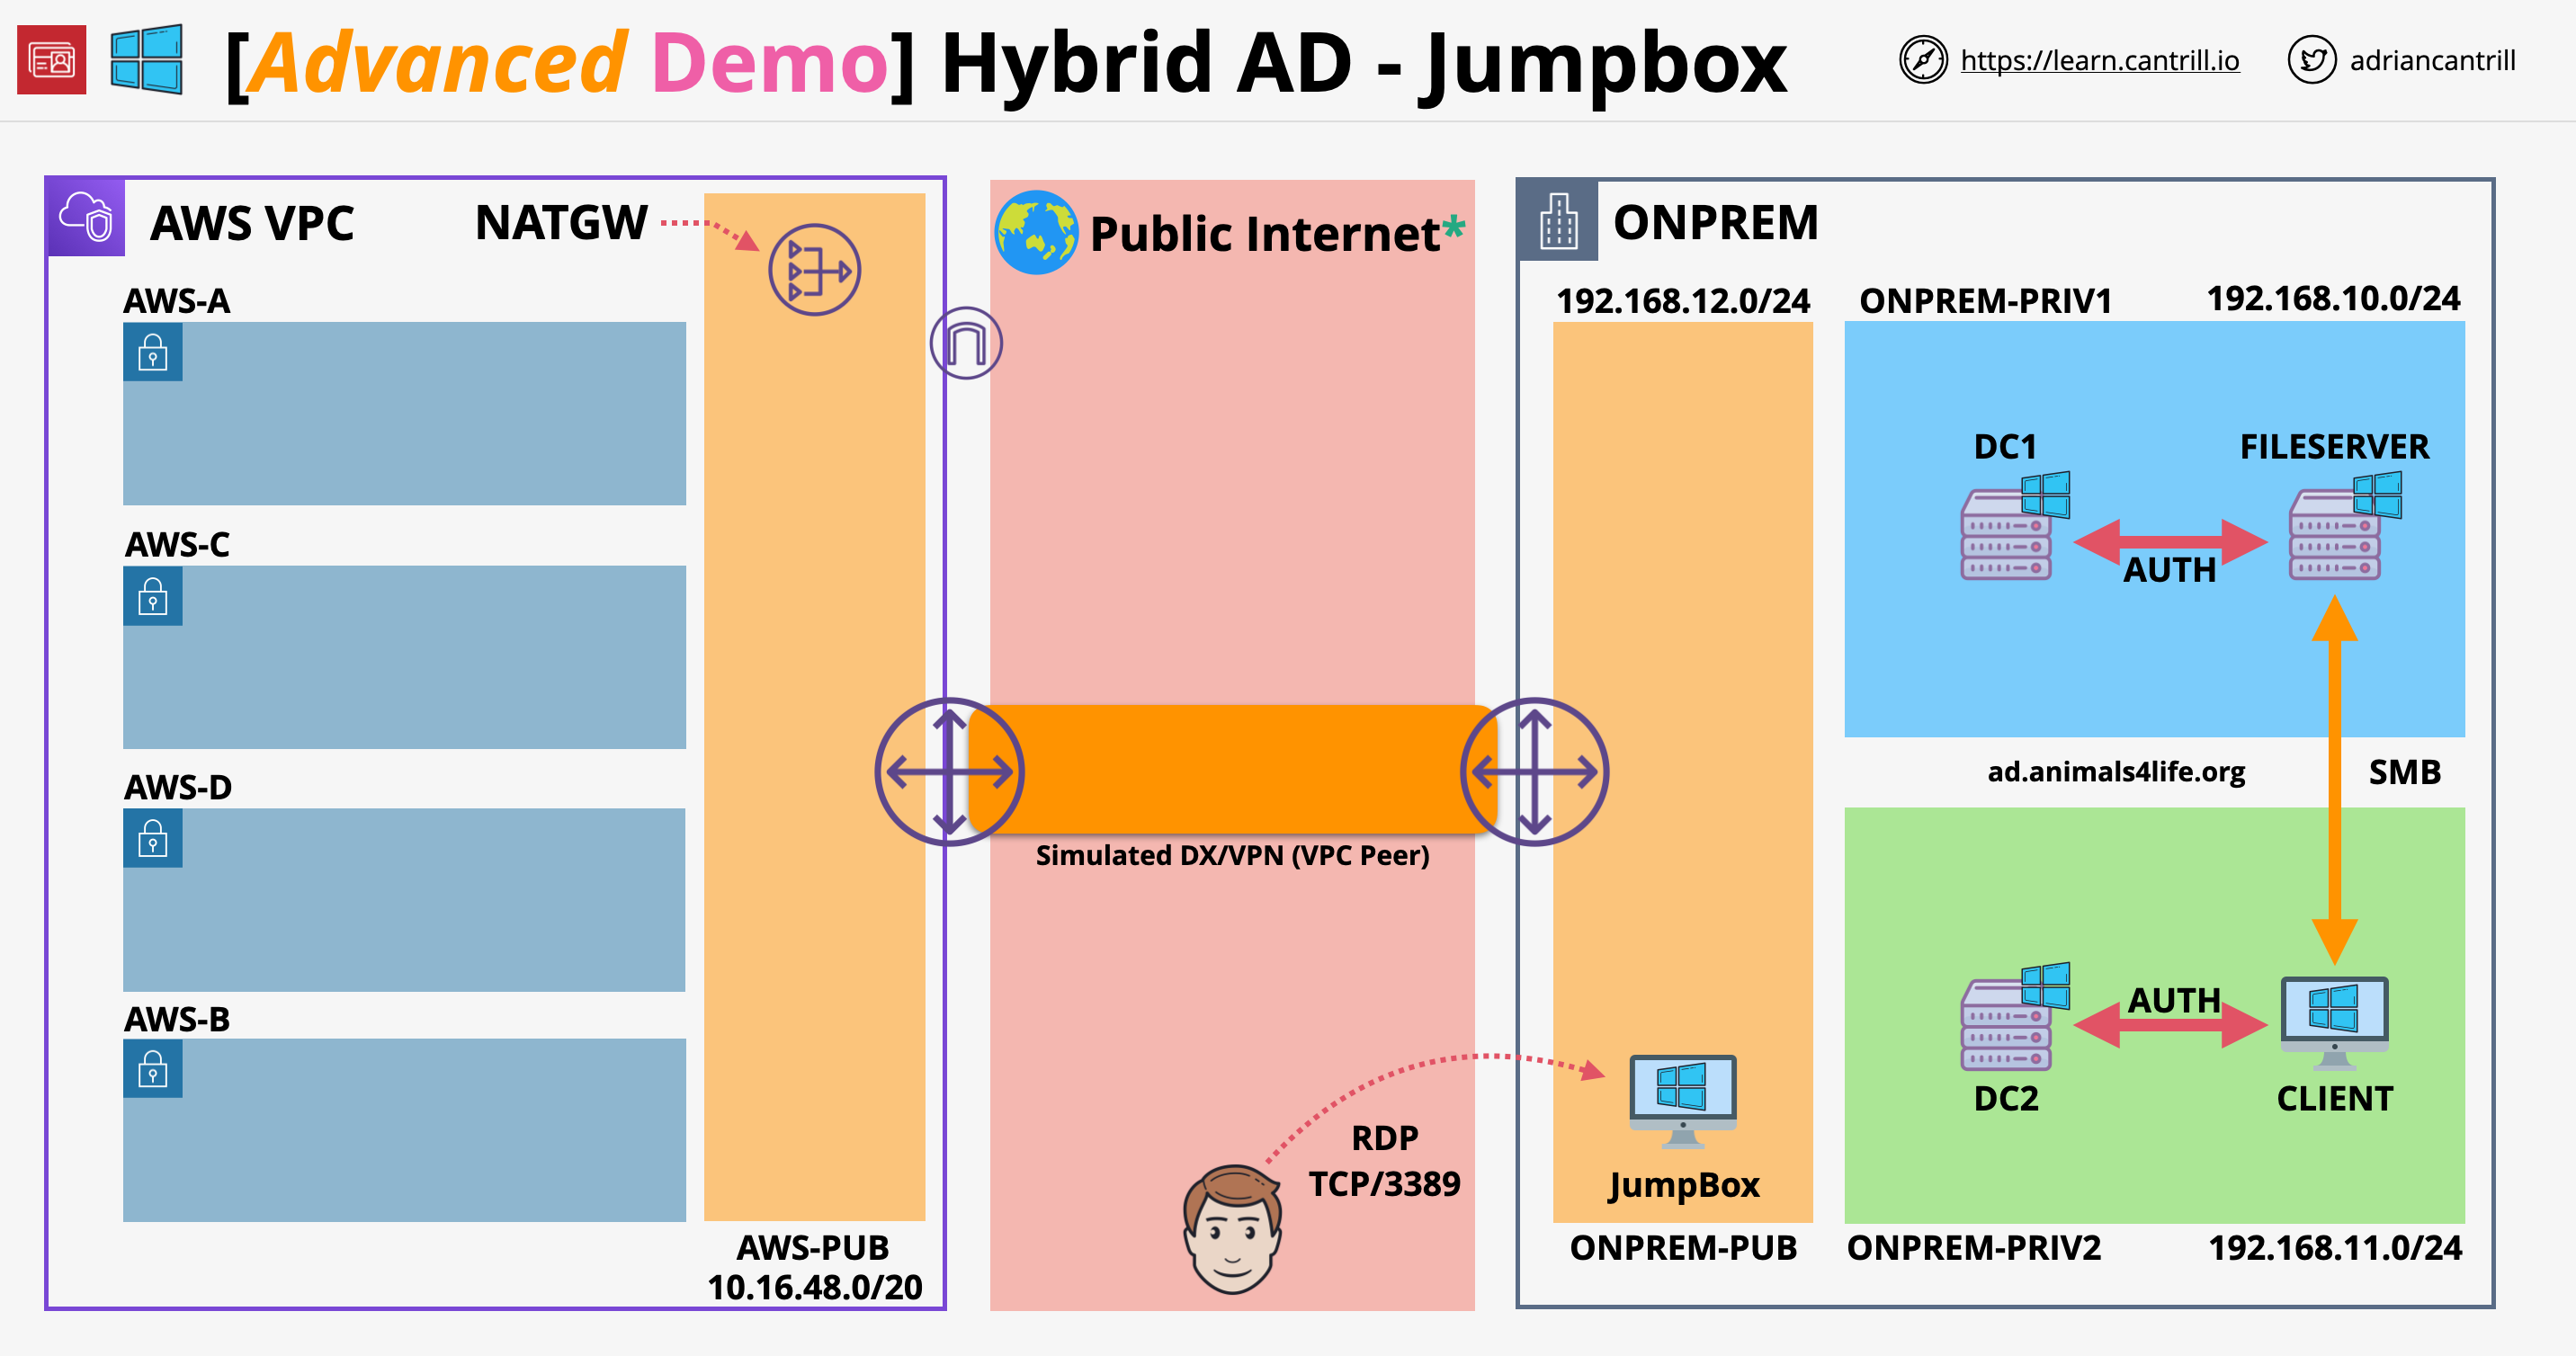
In this foundational stage, we lay the groundwork for a dynamic hybrid environment using CloudFormation. By orchestrating the creation of simulated on-premises and AWS environments, self-managed Active Directory, and essential on-premises compute resources, we set the stage for a holistic hybrid infrastructure.
Click here to apply the HybridDirectory Stack. You will need to pick a Domain Admin Password to use for the on-premises directory and a KeyPair to use.

Once the deployment is completed, we can move to the next Stage.
Stage 2: Connecting to Simulated On-Premises
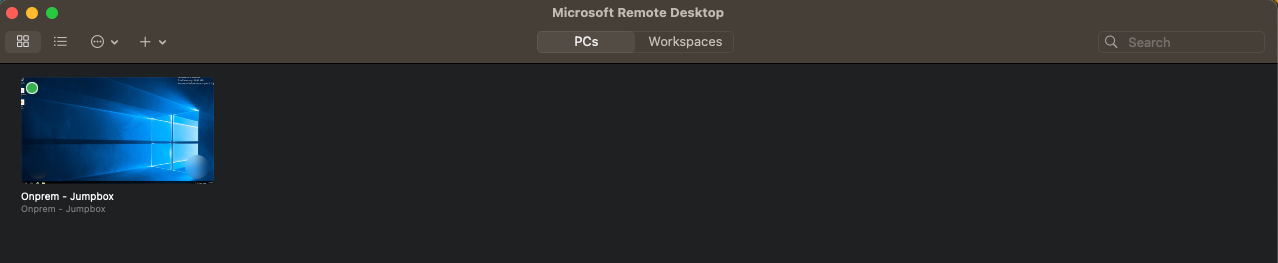
Install Remote Desktop Application:
Provide users with remote access by installing the Microsoft Remote Desktop application tailored to their respective operating systems.
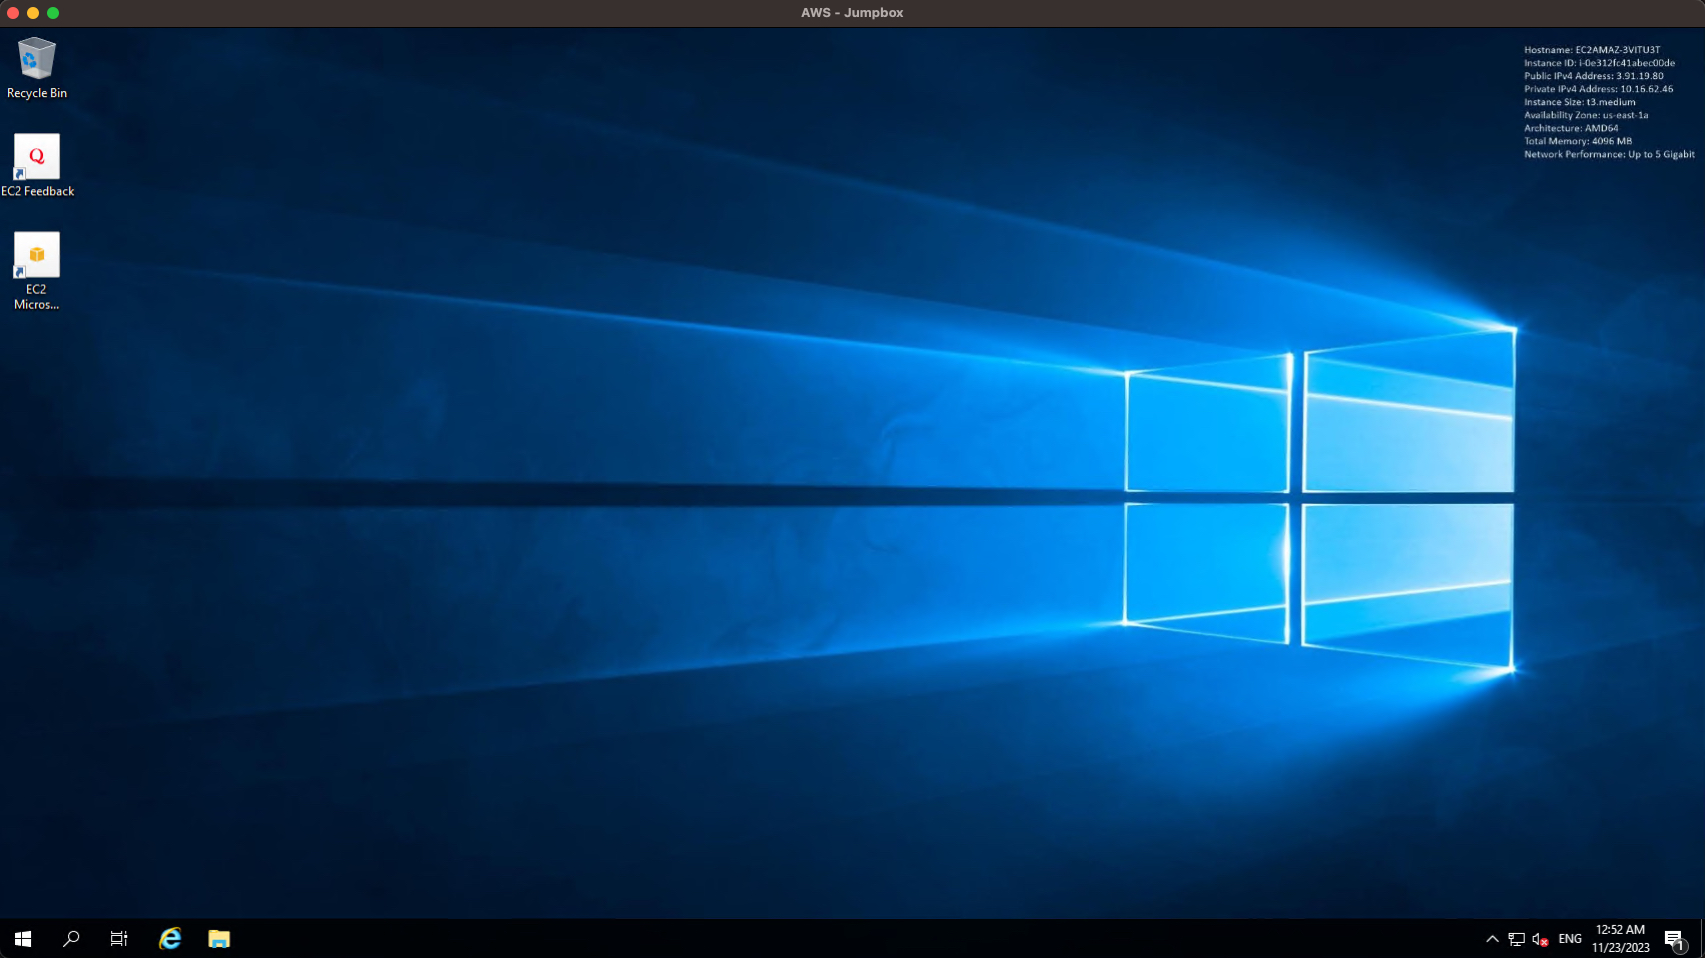
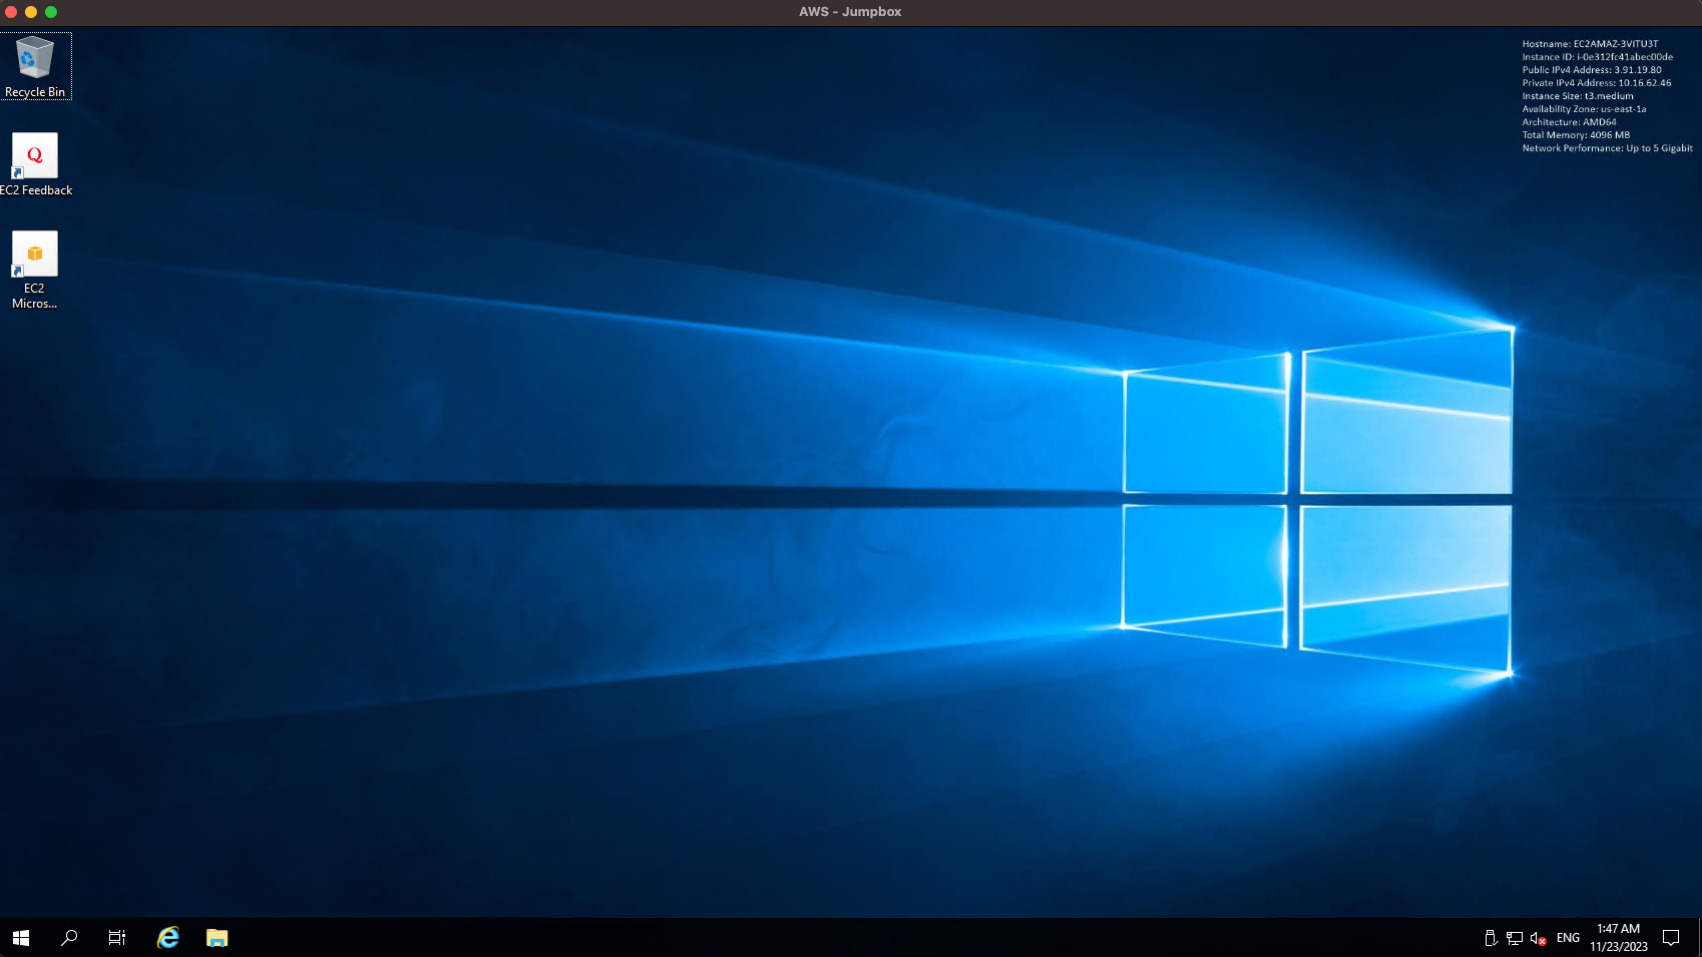
Locate Jumpbox Details:
Identify and locate the Jumpbox details. This Jumpbox serves as the gateway to our on-premises environment, serving as a centralized entry point.
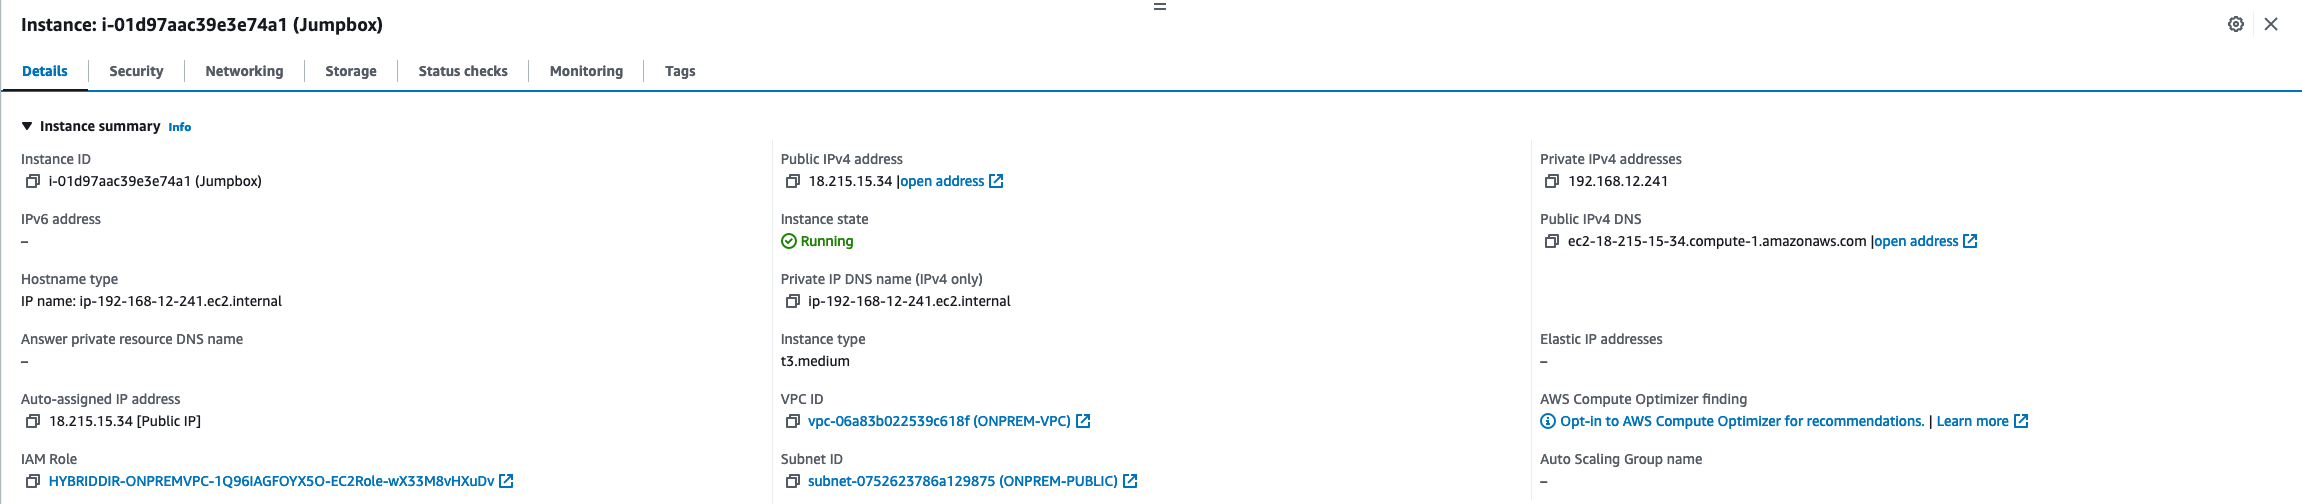
Connect to Jumpbox:
Use the identified Jumpbox details to establish a connection. This connection will act as a gateway, allowing access to the simulated on-premises environment.
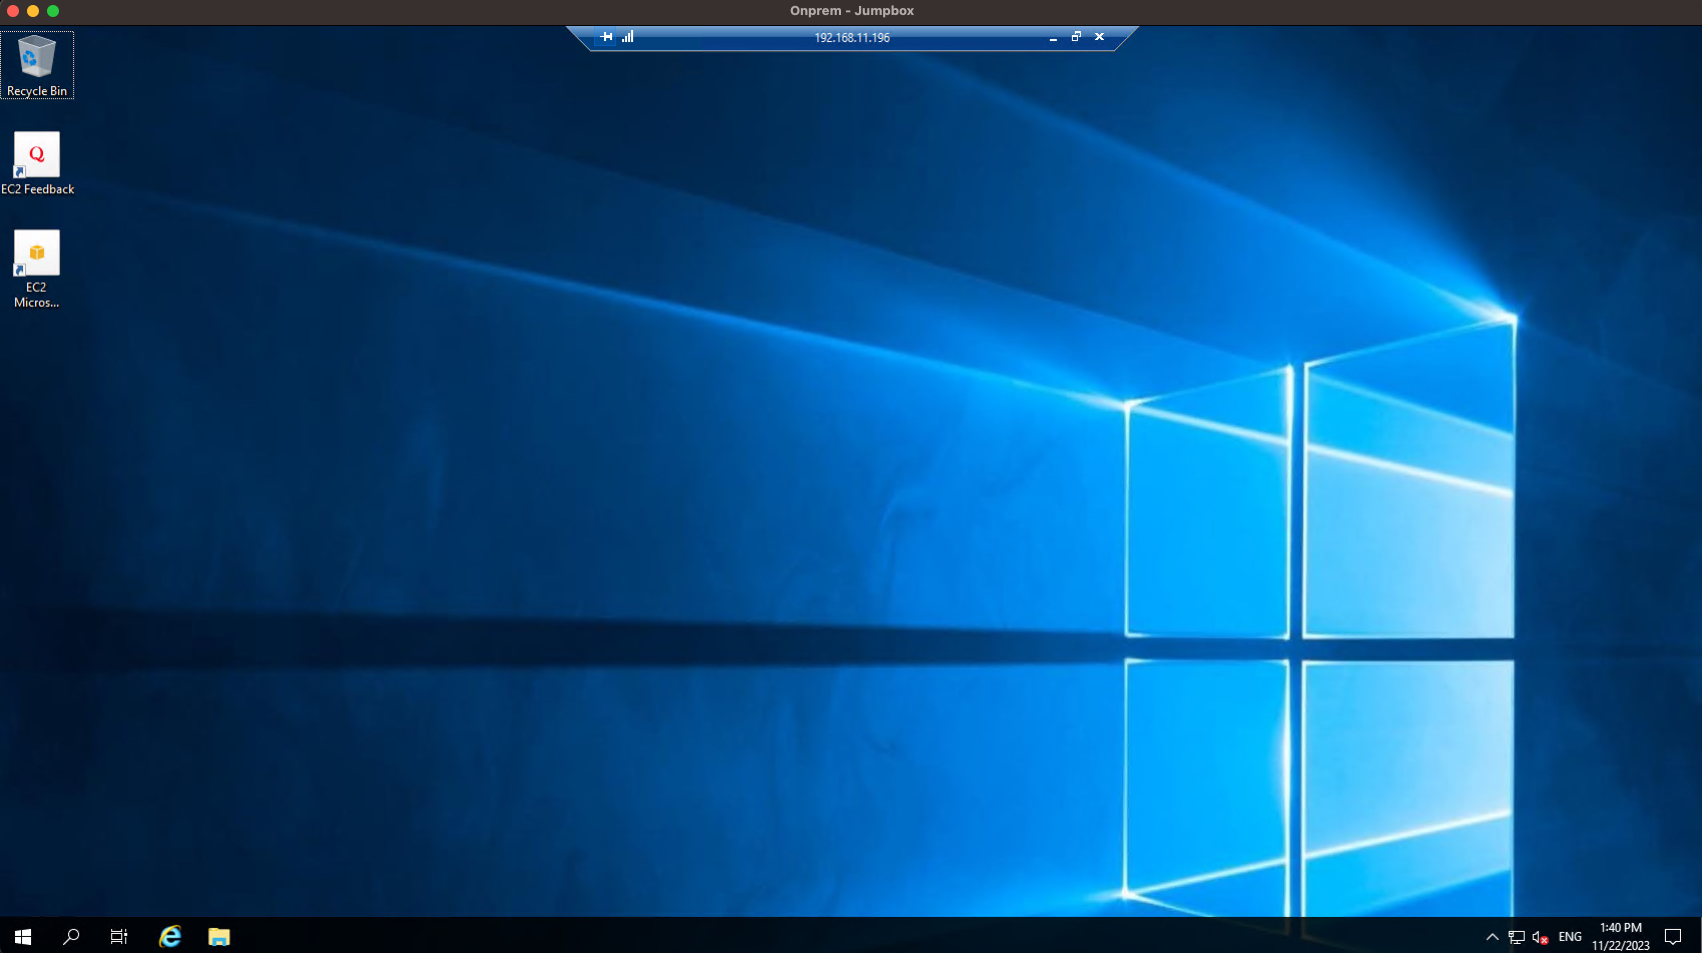
Connect to Other Instances:
Once connected to the Jumpbox, log the Private IP Address of the following instances:
Client - 192.168.11.196
FileServer - 192.168.10.95
DC1 - 192.168.10.100
DC2 - 192.168.11.100
Establishing these connections is crucial as it initiates the integration of on-premises resources, simulating a real-world infrastructure.
Connect to the 'Client' instance which simulates a client machine within the A4L Onpremises environment.
Access FileServer:
Navigate to the FileServer instance after establishing the connections.
\\FileServer\A4LFilesValidate the functionality of our simulated on-premises file-sharing system by browsing the FileServer and creating a text document. This step ensures that the file-sharing system is operational and ready for use.

Stage 3: Creating Managed Microsoft AD within AWS
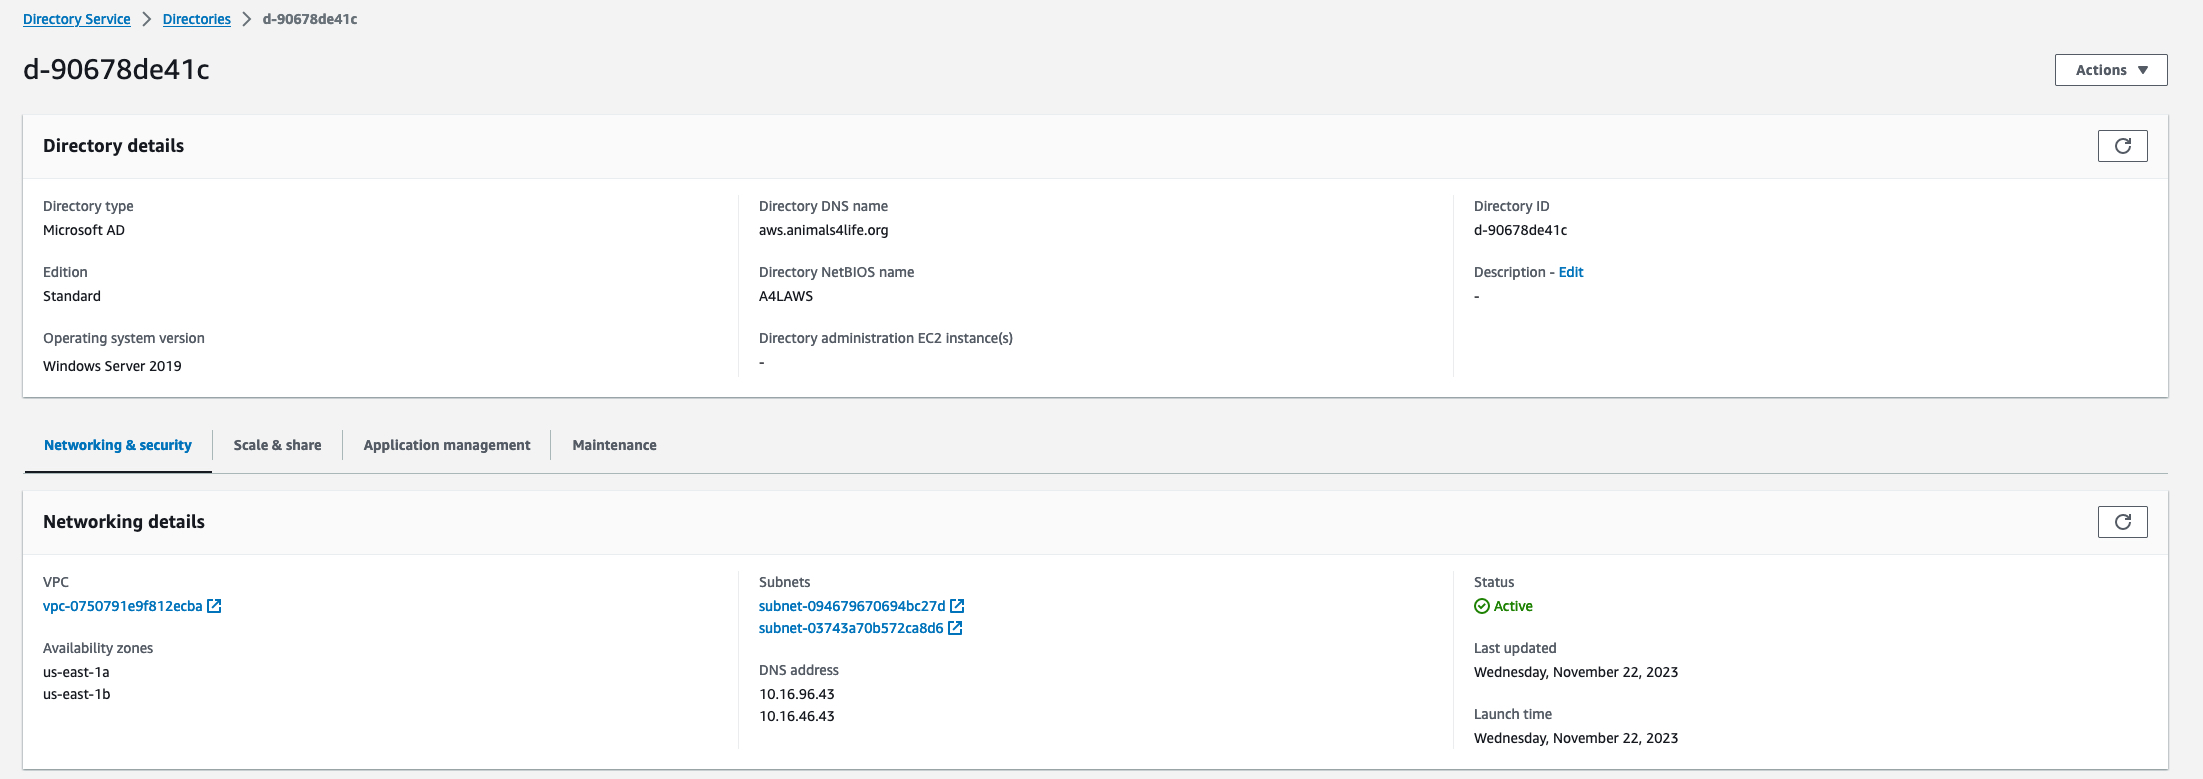
Create Directory:
The creation of a managed Microsoft AD within AWS opens the gateway to a fully functional, cloud-based Active Directory, serving as a backbone for AWS services.
Create Jump Box in AWS:
Launching a domain-joined JumpBox in AWS facilitates seamless management and interaction with the AWS-based Active Directory.

Connect to Jump Box:
Connecting to the JumpBox allows administrators to wield control over AWS resources from within the AWS environment.
Install Admin Tools:
Installing RSAT ensures the availability of domain management tools, simplifying administrative tasks within the AWS-based Active Directory.

Verify Domain Works:
Confirming domain functionality assures the successful integration and operation of the AWS-based Active Directory.

Stage 4: Establishing Two-Way Forest Trust
ONPREM: Ensure That Kerberos Pre-authentication Is Enabled:
Ensuring Kerberos pre-authentication is disabled on the CLIENT server streamlines the authentication process within the hybrid environment.
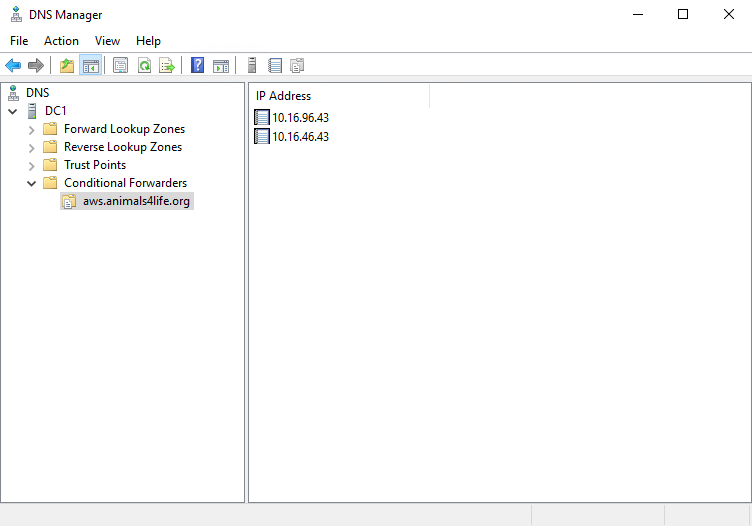
ONPREM: Configure DNS Conditional Forwarders for ONPREM:
The configuration of DNS conditional forwarders optimizes DNS resolution, enhancing the efficiency of communication between AWS and on-premises environments.
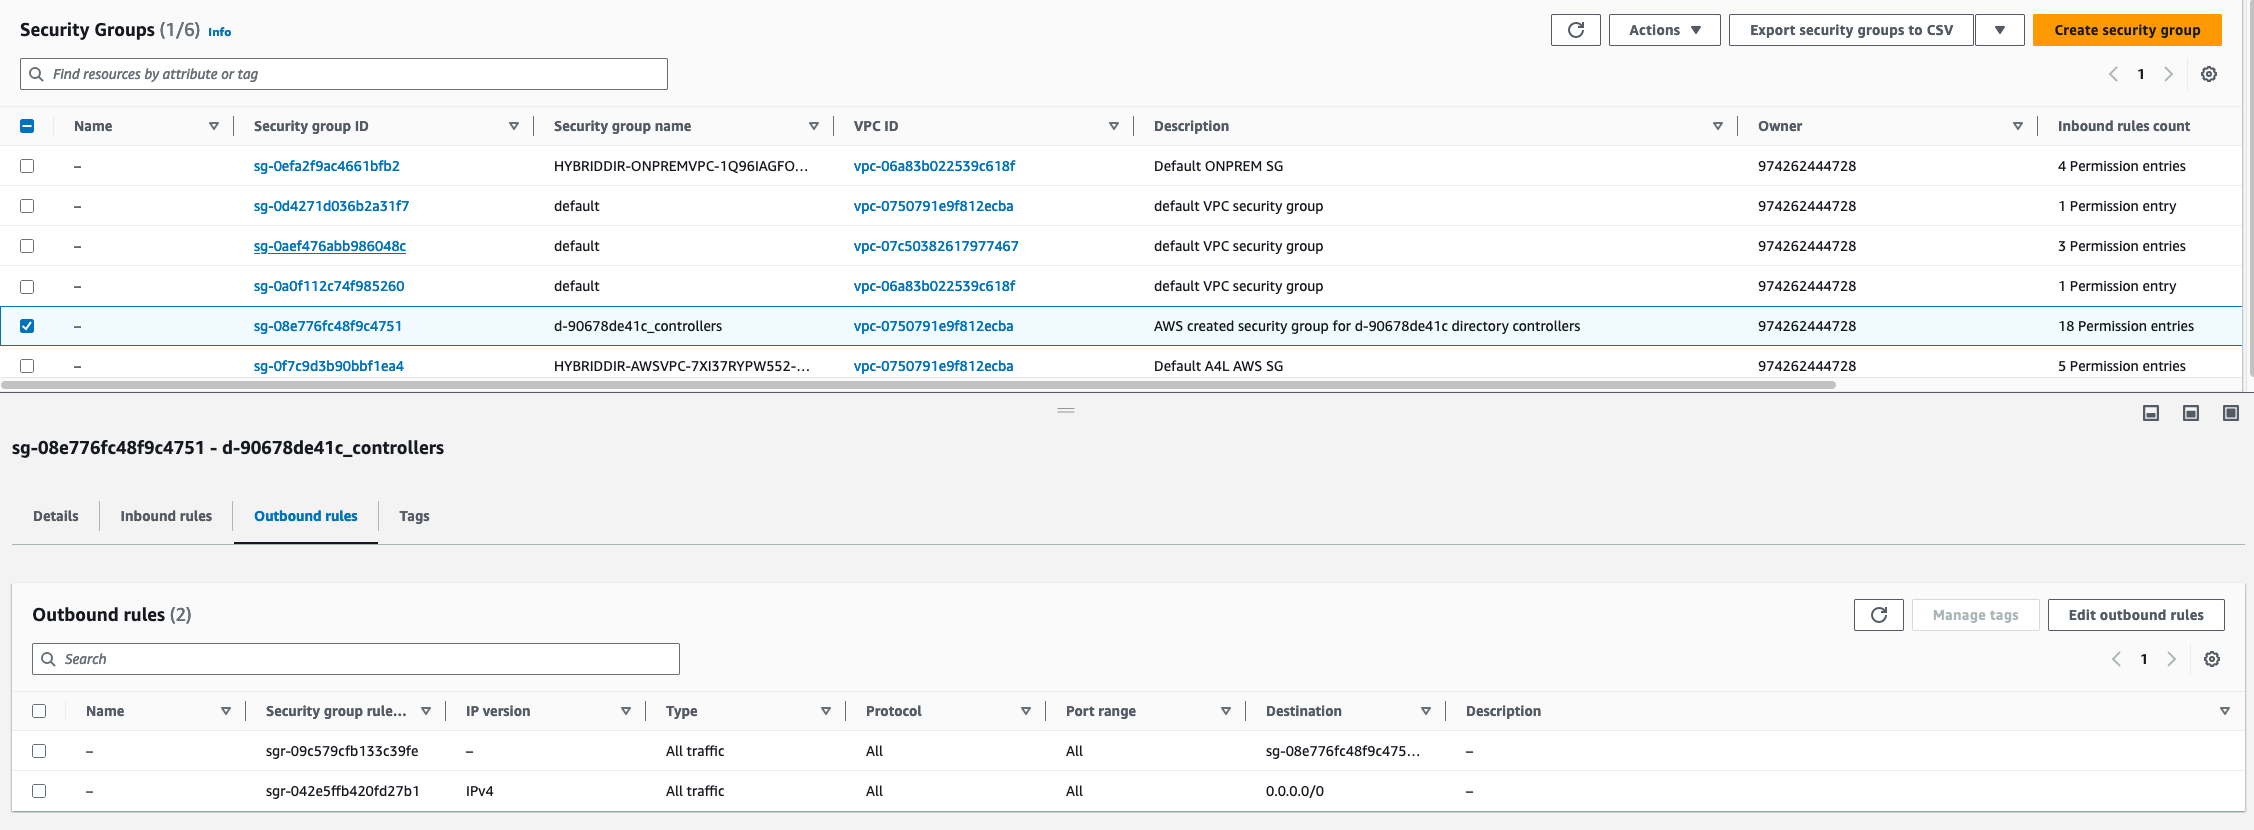
AWS: MicrosoftAD Security Group:
Updating security groups in AWS ensures secure communication, fostering a robust and protected hybrid infrastructure.
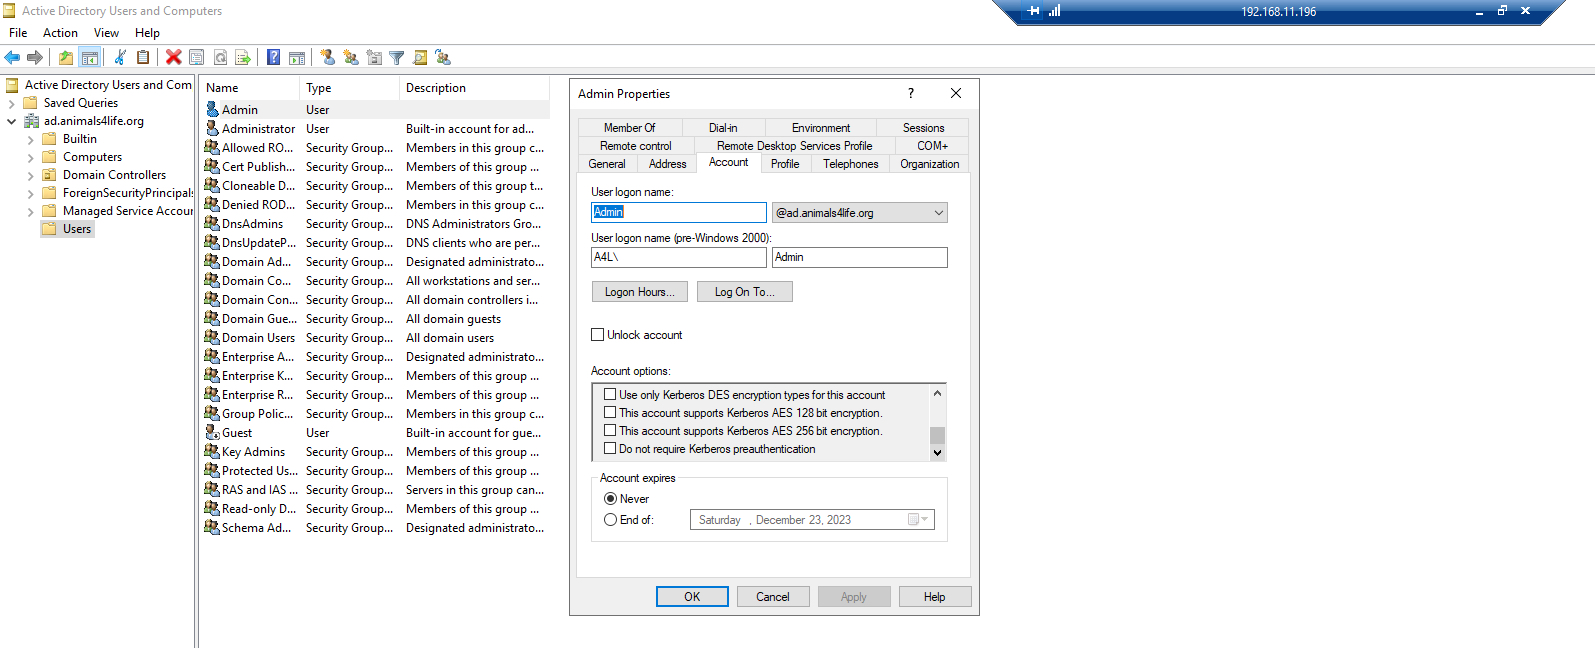
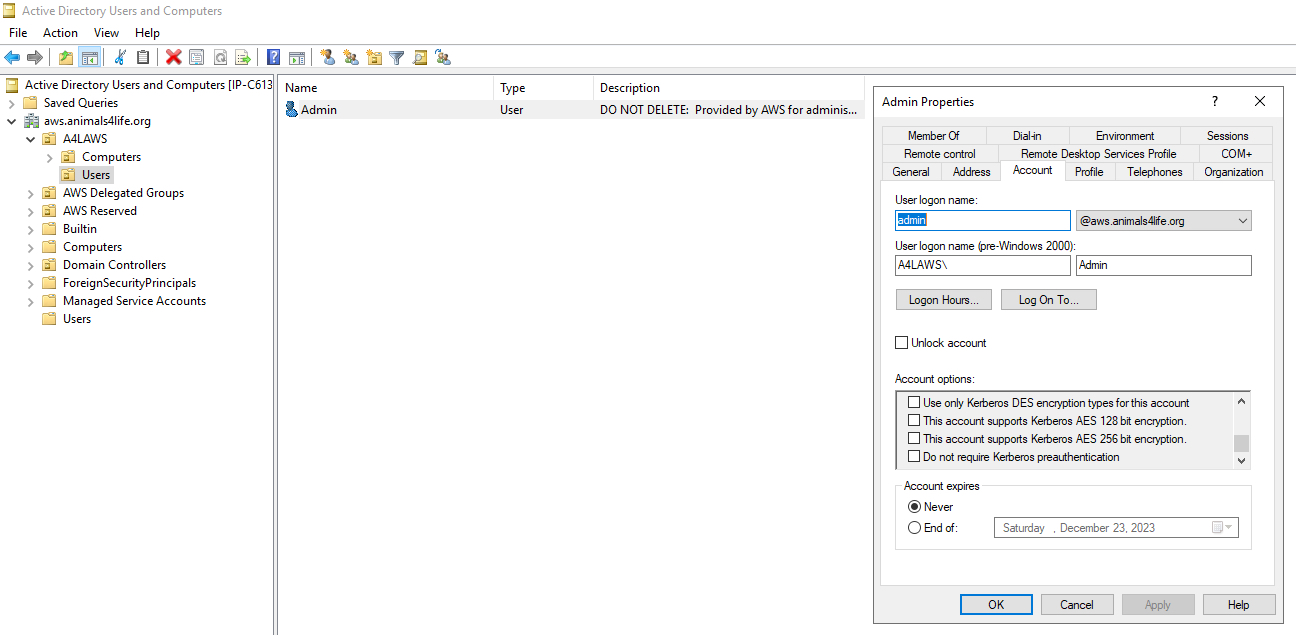
AWS: Ensure That Kerberos Pre-authentication Is Enabled:
Ensuring Kerberos pre-authentication is enabled on the Admin account within the AWS environment.
Configure the Trust in Your On-Premises Active Directory:
Return to or reconnect to the On-Prem JumpBox.
Connect to the CLIENT instance and follow the provided instructions to configure the forest trust for two-way authentication.
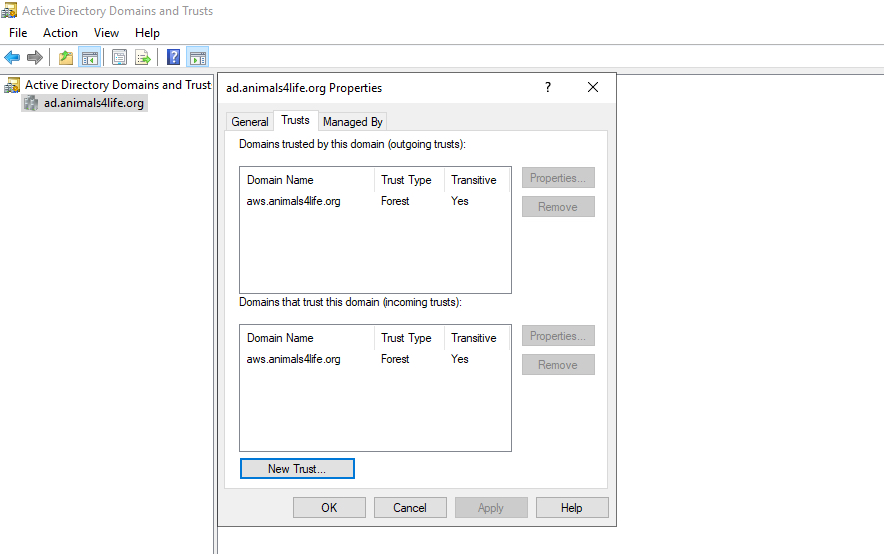
Configure the Trust in Your AWS Managed Microsoft AD Directory
Access the AWS console and navigate to the managed Microsoft AD directory.
Add a trust relationship with ad.animals4life.org following the provided instructions.

Test the Trust:
Verifying the trust establishes a seamless connection, allowing administrators to operate within the AWS environment using on-premises credentials.

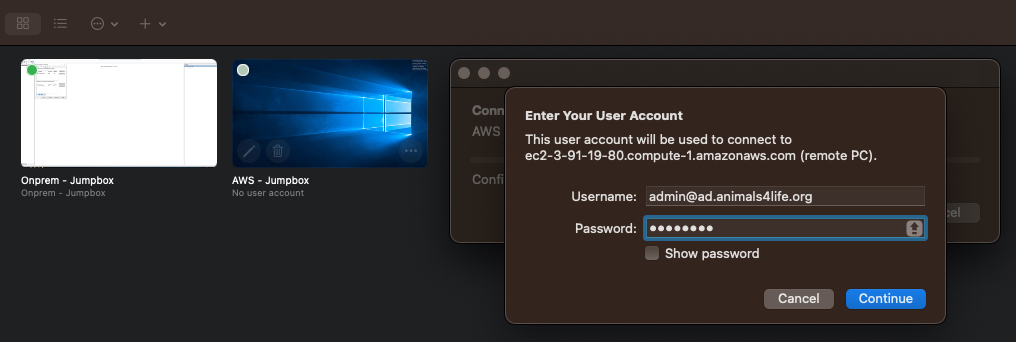
Successful verification confirms the seamless trust connection, enabling administrators to confidently operate within the AWS environment using their on-premises credentials.
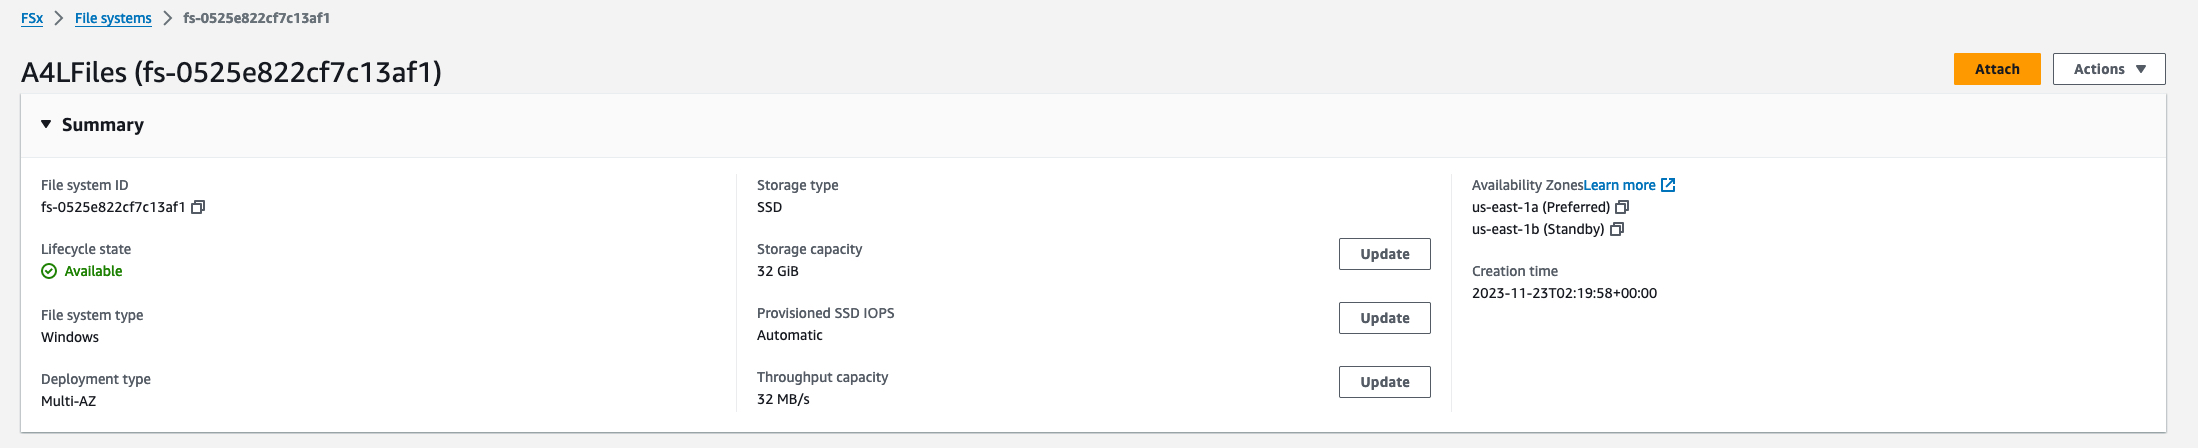
Stage 5: Creating FSx File System

Create FSx File System:
AWS FSx facilitates the creation of a scalable and high-performance file system, enabling centralized data management.
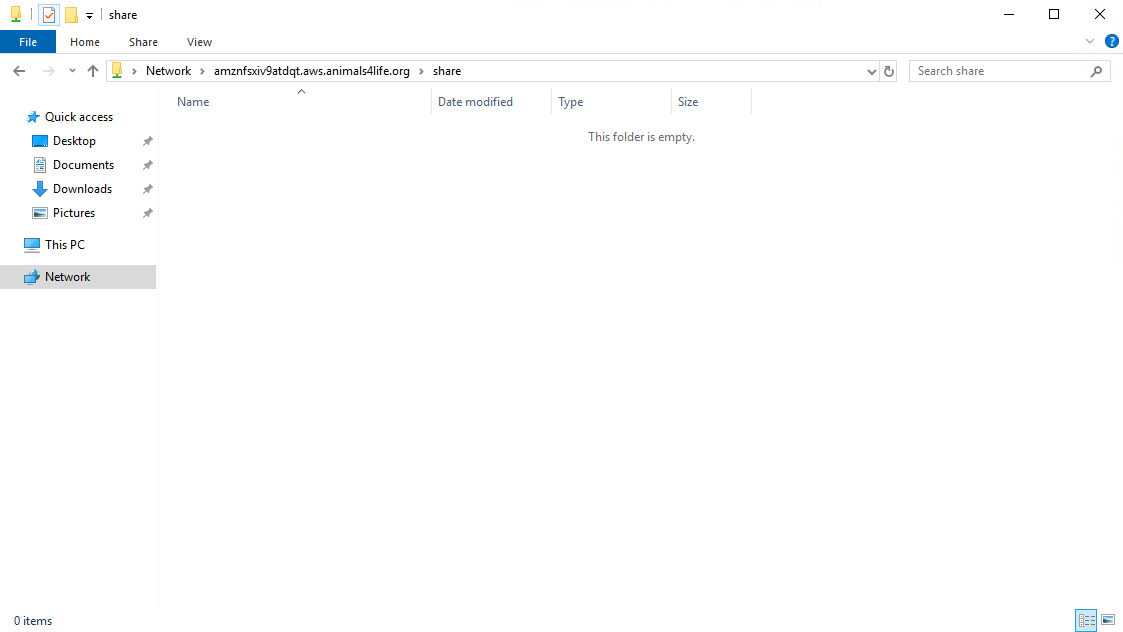
Verify Access:
Confirming access to the FSx file system ensures that file sharing is operational between on-premises and AWS environments.
Configure DFS Namespace and Folder:
Configuring a DFS Namespace unifies file access, directing users to the closest file server, be it on-premises or in AWS.

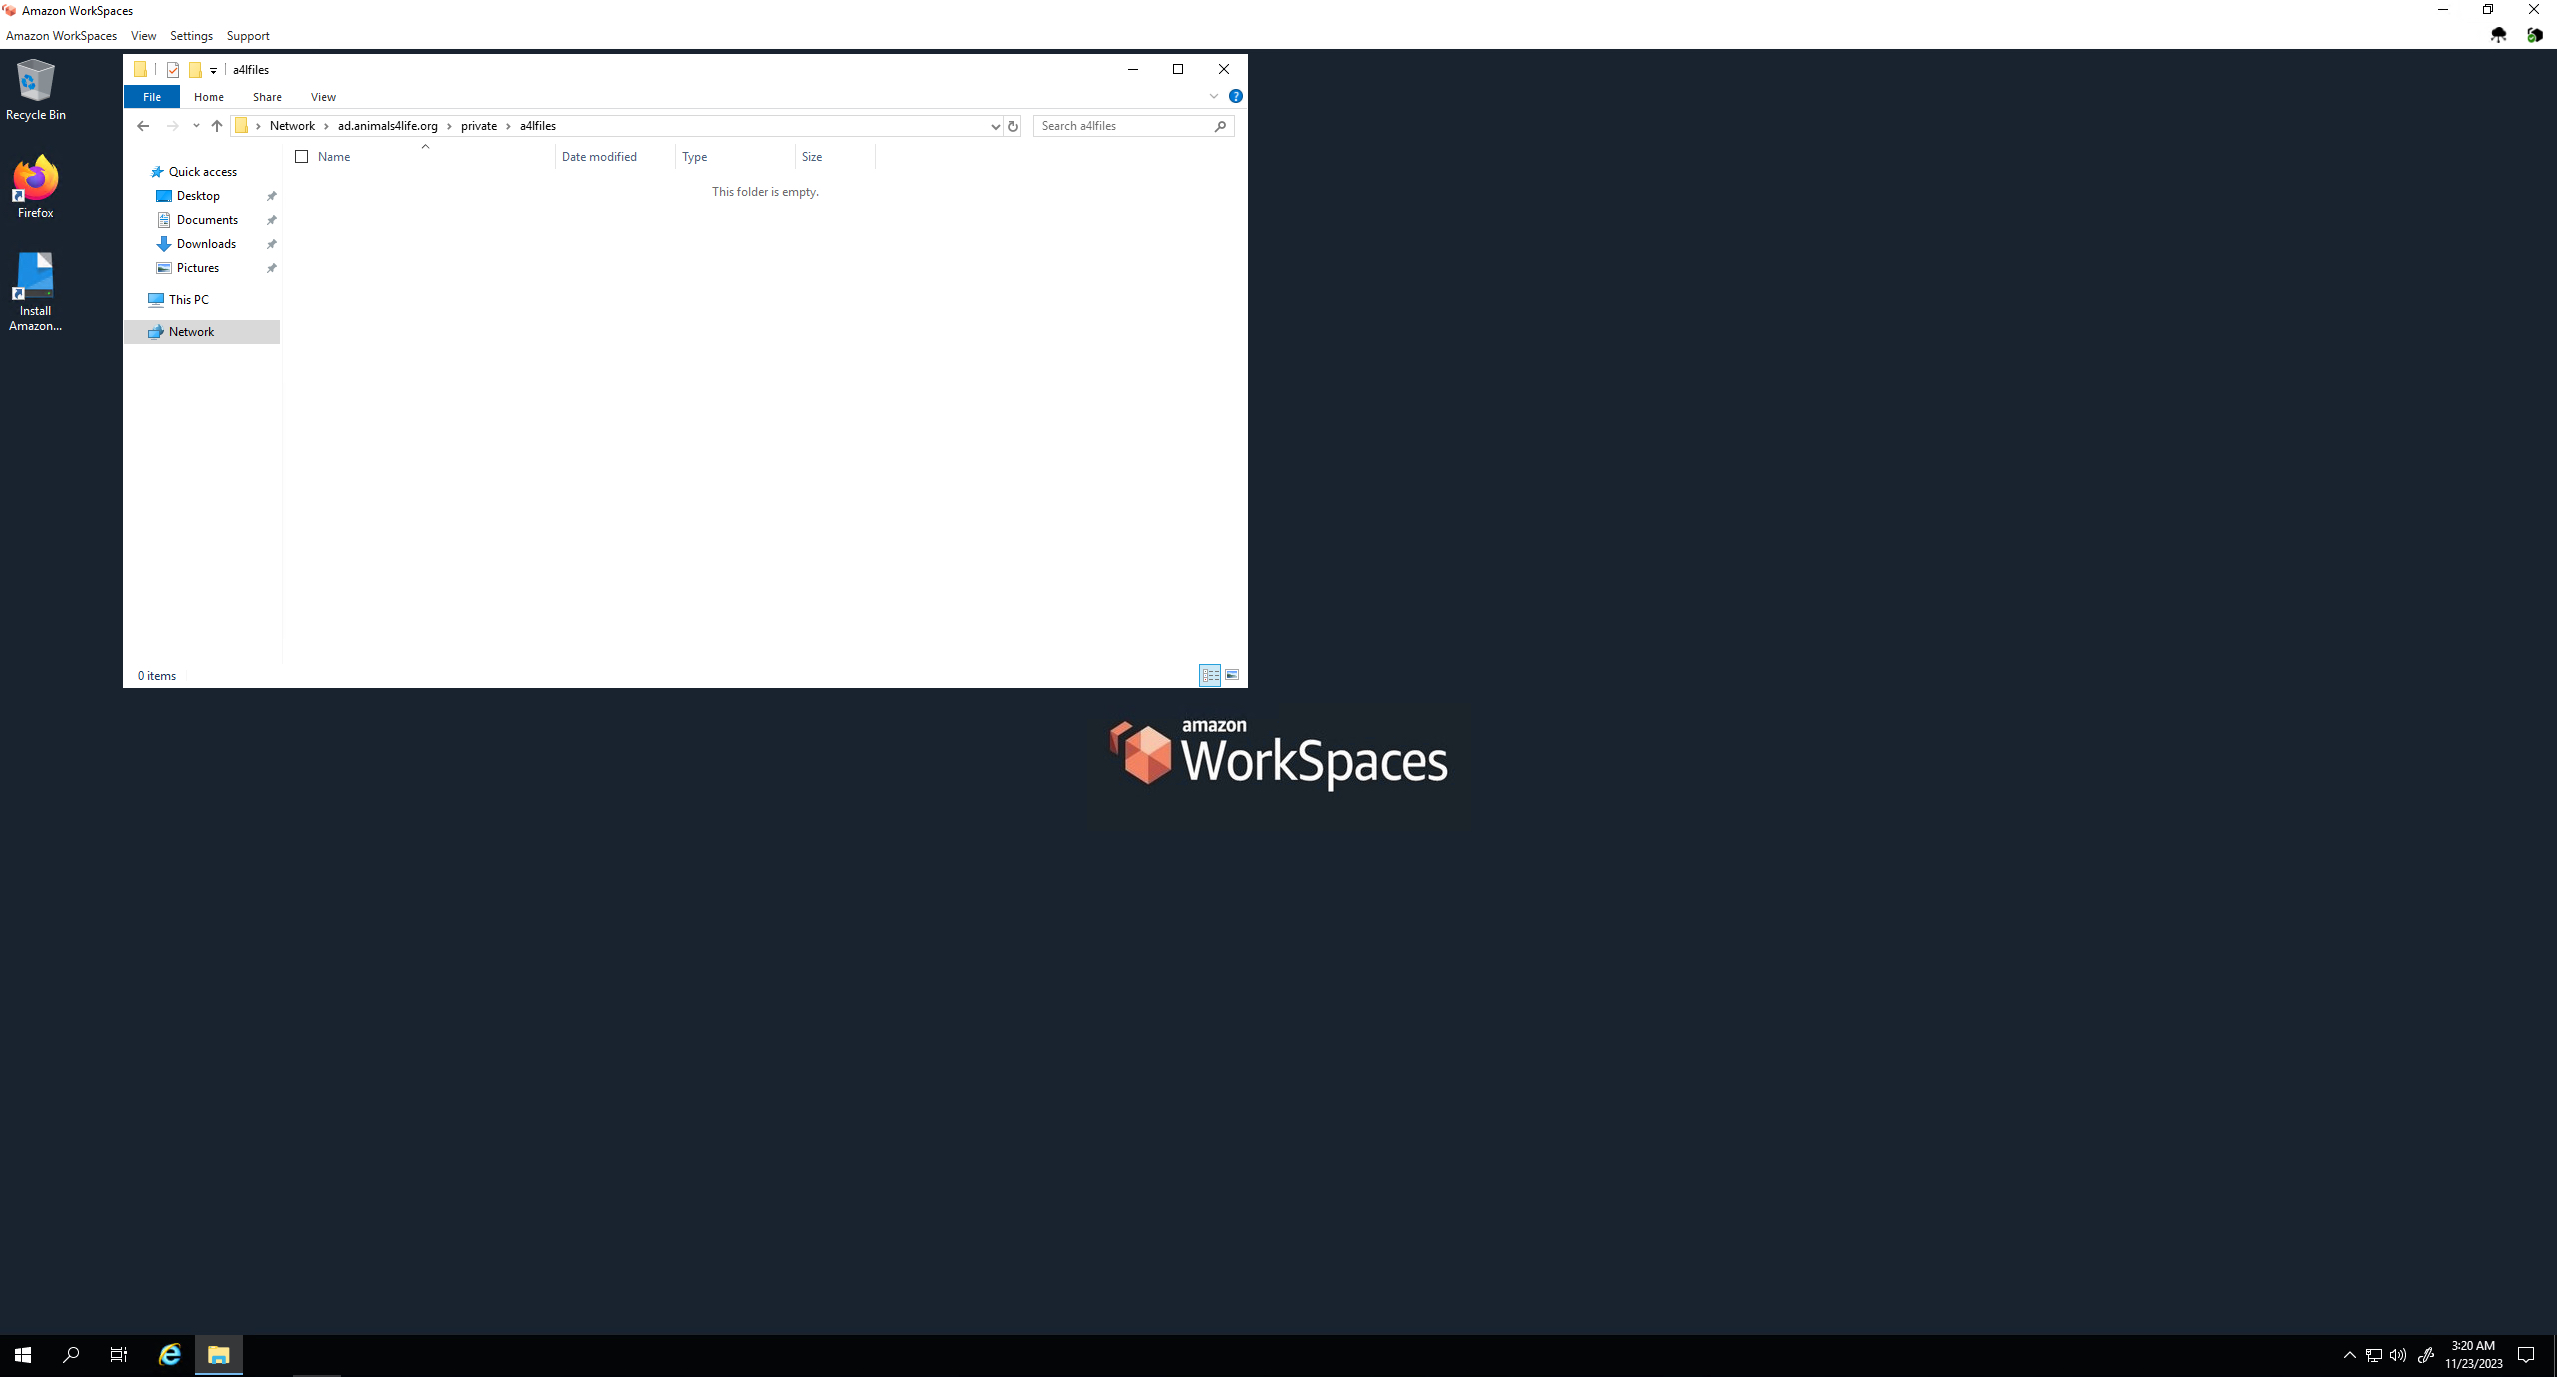
Stage 6: Creating Workspaces
Create Workspaces:
Leveraging AWS Workspaces introduces the concept of virtual desktops, providing a flexible and scalable desktop computing solution.

Workspaces Client:
Installing the Workspaces client and connecting to the workspace showcases the feasibility of accessing resources in the hybrid environment from a virtual desktop.

Adjust Security Group Rules:
Updating security group rules ensures that the virtual desktop can seamlessly access resources across security boundaries, creating a cohesive user experience.
Now we can start migrating our data from On-Premises to AWS.
As we embark on the data migration phase from On-Premises to AWS, it's worth noting that this project not only serves as a comprehensive guide for the initial setup but also demonstrates the seamless integration of on-premises and AWS. I encourage you to meticulously explore and adapt these steps to align with your specific requirements, ensuring a streamlined and efficient migration process.