CI/CD pipeline on AWS - CodePipeline - Part 4 🚀 ☁
Cloud Engineer and DevOps enthusiast, just talking about AWS, Docker, Linux, Kubernetes, Python, and automation.
Welcome to Part 4 of my series on building a comprehensive CI/CD pipeline in AWS. In this article, I will explore AWS CodePipeline, a powerful service for building and deploying applications in a continuous integration and continuous delivery (CI/CD) pipeline.
What is CodePipeline?
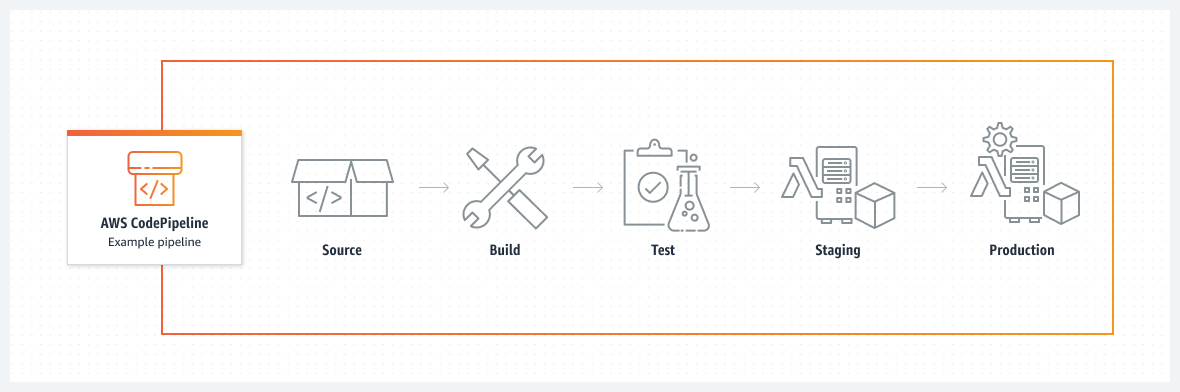
AWS CodePipeline is a fully managed continuous integration and continuous delivery (CI/CD) service provided by Amazon Web Services (AWS). It enables you to build, test, and deploy your applications quickly and reliably. CodePipeline automates the entire software release process, allowing you to deliver updates to your applications seamlessly.
With CodePipeline, you can define a series of stages, each representing a specific step in your software release workflow. These stages can include source code repositories, build servers, testing environments, and deployment targets. CodePipeline integrates with various AWS services and third-party tools, providing a flexible and extensible platform for building your CI/CD pipeline.
Task 1: Setting Up a CodePipeline
Create a Deployment Group of EC2 Instances:
Open the AWS Management Console and navigate to AWS CodeDeploy.
Click on "Create Deployment Group" and provide a name and description for the group.
Select the EC2 instances you want to include in the group and configure the deployment settings.
Define the deployment type, load balancer settings, and alarms for monitoring.
Save the deployment group configuration.
Create a CodePipeline:
Go to the AWS Management Console and navigate to AWS CodePipeline.
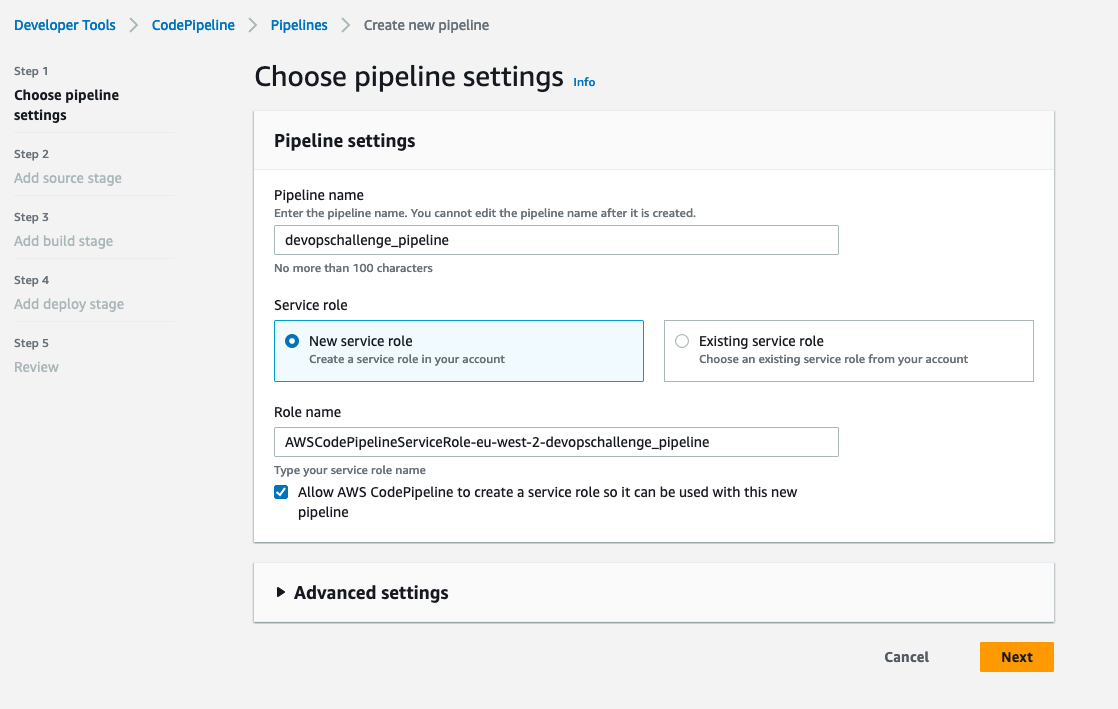
Click on "Create pipeline" and provide a name and description for the pipeline.

Provide the Pipeline name and select to create a New service role
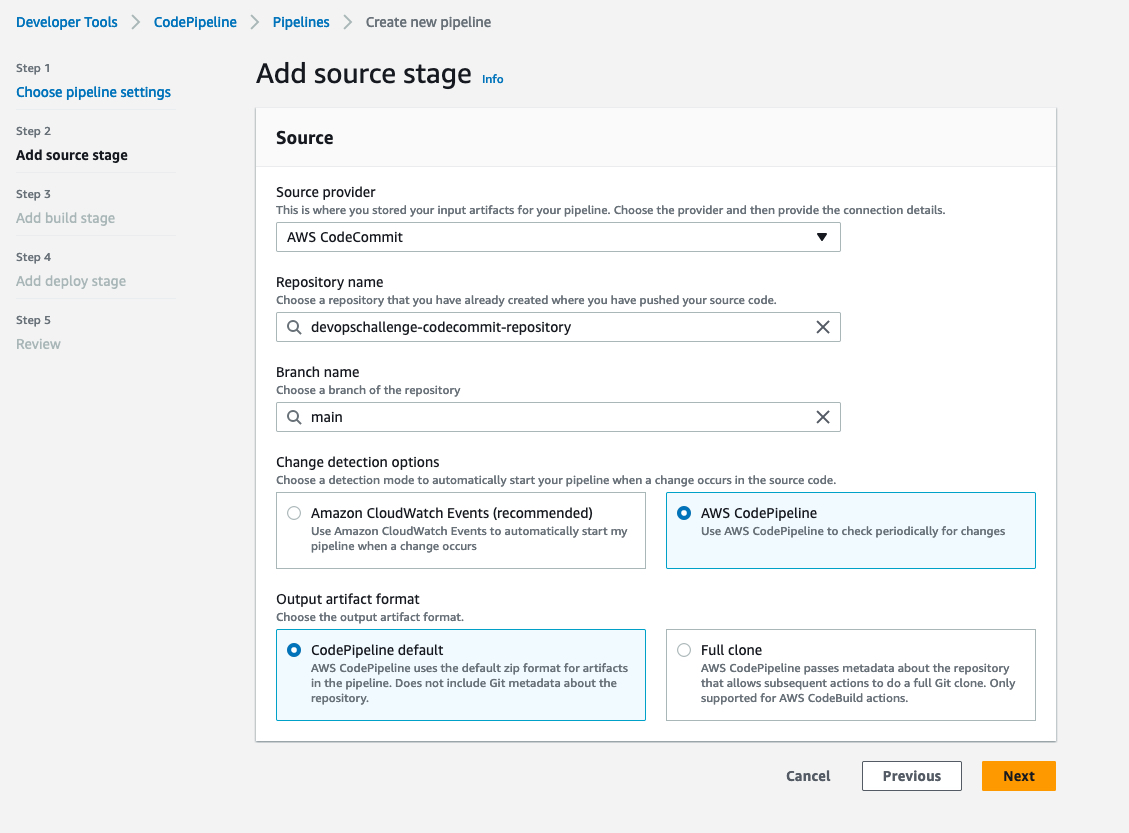
Configure the source stage by selecting CodeCommit as the source provider and specifying the repository and branch.
Configure the build stage by selecting CodeBuild as the build provider and specifying the build project.

Set up the deploy stage by selecting AWS CodeDeploy as the deploy provider and specifying the deployment group created earlier.

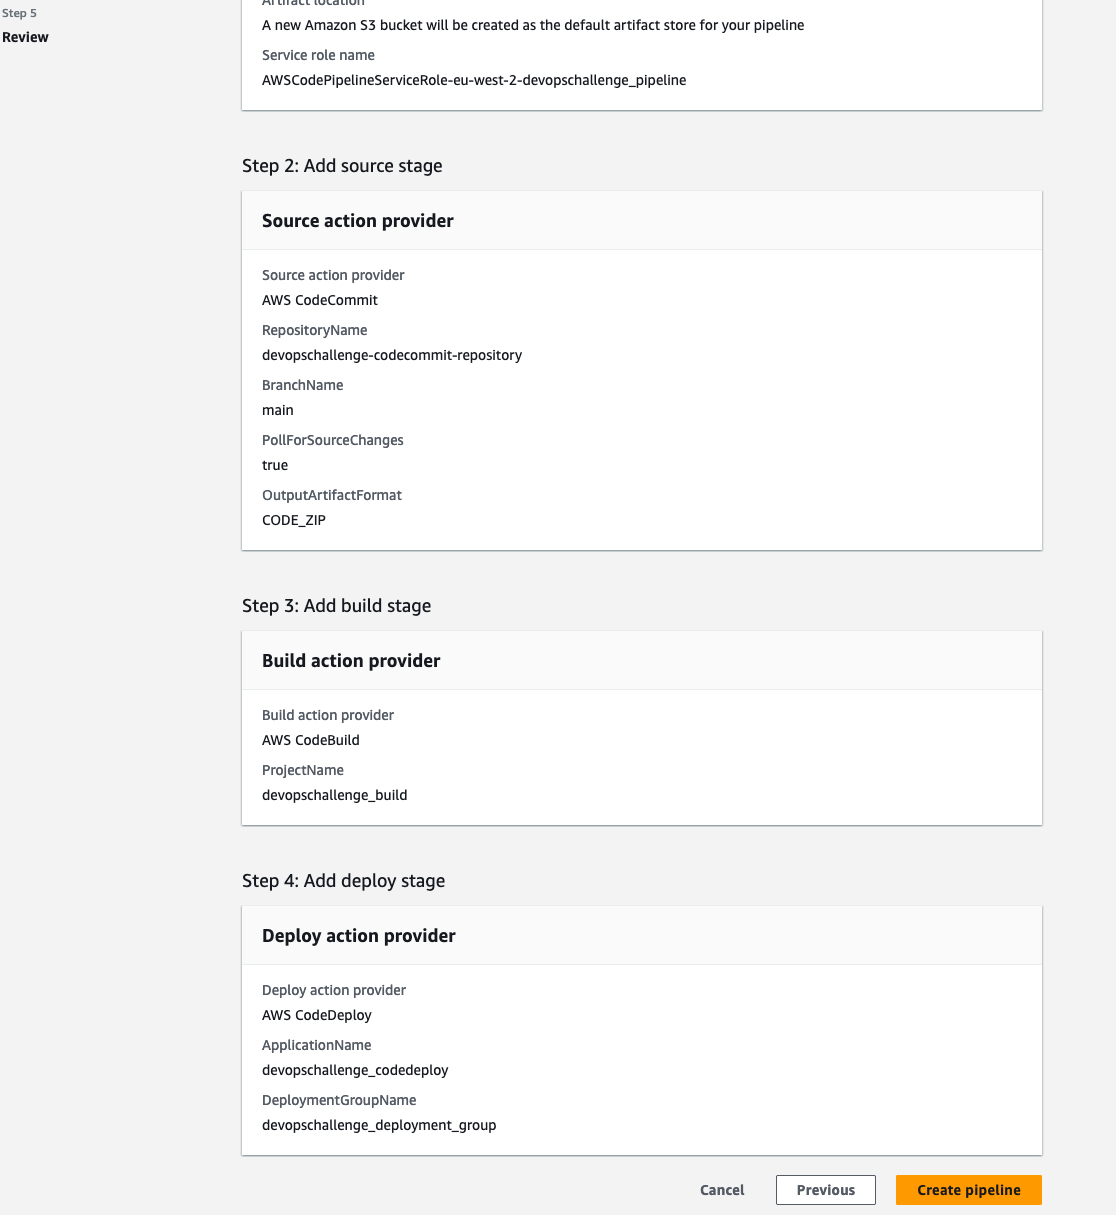
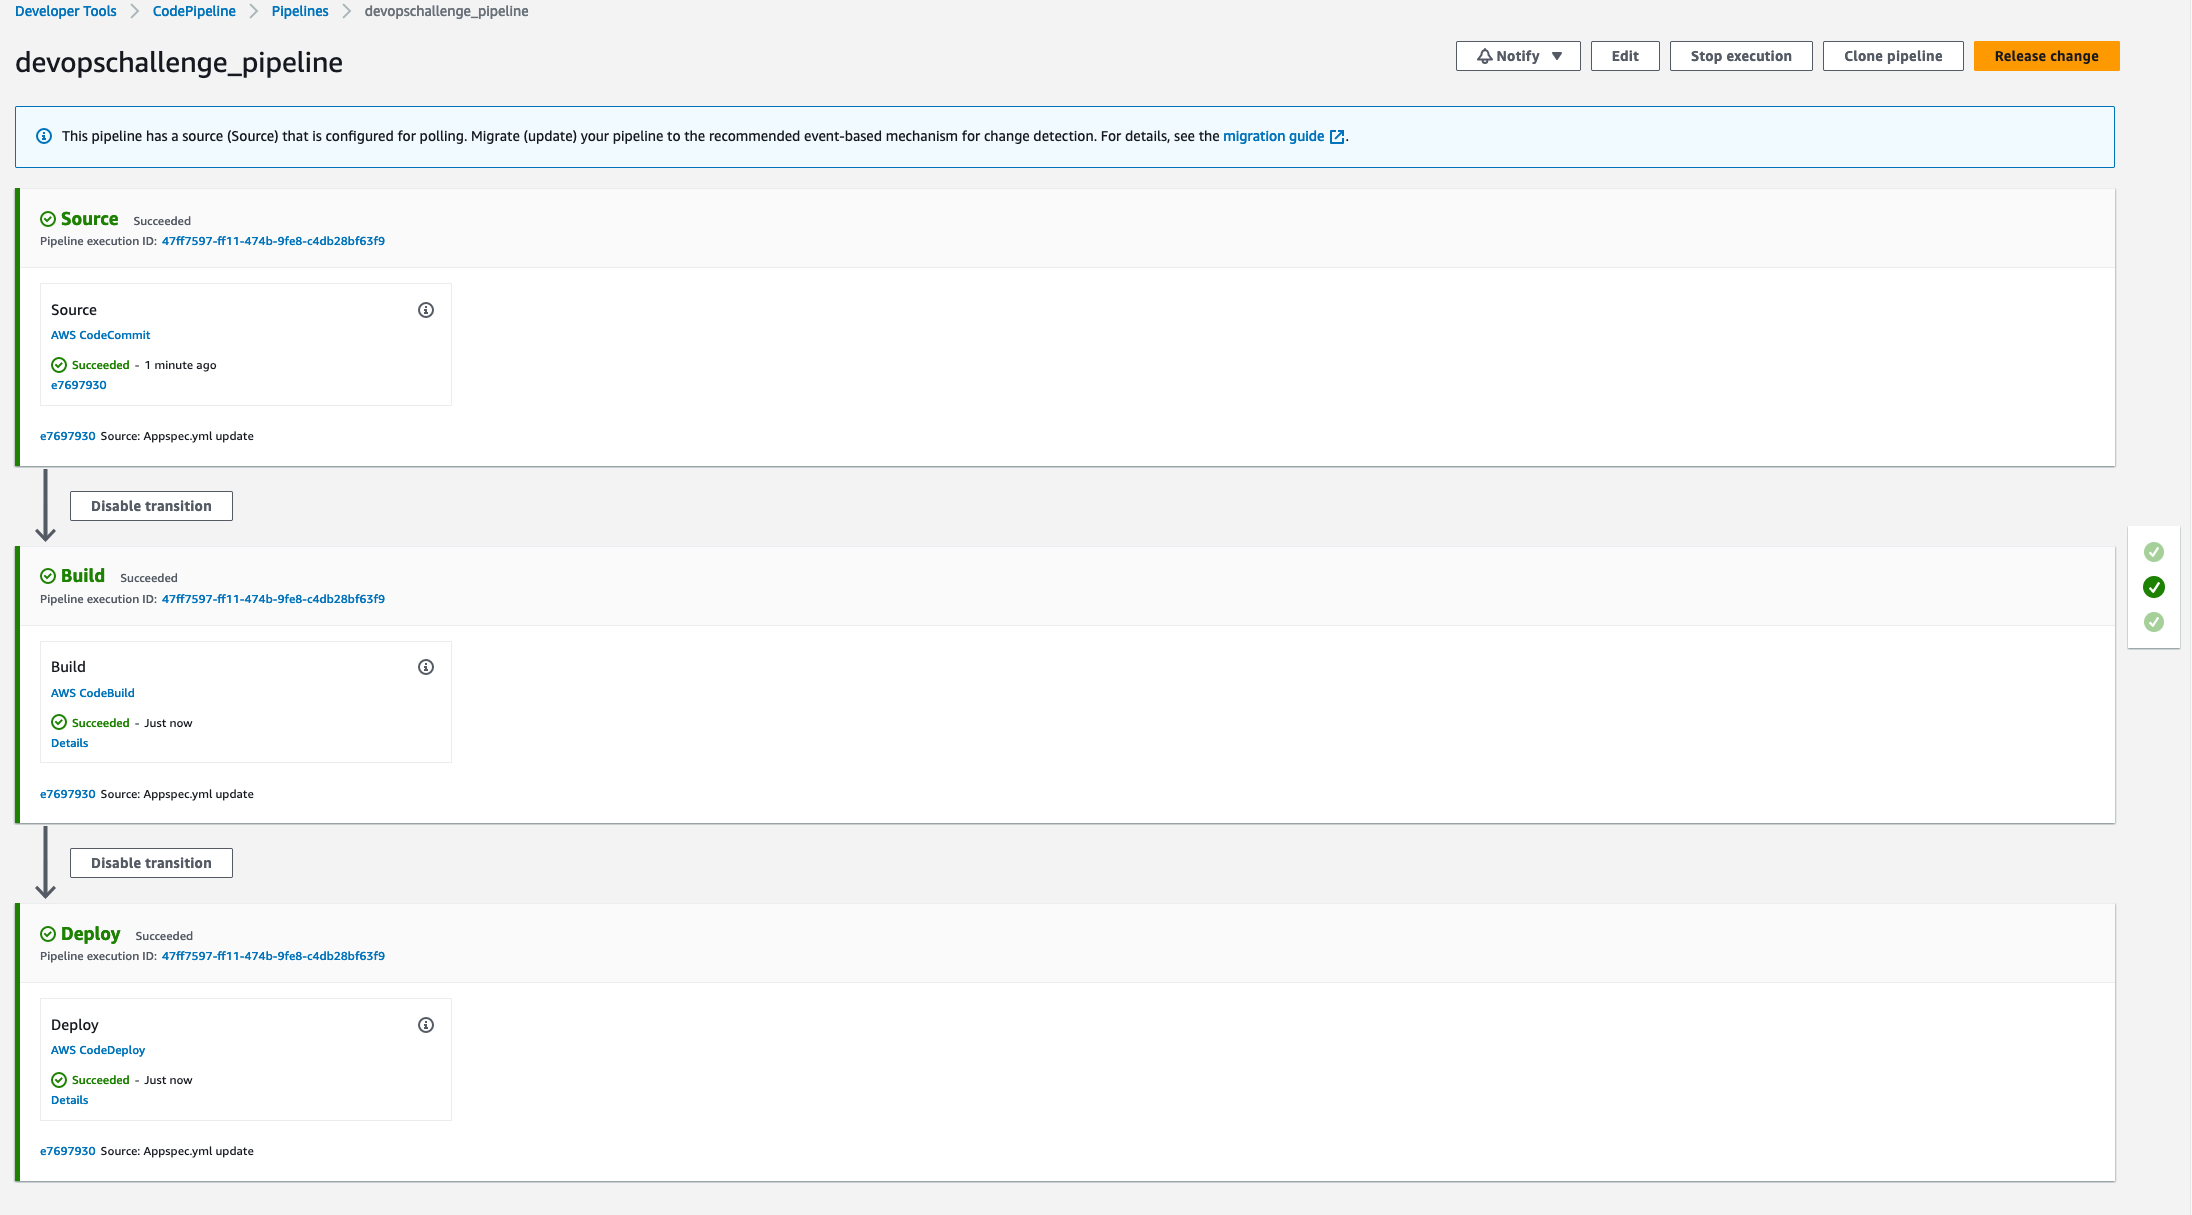
Review the pipeline configuration and click on "Create pipeline" to create the CodePipeline.
CodePipeline will fetch the code from CodeCommit, build the code using CodeBuild and deploy the application in the EC2 instance specified in CodeDeploy.
Navigate to the public IP Address of the EC2 instance where the application has been deployed and verify the HTML website deployment works.

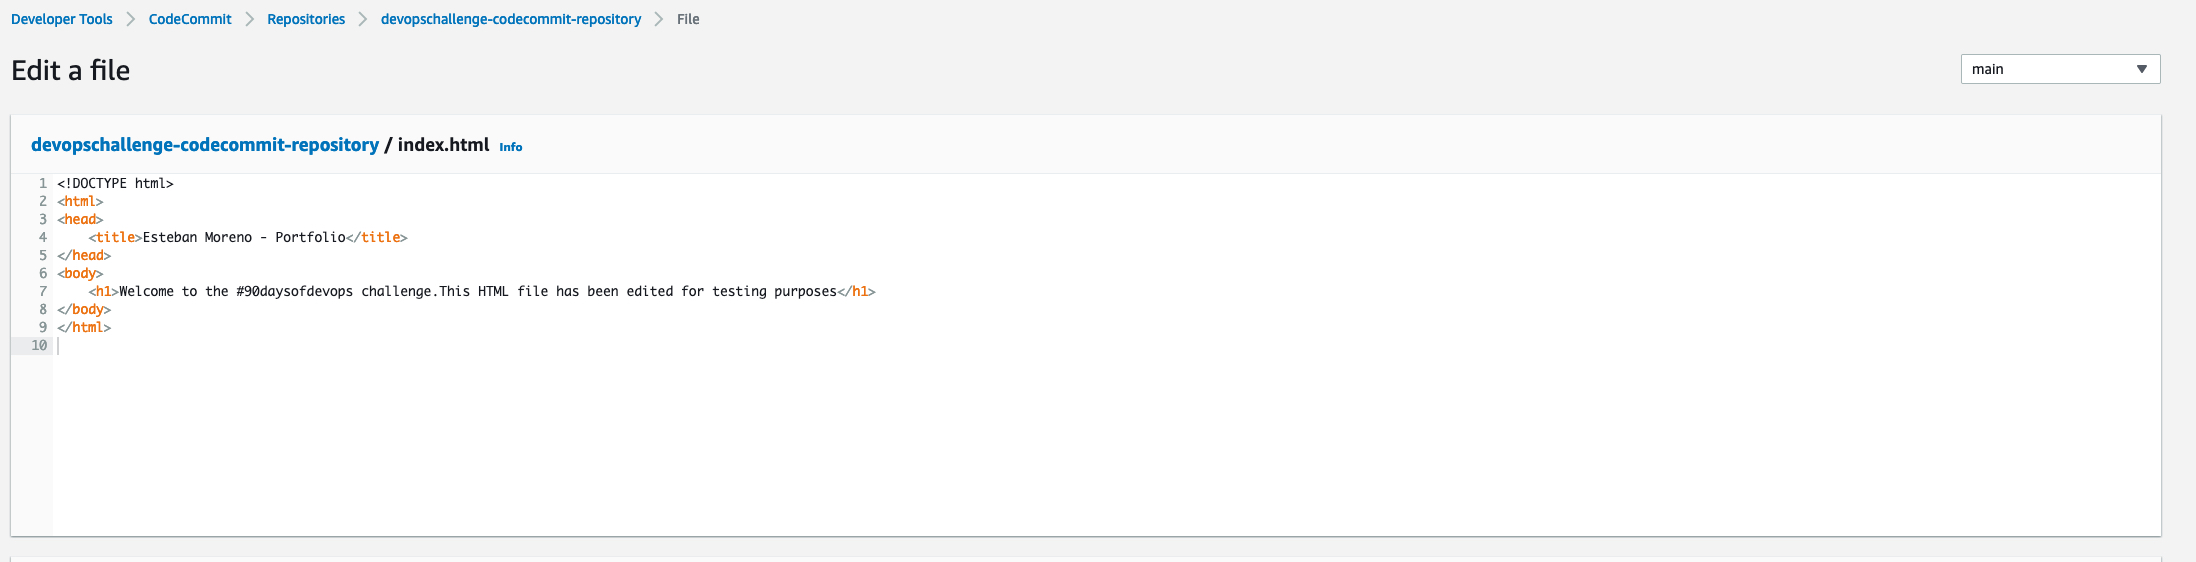
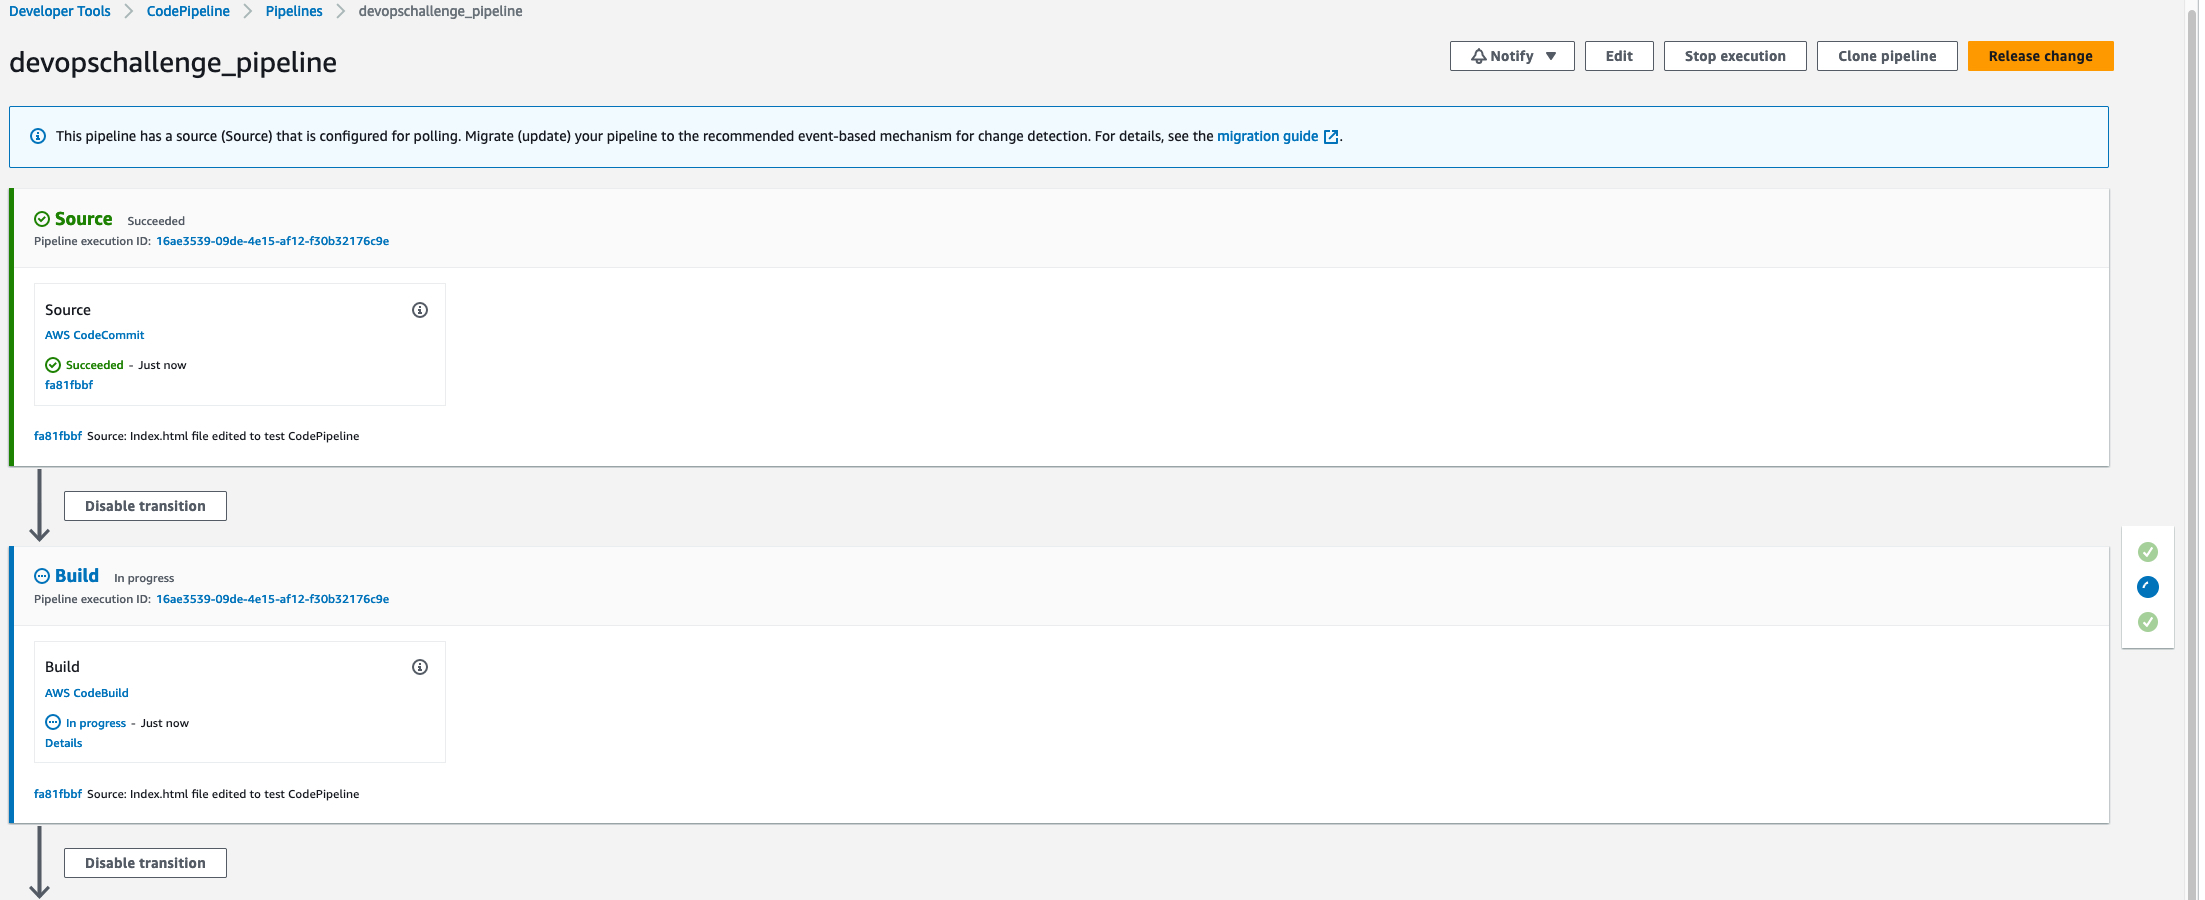
We can verify the pipeline works by making a change in the index.html file and waiting for the pipeline to fetch the changes and build the app as explained earlier.
The pipeline is executing and applying the changes.
Refresh the browser and verify the changes have been successfully applied

By following these steps, you can create a CodePipeline that integrates CodeCommit, CodeBuild, and CodeDeploy. This enables a seamless flow of your application code from source control to build and deployment on the EC2 instances in the deployment group.
As we wrap up this series, you've learned how to set up a CodePipeline that seamlessly integrates AWS CodeCommit, CodeBuild, and CodeDeploy. This orchestration ensures a smooth flow of your application code from source control to build and deployment on EC2 instances within the deployment group. You're now well-equipped to take your CI/CD journey to the next level in AWS.