#90DaysOfDevOps Challenge - Day 84 - DevOps Project 5 - Deploying a Netflix Clone Web Application on a Kubernetes Cluster

Cloud Engineer and DevOps enthusiast, just talking about AWS, Docker, Linux, Kubernetes, Python, and automation.
Welcome to Day 84 of the #90DaysOfDevOps Challenge. Today, we embark on an exciting project where we'll deploy a Netflix clone web application on a Kubernetes cluster. Let's get started!
Project Description
The project involves deploying a Netflix clone web application on a Kubernetes cluster, a popular container orchestration platform that simplifies the deployment and management of containerized applications.
The project will require creating Docker images of the web application and its dependencies and deploying them onto the Kubernetes cluster using Kubernetes manifests. The Kubernetes cluster will provide benefits such as high availability, scalability, and automatic failover of the application. Additionally, the project will utilize Kubernetes tools such as Kubernetes Dashboard and kubectl to monitor and manage the deployed application.
Overall, the project aims to demonstrate the power and benefits of Kubernetes for deploying and managing containerized applications at scale.
Hands-on Project: Deploying a Netflix Clone Web Application on a Kubernetes Cluster
Pre-requisites:
Install Docker: Follow the instructions from the Official Docker Documentation to install Docker on your OS.

Install Kubernetes and Kubectl: To install Kubernetes and
kubectlin your OS, follow the steps from my previous Kubernetes blog or use the official minikube documentation.
Project Steps:
API Key Configuration: If the Netflix Clone web application requires an API key to fetch data, make sure to follow the instructions provided in the README.md file of the GitHub repository to configure the API key while creating the Docker container.
Clone the Netflix Clone Repository: Navigate to the directory where you want to clone the Netflix Clone repository from GitHub. Use the following command to clone the repository:
git clone https://github.com/crazy-man22/netflix-clone-react-typescript.gitBuild Docker Image: Once you have cloned the repository, navigate to the project directory and locate the Dockerfile. Ensure that the Dockerfile specifies the necessary dependencies and configurations for your Netflix Clone web application. Build the Docker image using the following command:
docker build --build-arg TMDB_V3_API_KEY=your_api_key_here -t netflix-clone .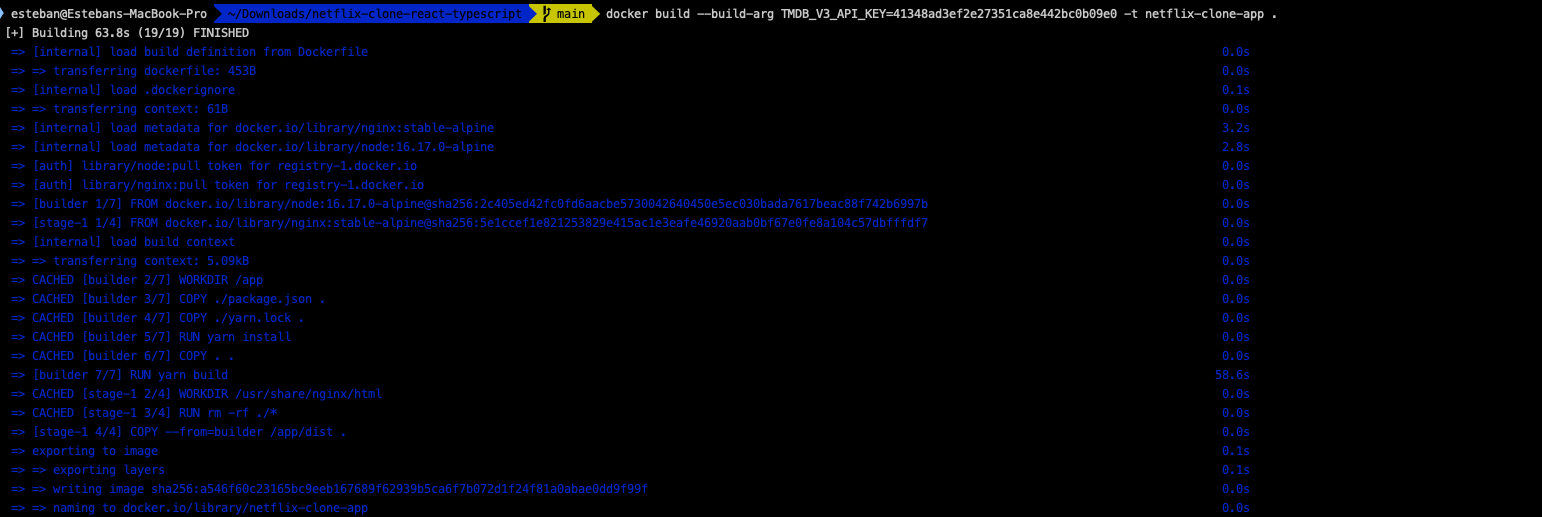
Push Docker Image to DockerHub: To push the Docker image to DockerHub, you need to have a DockerHub account and repository set up. Tag the image with your DockerHub username and repository name, and then push it using the following commands:
 docker tag netflix-clone-app:latest estebanmorenoit/netflix-clone-app:latest
 docker push estebanmorenoit/netflix-clone-app:latest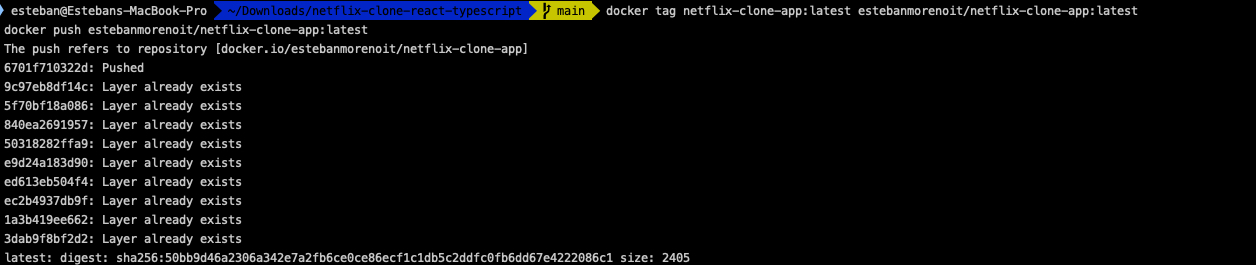
Create Kubernetes Deployment: Now, create a Kubernetes Deployment manifest file (e.g.,
deployment.yaml) that describes the desired state of the Netflix Clone application. In the manifest, specify the Docker image, replica count, and any required environment variables. An exampledeployment.yamlfile might look like this:apiVersion: apps/v1 kind: Deployment metadata: name: netflix-clone-deployment spec: replicas: 3 selector: matchLabels: app: netflix-clone-app template: metadata: labels: app: netflix-clone-app spec: containers: - name: netflix-clone-container image: estebanmorenoit/netflix-clone-app:latest ports: - containerPort: 80Apply the deployment using the following command:
kubectl apply -f deployment.yaml
Verify the deployment and pods are successfully created.
 kubectl get deployments
 kubectl get pods
Create Kubernetes Service: Next, create a Kubernetes Service manifest file (e.g.,
service.yaml) that exposes the Netflix Clone application to the outside world. The service will use a LoadBalancer type, and Minikube will assign an external load balancer that enables access to the application on a specific port. An exampleservice.yamlfile might look like this:apiVersion: v1 kind: Service metadata: name: netflix-clone-service spec: type: LoadBalancer selector: app: netflix-clone-app ports: - protocol: TCP port: 80 targetPort: 80 nodePort: 30080Apply the service using the following command:
kubectl apply -f service.yaml
Verify the service has been successfully created.
kubectl get svc
Testing Website Accessibility: Use the
curlcommand to check if the application is accessible. Open a terminal and run the following command:minikube service netflix-clone-service --url
Copy the above URL and use the curl command to query the app. You should receive the HTML content of the Netflix Clone homepage as a response to the below command.
curl -L http://<your-minikube-service-ip-address>:30080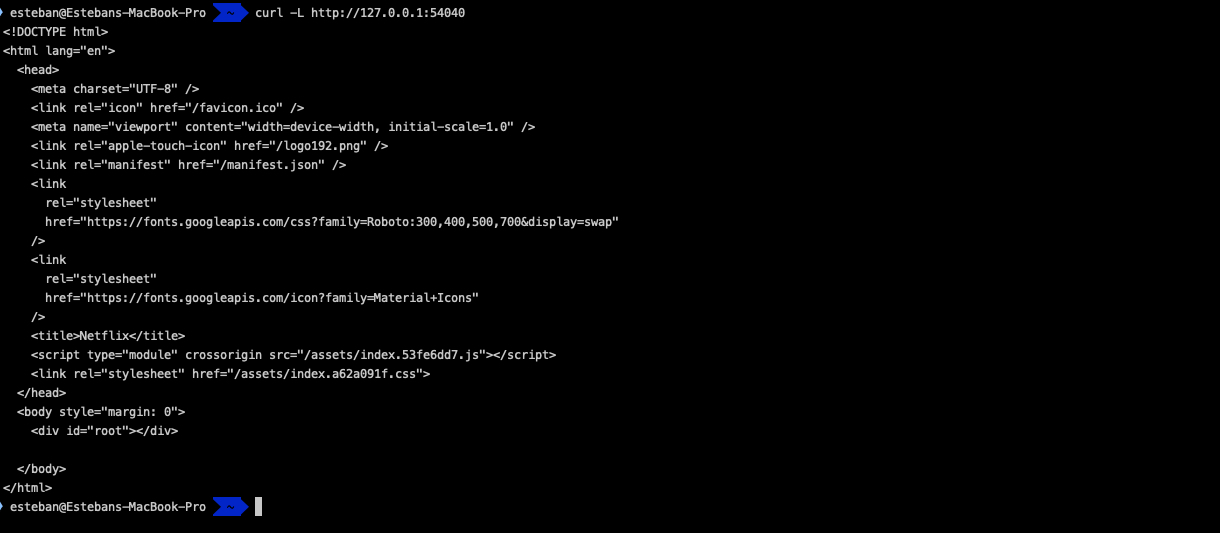
Access the Netflix Clone Web Application: As we can see, the Load Balancer service called
netflix-clone-serviceand its external IP assignment are pending. To access and assign the external IP, we need to create a bridge between Minikube and our machine by using a tunnel command.kubectl get svc
minikube tunnel
We have to keep the tunnel running, so we are going to open a second terminal and check the status of the service again

We can use the External IP address and the port to access our app. You should now see the Netflix Clone web application running on the Kubernetes cluster.
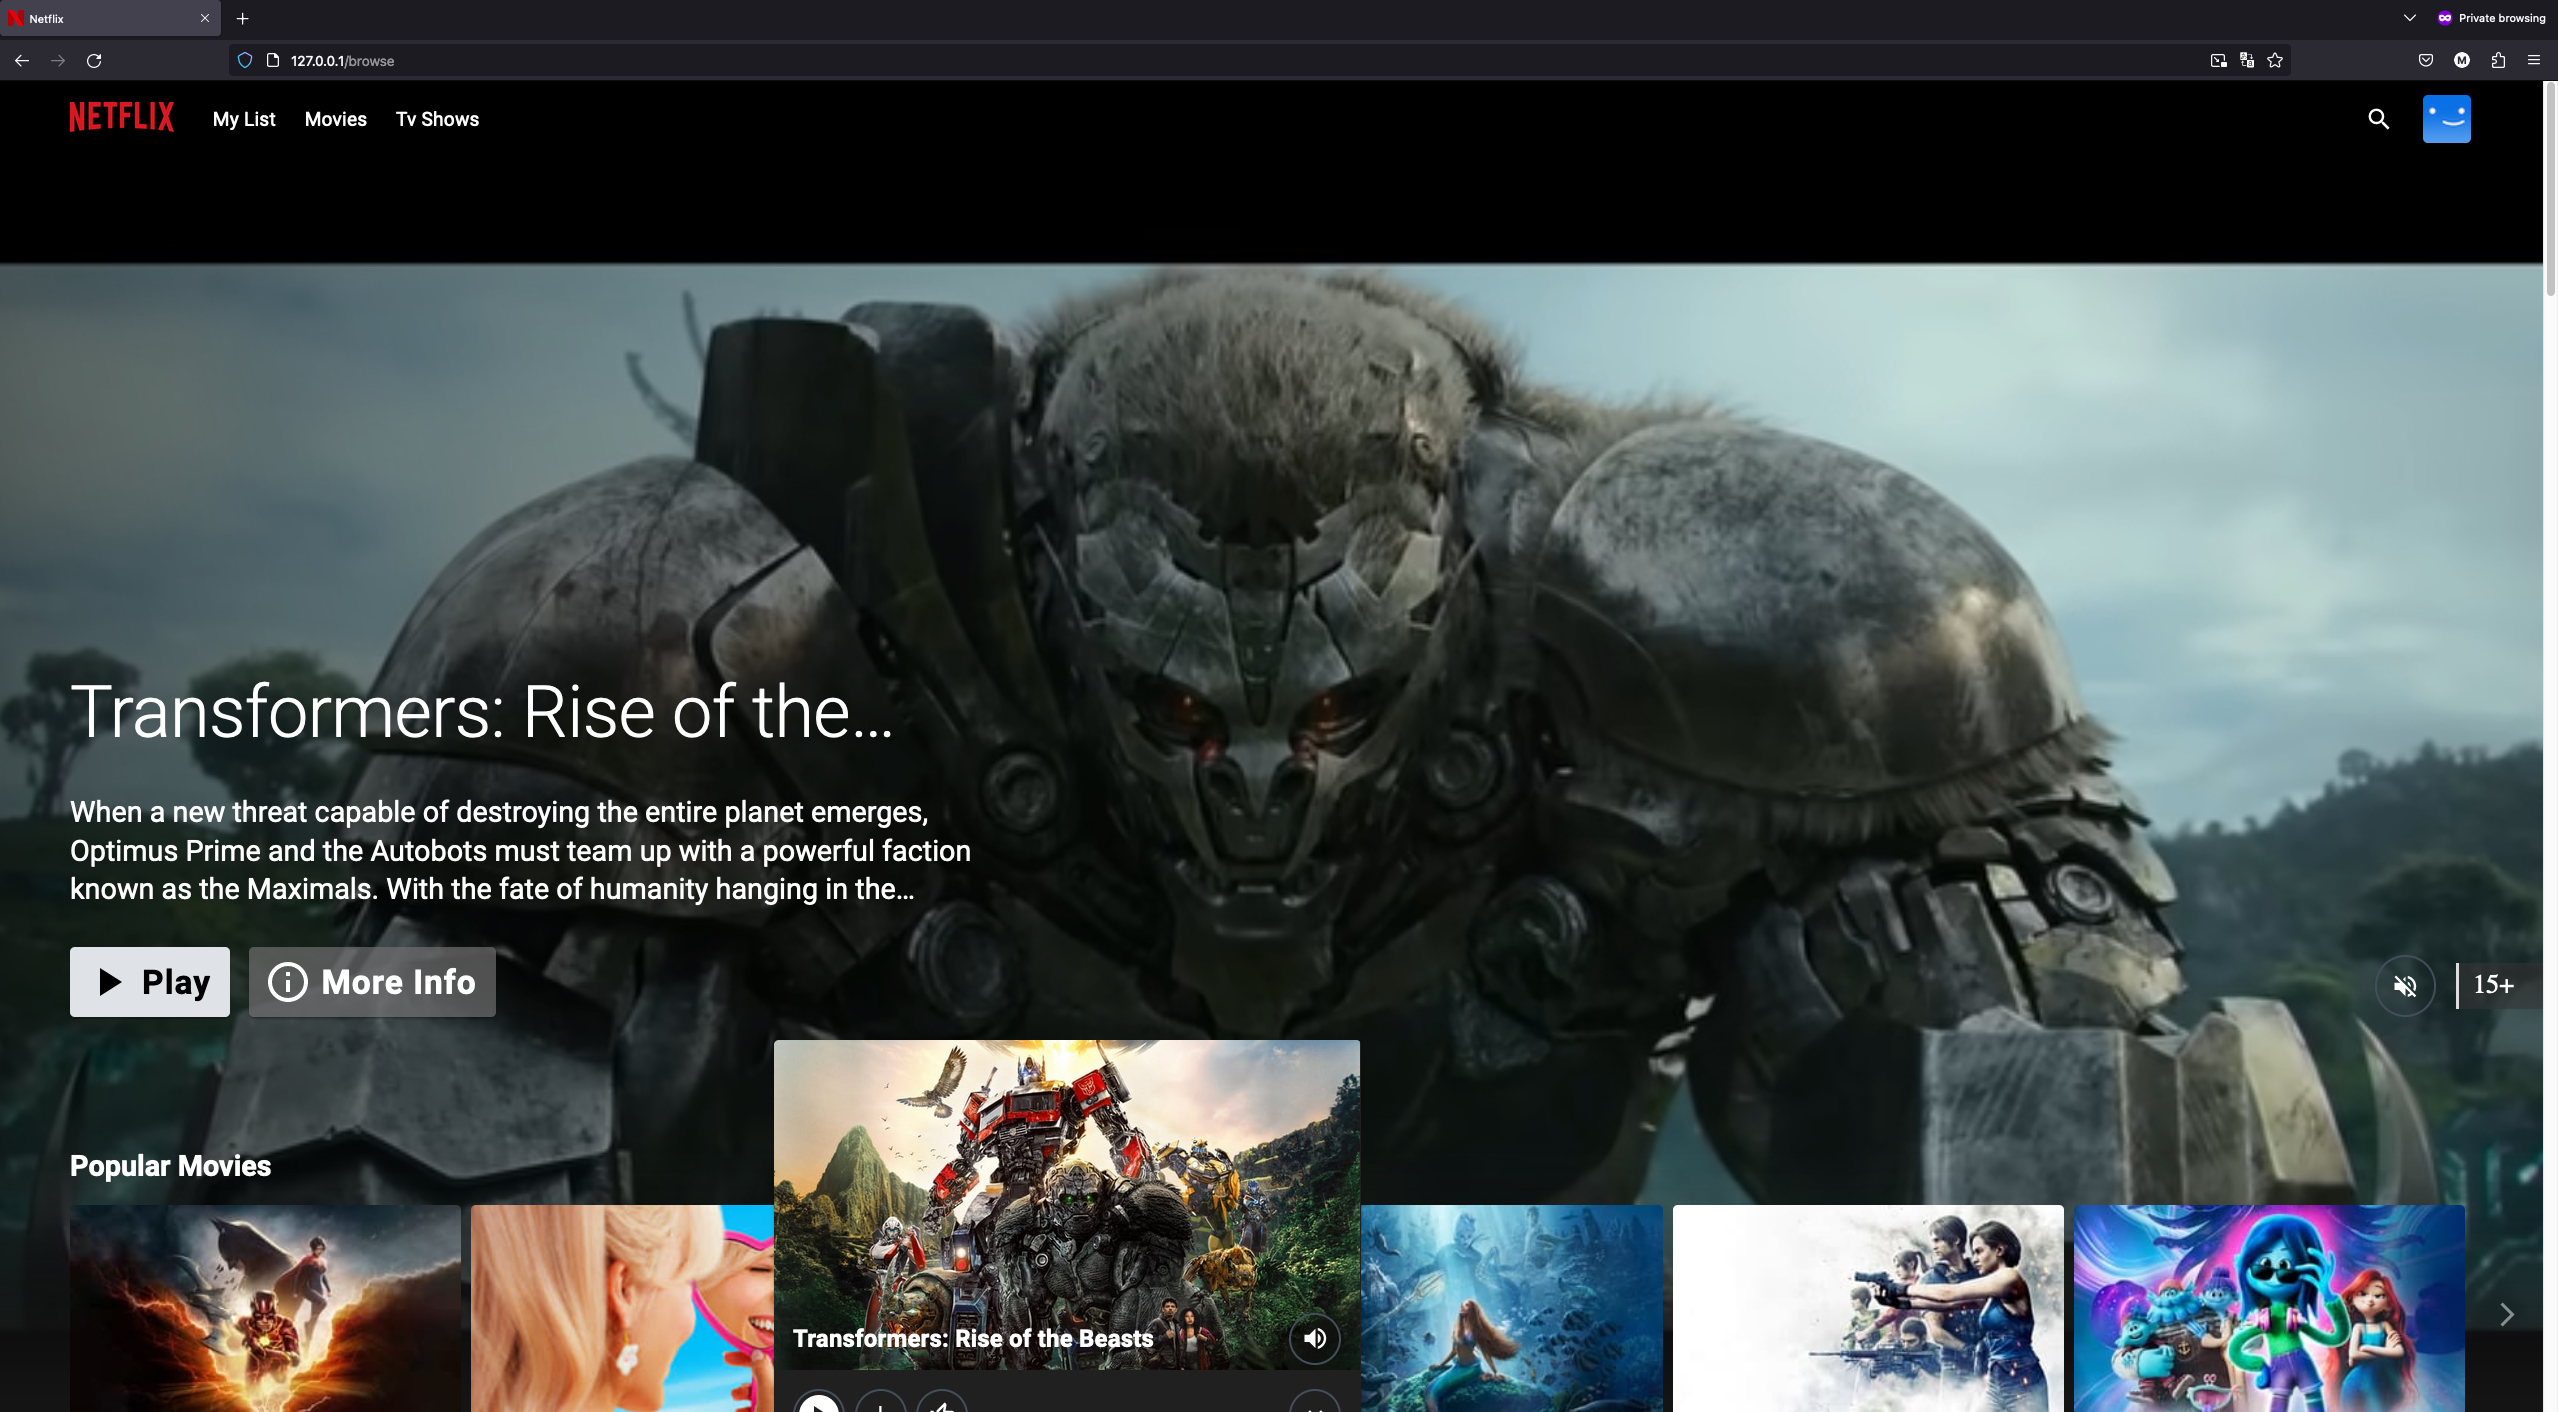
Congratulations on completing Day 84 of the #90DaysOfDevOps Challenge! Today, we successfully deployed a Netflix clone web application on a Kubernetes cluster, utilizing the power of container orchestration to simplify our deployment process. Kubernetes' high availability, scalability, and automatic failover ensure that our application is robust and resilient. Tomorrow, we'll continue our #90DaysOfDevOps challenge with a new exciting project. Stay tuned!


