CI/CD pipeline on AWS - CodeDeploy - Part 3 🚀 ☁
Cloud Engineer and DevOps enthusiast, just talking about AWS, Docker, Linux, Kubernetes, Python, and automation.
Welcome to Part 3 of my series on building a comprehensive CI/CD pipeline in AWS. In this article, I'll dive into the powerful world of AWS CodeDeploy and explore how it can revolutionize your CI/CD pipeline on AWS. Let's get started!
What is CodeDeploy?
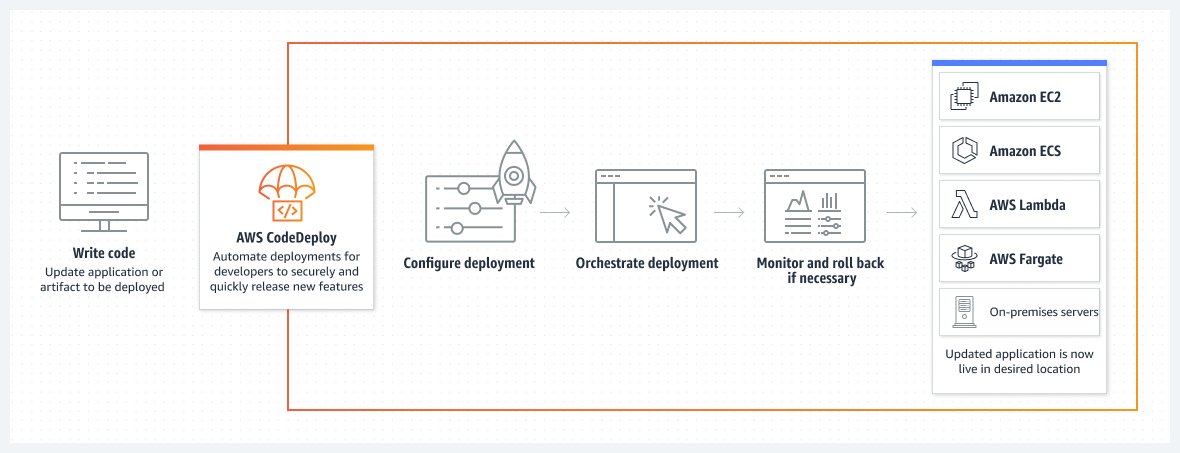
AWS CodeDeploy is a fully managed deployment service provided by Amazon Web Services (AWS). It automates the process of deploying applications to a variety of compute services, including Amazon EC2 instances, AWS Fargate, and on-premises servers. CodeDeploy simplifies the release process, ensuring fast, reliable, and consistent deployments.
CodeDeploy enables you to define deployment configurations and deploy your applications using different deployment strategies, such as rolling updates, blue/green deployments, and in-place deployments. It integrates seamlessly with other AWS services, making it an essential component of your CI/CD pipeline.
With CodeDeploy, you can easily manage deployments for applications written in various programming languages and frameworks. It provides flexibility in defining pre- and post-deployment hooks, which allows you to perform custom actions, such as running scripts or executing tests, before or after each deployment.
Additionally, when using AWS CodeDeploy, you can include an appspec.yaml file. This file defines the deployment instructions and lifecycle events for your application. Here's an example of an appspec.yaml file:
Certainly! Here's a generic example of an appspec.yaml file:
version: 0.0
os: linux

files:
  - source: /
    destination: /path/to/destination

permissions:
  - object: /path/to/destination
    pattern: "**"
    owner: <owner>
    group: <group>
    mode: <permissions>

hooks:
  BeforeInstall:
    - location: scripts/before_install.sh
      timeout: <timeout>
      runas: <user>

  AfterInstall:
    - location: scripts/after_install.sh
      timeout: <timeout>
      runas: <user>

  ApplicationStart:
    - location: scripts/application_start.sh
      timeout: <timeout>
      runas: <user>

  PreTraffic:
    - location: scripts/pre_traffic.sh
      timeout: <timeout>
      runas: <user>

  PostTraffic:
    - location: scripts/post_traffic.sh
      timeout: <timeout>
      runas: <user>
In this generic example, you need to replace the placeholders enclosed in "<>" with the appropriate values for your application. Here's an explanation of the different sections:
versionspecifies the version of theappspec.yamlfile.osspecifies the operating system for which the deployment is intended.filesdefine the files to be deployed, with the source and destination paths.permissionssets the permissions for the destination directory.hooksdefine the different lifecycle event hooks and their associated scripts. You can include additional hooks as needed, such asPreTrafficandPostTrafficfor blue/green deployments.
Remember to customize the file paths, permissions, scripts, and timeouts, and runas values based on your specific application and deployment requirements.
By combining AWS CodeDeploy and the appspec.yaml file, you can automate the deployment process, ensuring consistent and reliable deployments for your applications. This simplifies your release management and enhances the efficiency of your CI/CD pipeline.
Task 1: Configuring CodeDeploy
To deploy the index.html file on an EC2 machine using CodeDeploy, follow these steps:
Set up an EC2 instance: Launch an EC2 instance with your desired operating system and configuration. Make sure the instance has the necessary security groups and permissions to communicate with CodeDeploy.

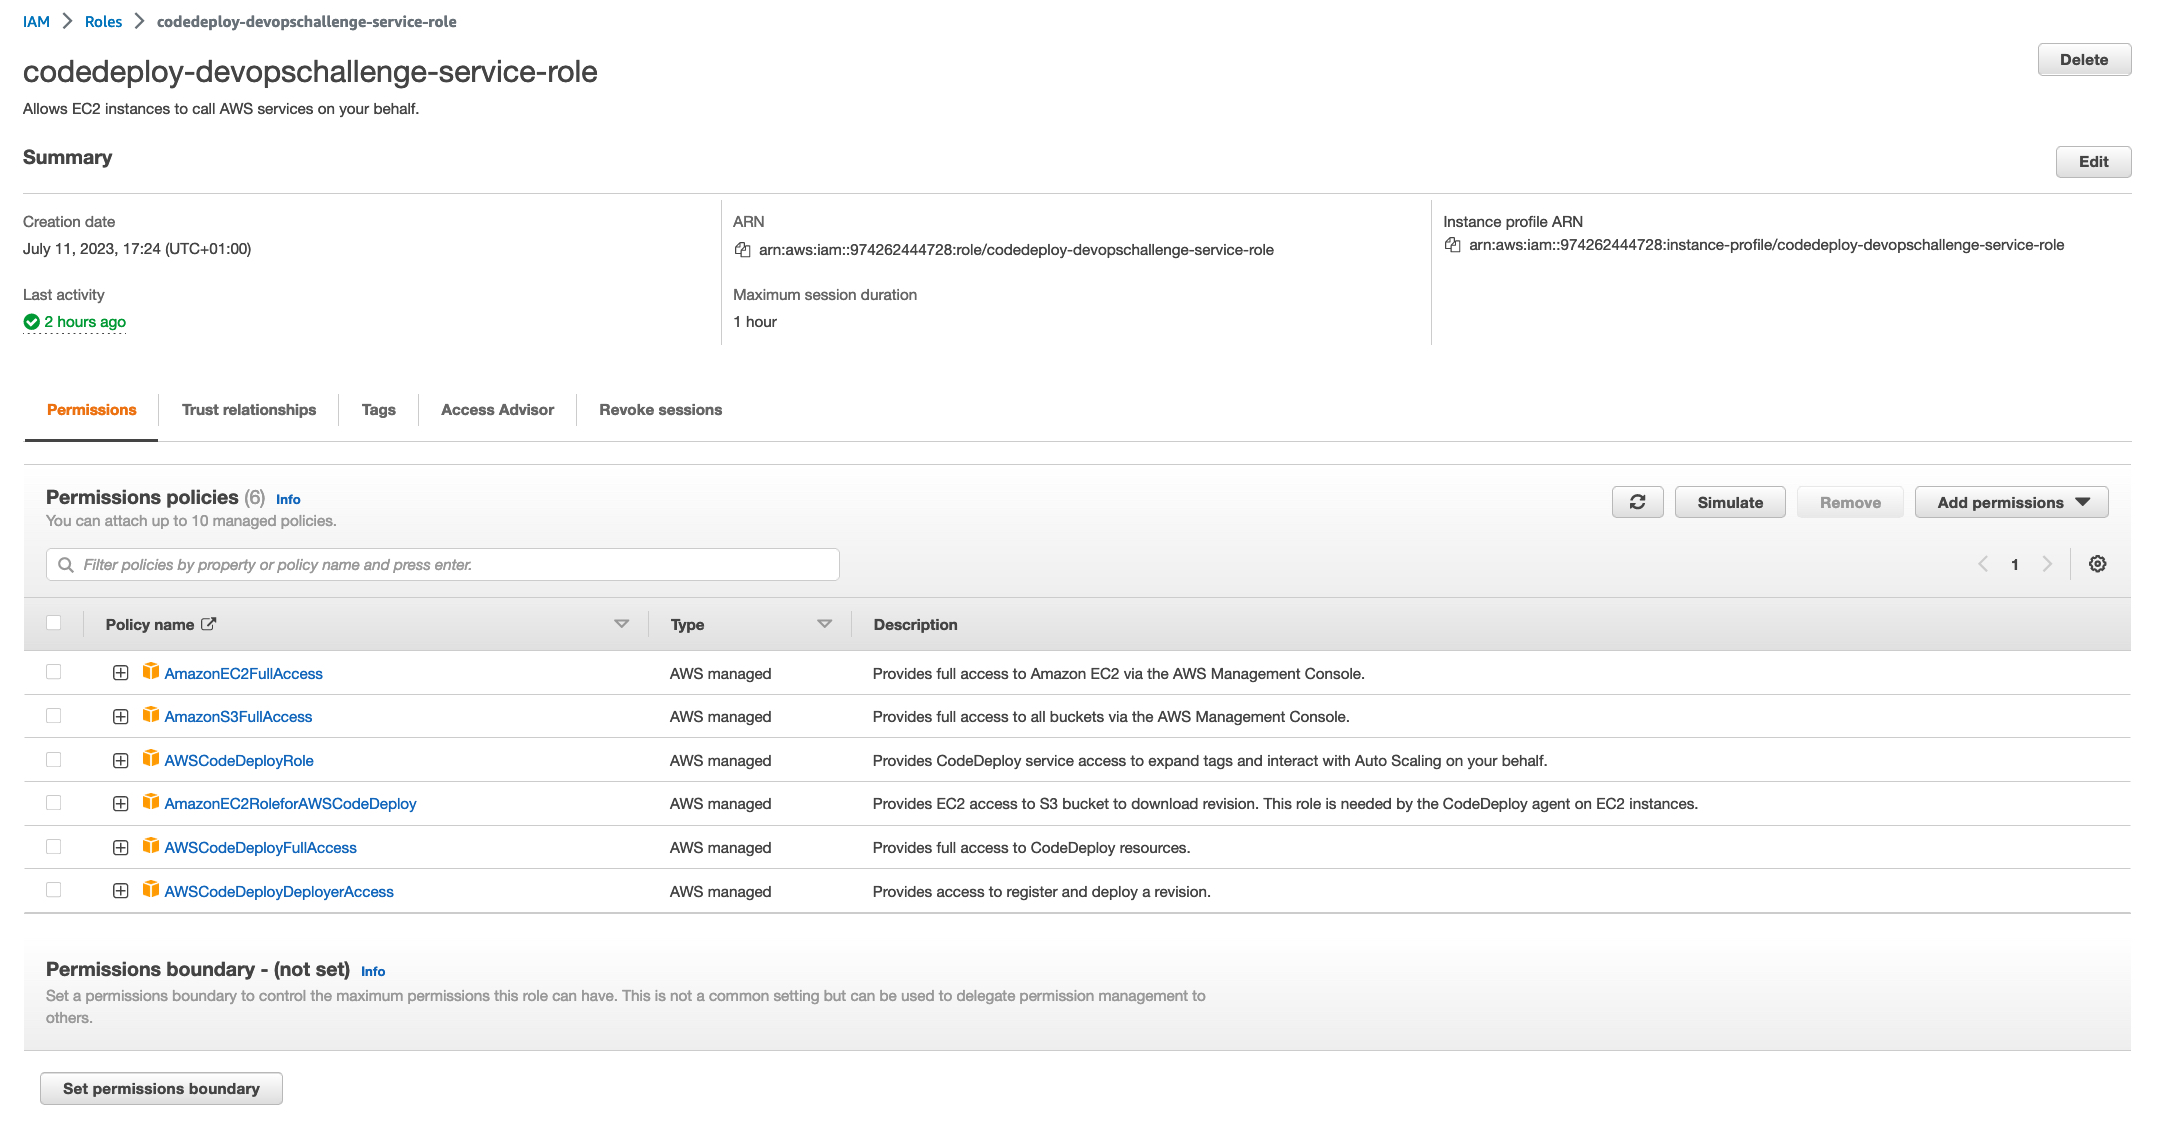
Create an IAM role: Create an IAM role that grants the necessary permissions for CodeDeploy to access your EC2 instances and perform deployments. Attach the role to the EC2 instance.
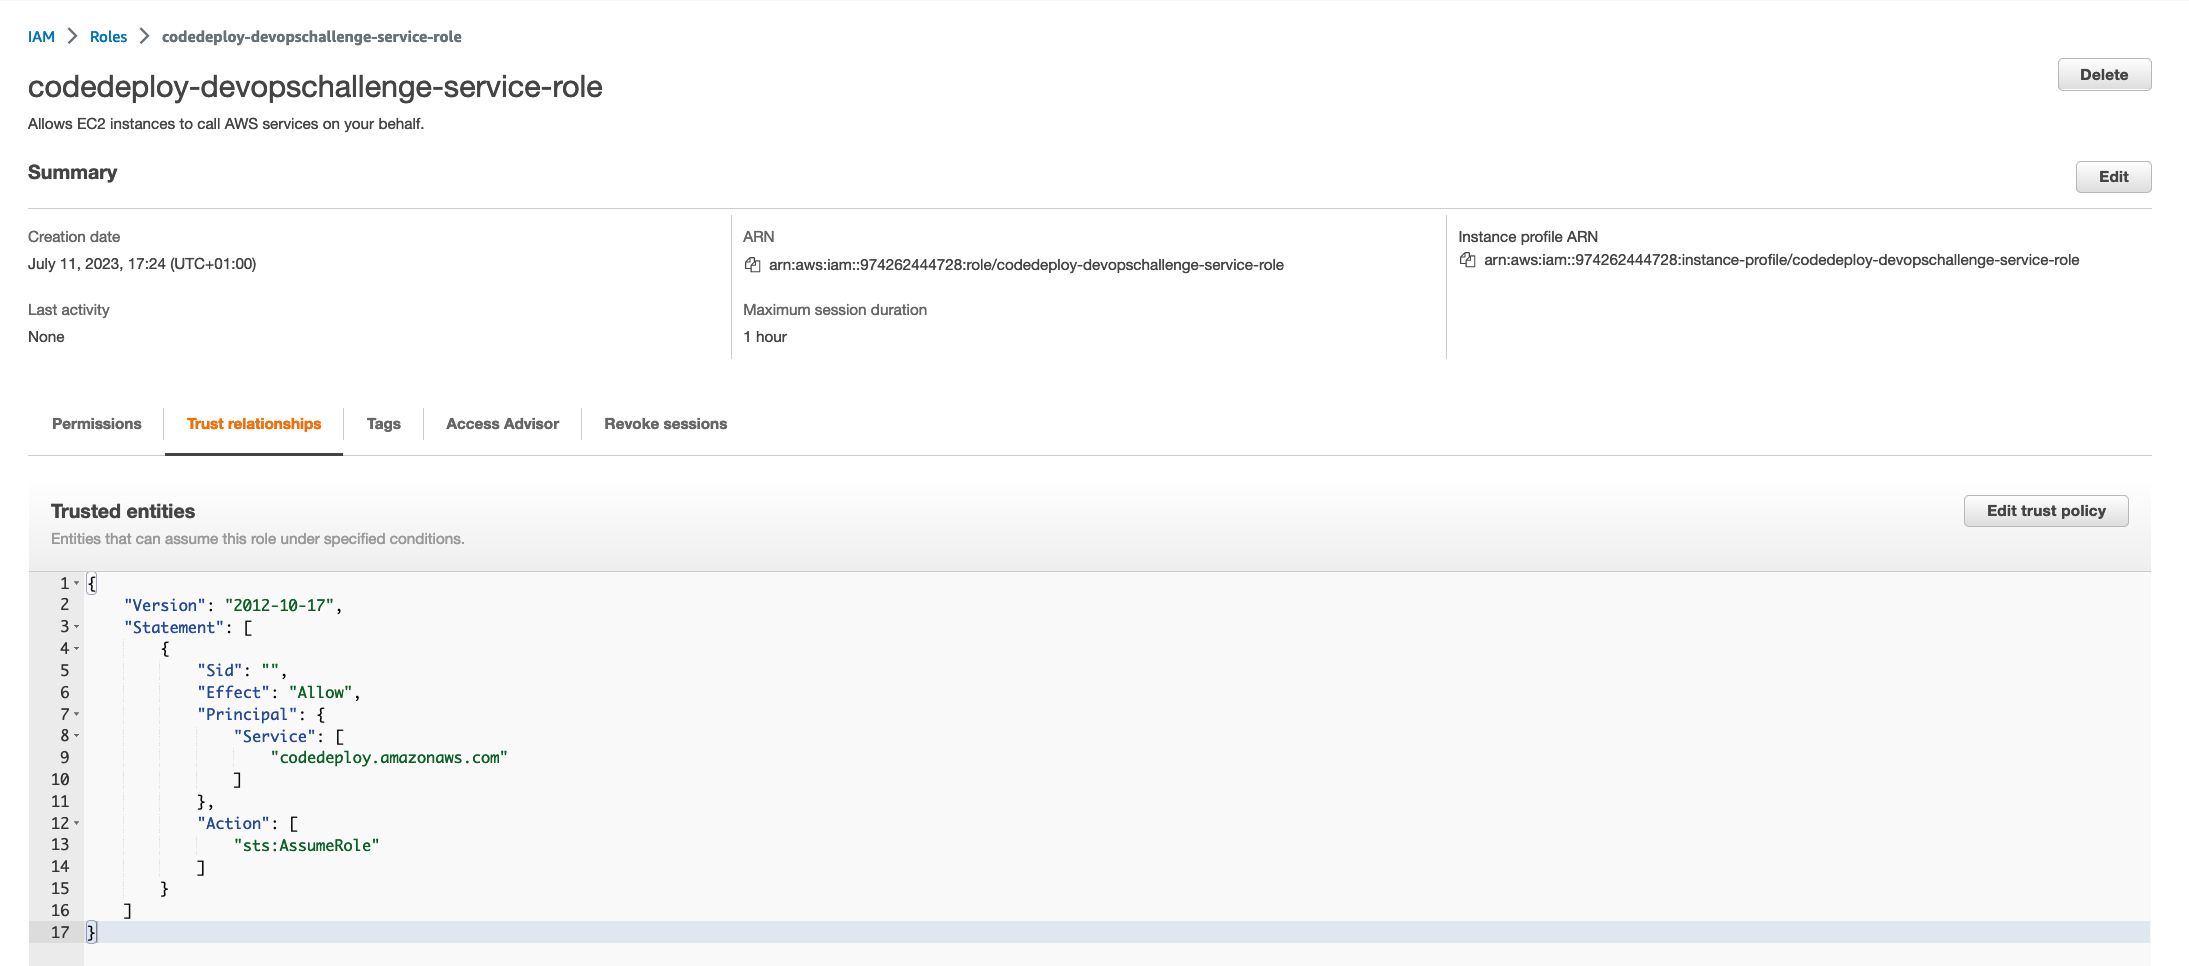
Ensure CodeDeploy can assume the role:
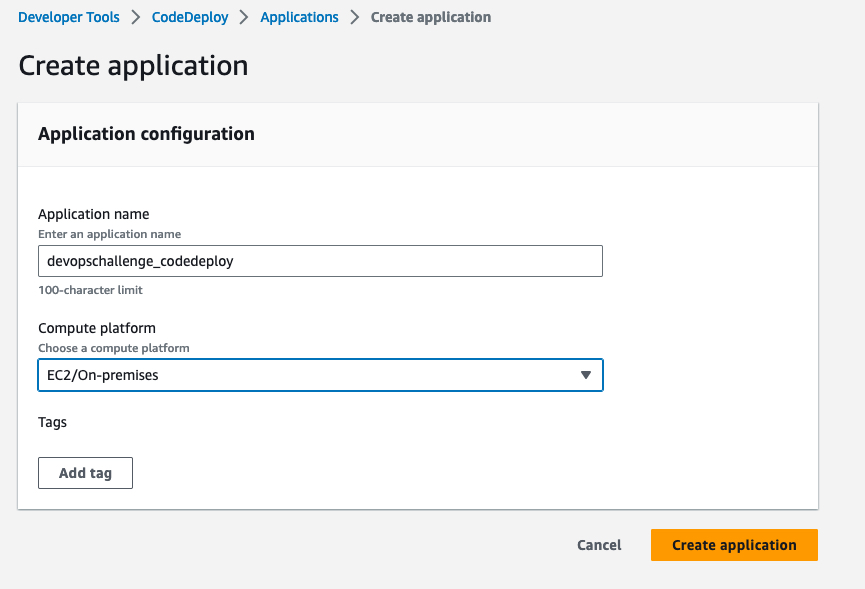
Create an application in CodeDeploy: Go to the CodeDeploy console and create an application.

Specify the deployment platform as EC2/On-premises and configure the deployment settings according to your requirements.
Create a deployment group: Within the application, create a deployment group that defines the set of EC2 instances where you want to deploy your application. Specify the deployment configuration and deployment type.

Provide the
deployment group nameandservice roleto use:
Add the EC2 instance details in the
Environment configurationsection. Selectnever install AWS CodeDeploy Agentin theAgent configuration with AWS Systems Manageras we'll install it manually. Untick the Load Balancer box to not use ALB and hit theCreate deployment groupbutton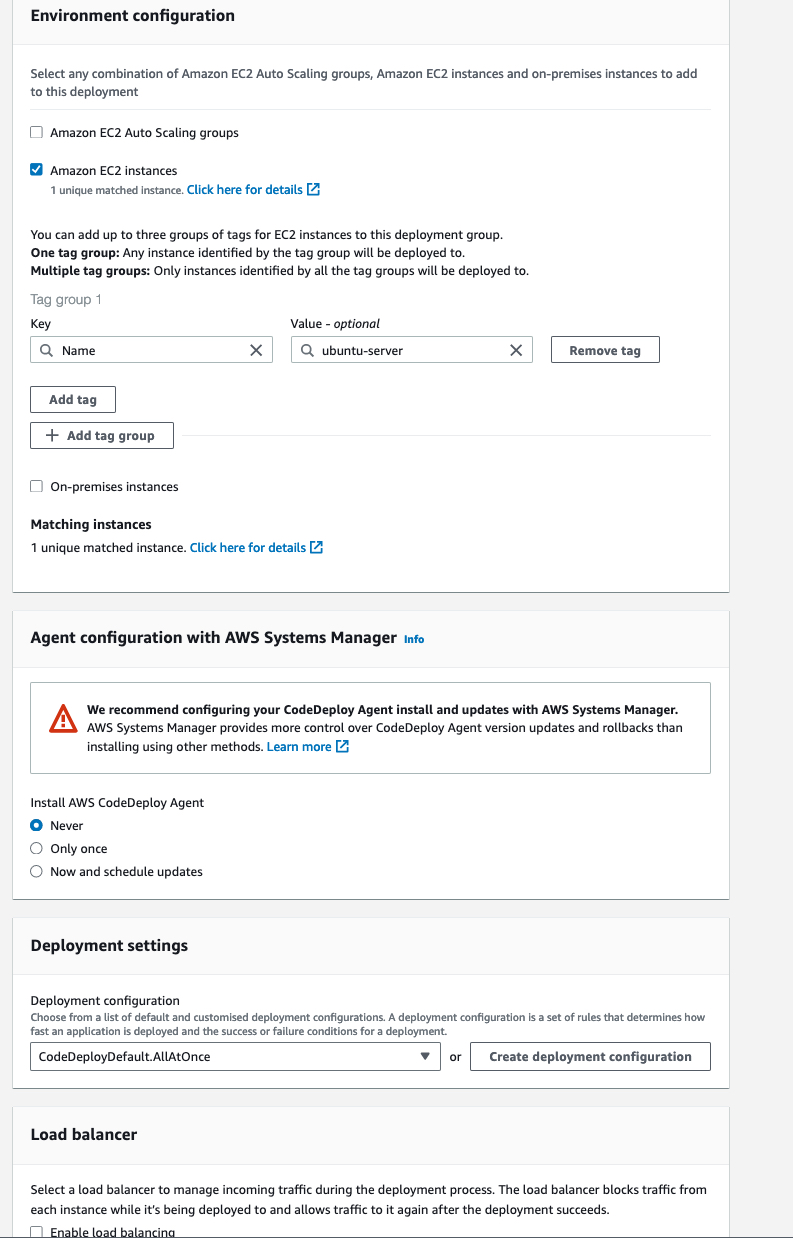
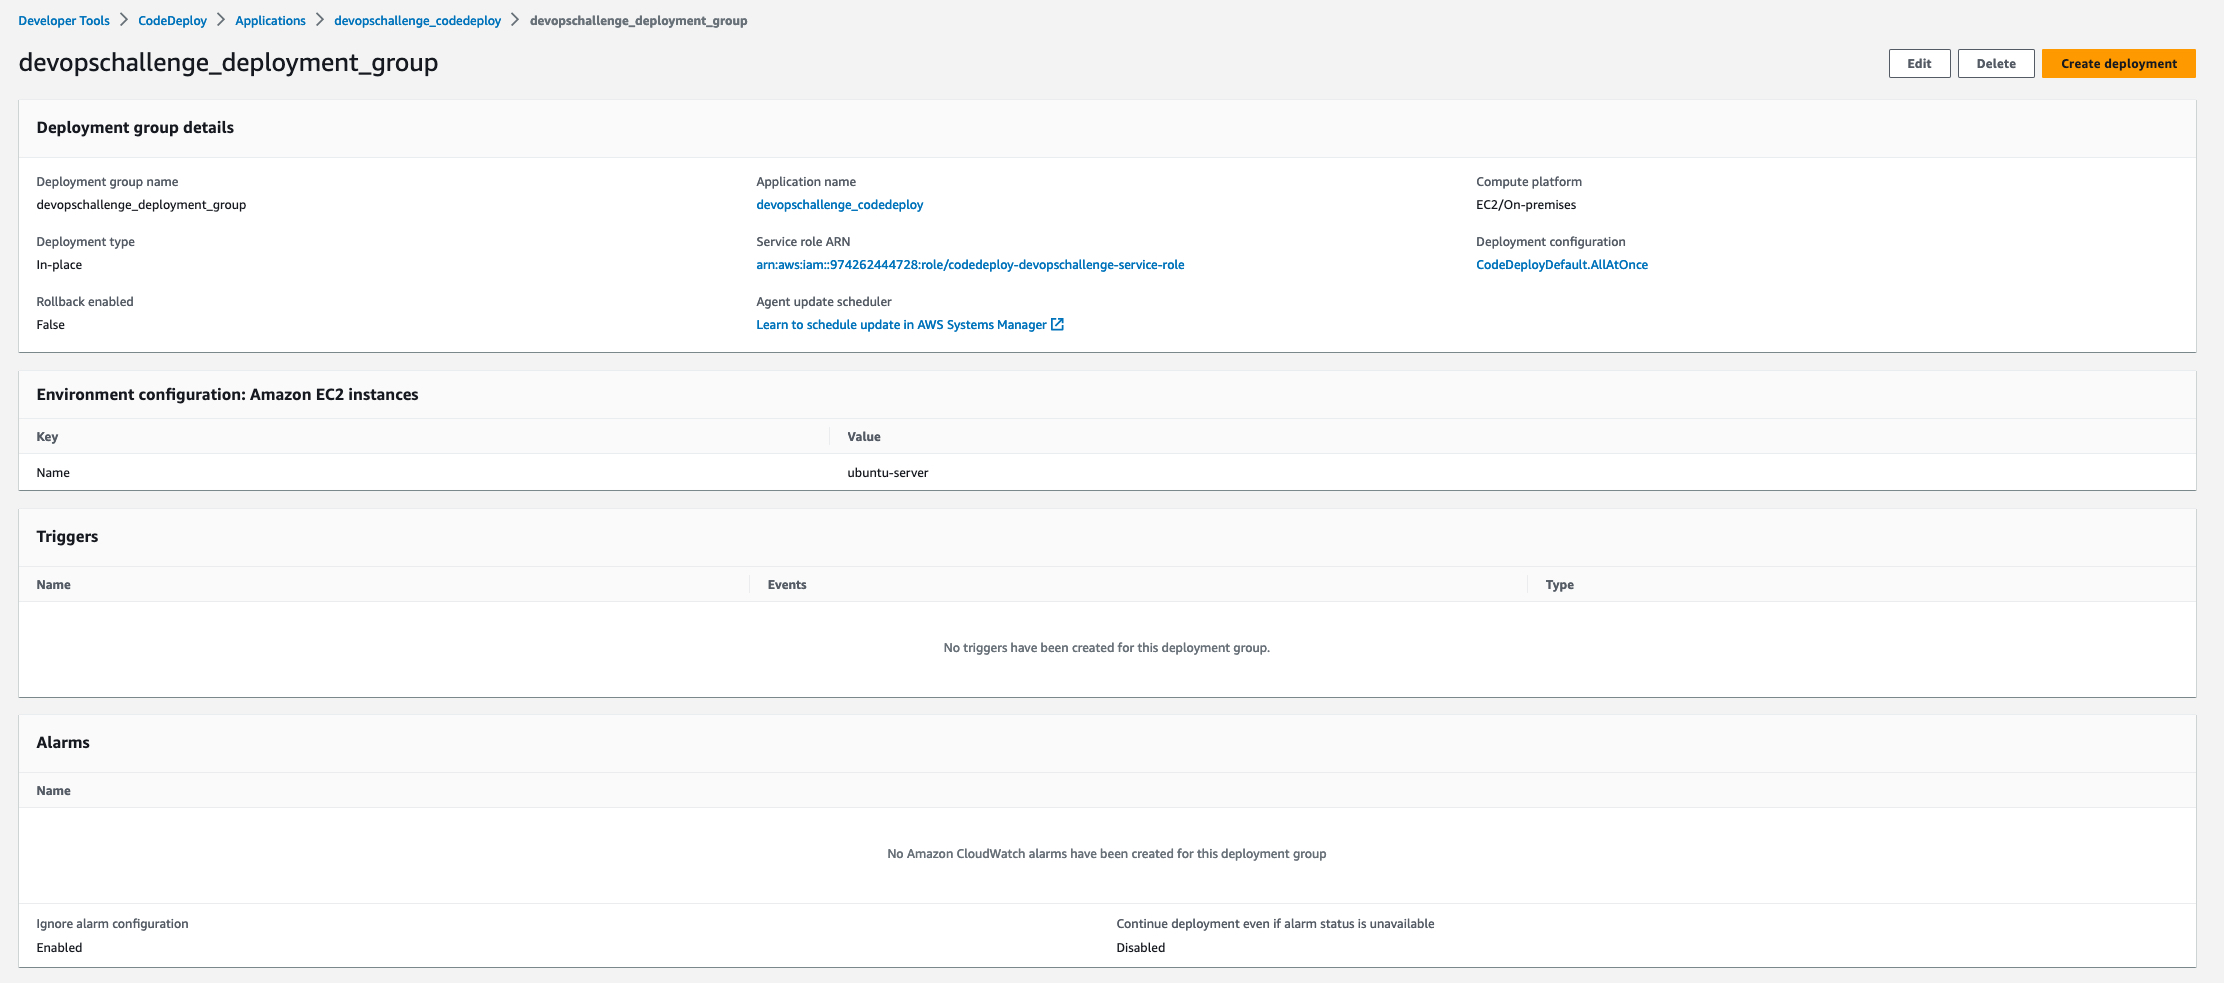
Verify the deployment group details:
Install and configure the CodeDeploy agent: Connect to the EC2 instance and install the CodeDeploy agent. The agent enables communication between the instance and the CodeDeploy service. Configure the agent to automatically start on boot. Follow the AWS Official Documentation for step-by-step instructions.

Task 2: Adding appspec.yaml to CodeCommit Repository and Completing the Deployment Process
To complete the deployment process in CodeDeploy, follow these steps:
Create an
appspec.yamlfile: In your CodeCommit repository, create anappspec.yamlfile if you haven't already. This file defines the deployment instructions and lifecycle events for your application.
Define deployment lifecycle events, specify the source files, and define hooks and scripts: Within the
appspec.yamlfile, define the deployment lifecycle events, such asBeforeInstall,AfterInstall,ApplicationStart, andValidateService. These events specify the actions to be performed at each stage of the deployment process. In theappspec.yamlfile, specify the source files to be deployed. You can include the index.html file and any other necessary files or directories. Define hooks and scripts that should be executed during the deployment process. For example, you can run scripts to install dependencies, configure the environment, or start the application.version: 0.0 os: linux files: - source: / destination: /var/www/html hooks: BeforeInstall: - location: scripts/install_dependencies.sh timeout: 300 runas: root ApplicationStart: - location: scripts/start_server.sh timeout: 300 runas: root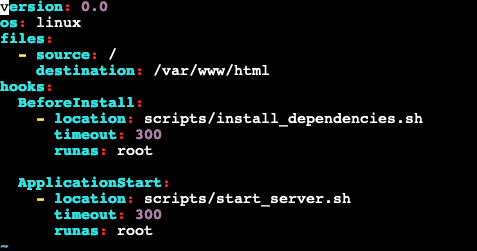
I've also created the below scripts to use with the
appspec.yamlfile:
Commit and push changes: Commit the
appspec.yamlfile with your deployment instructions to the CodeCommit repository and push the changes.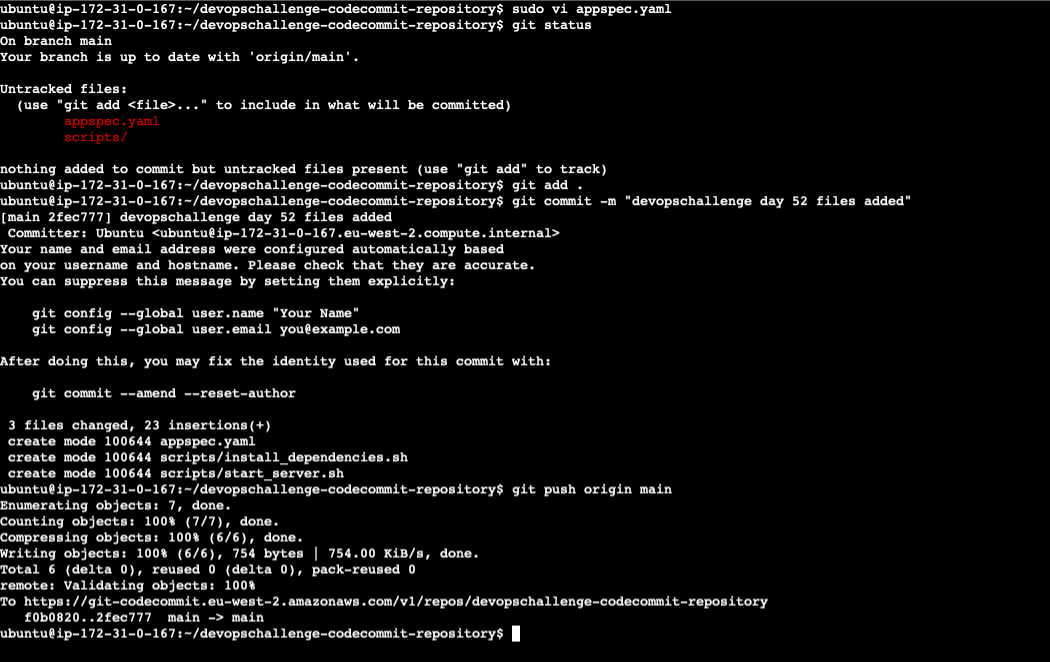
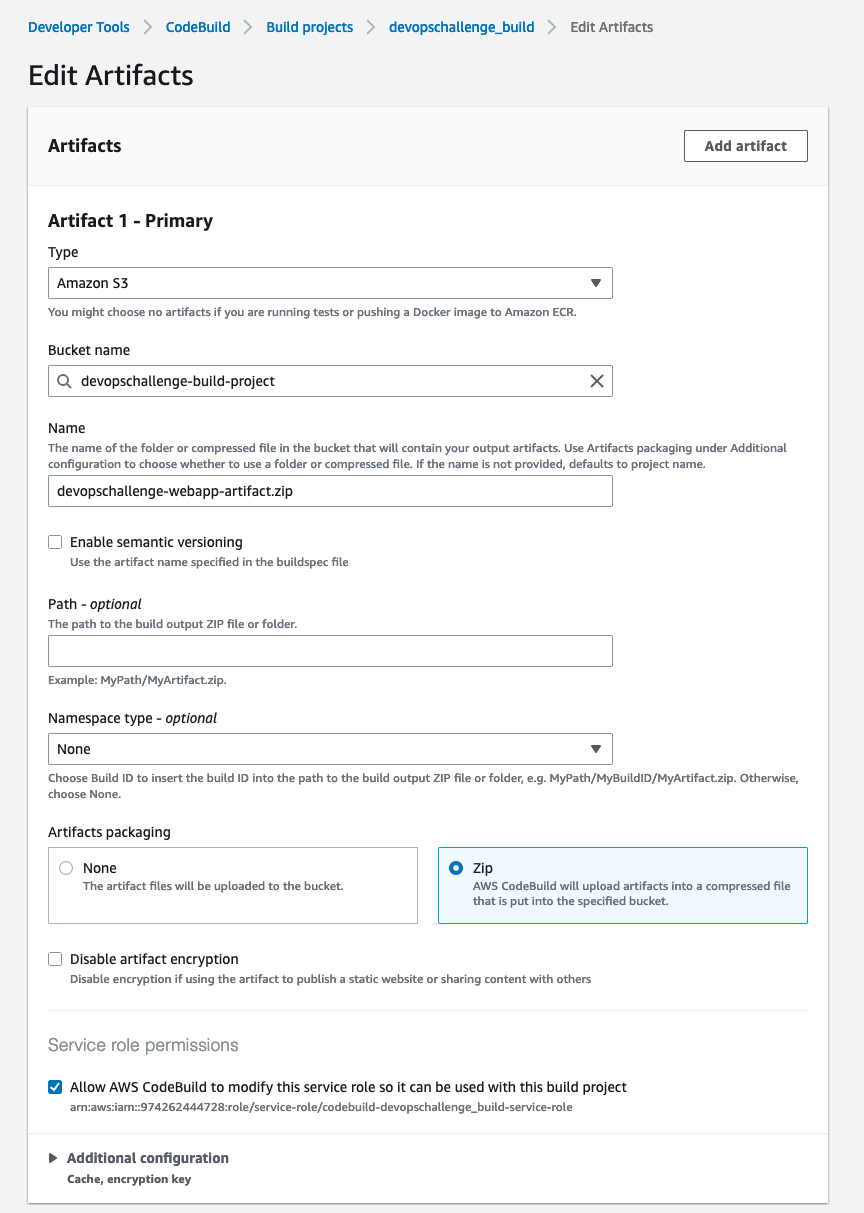
Build the project: We have to build the artifact again but first, we need to edit the Artifacts settings, so it will create the artifact in a zip file and store it in the S3 bucket we created on an earlier day.
Save and click on
Start build: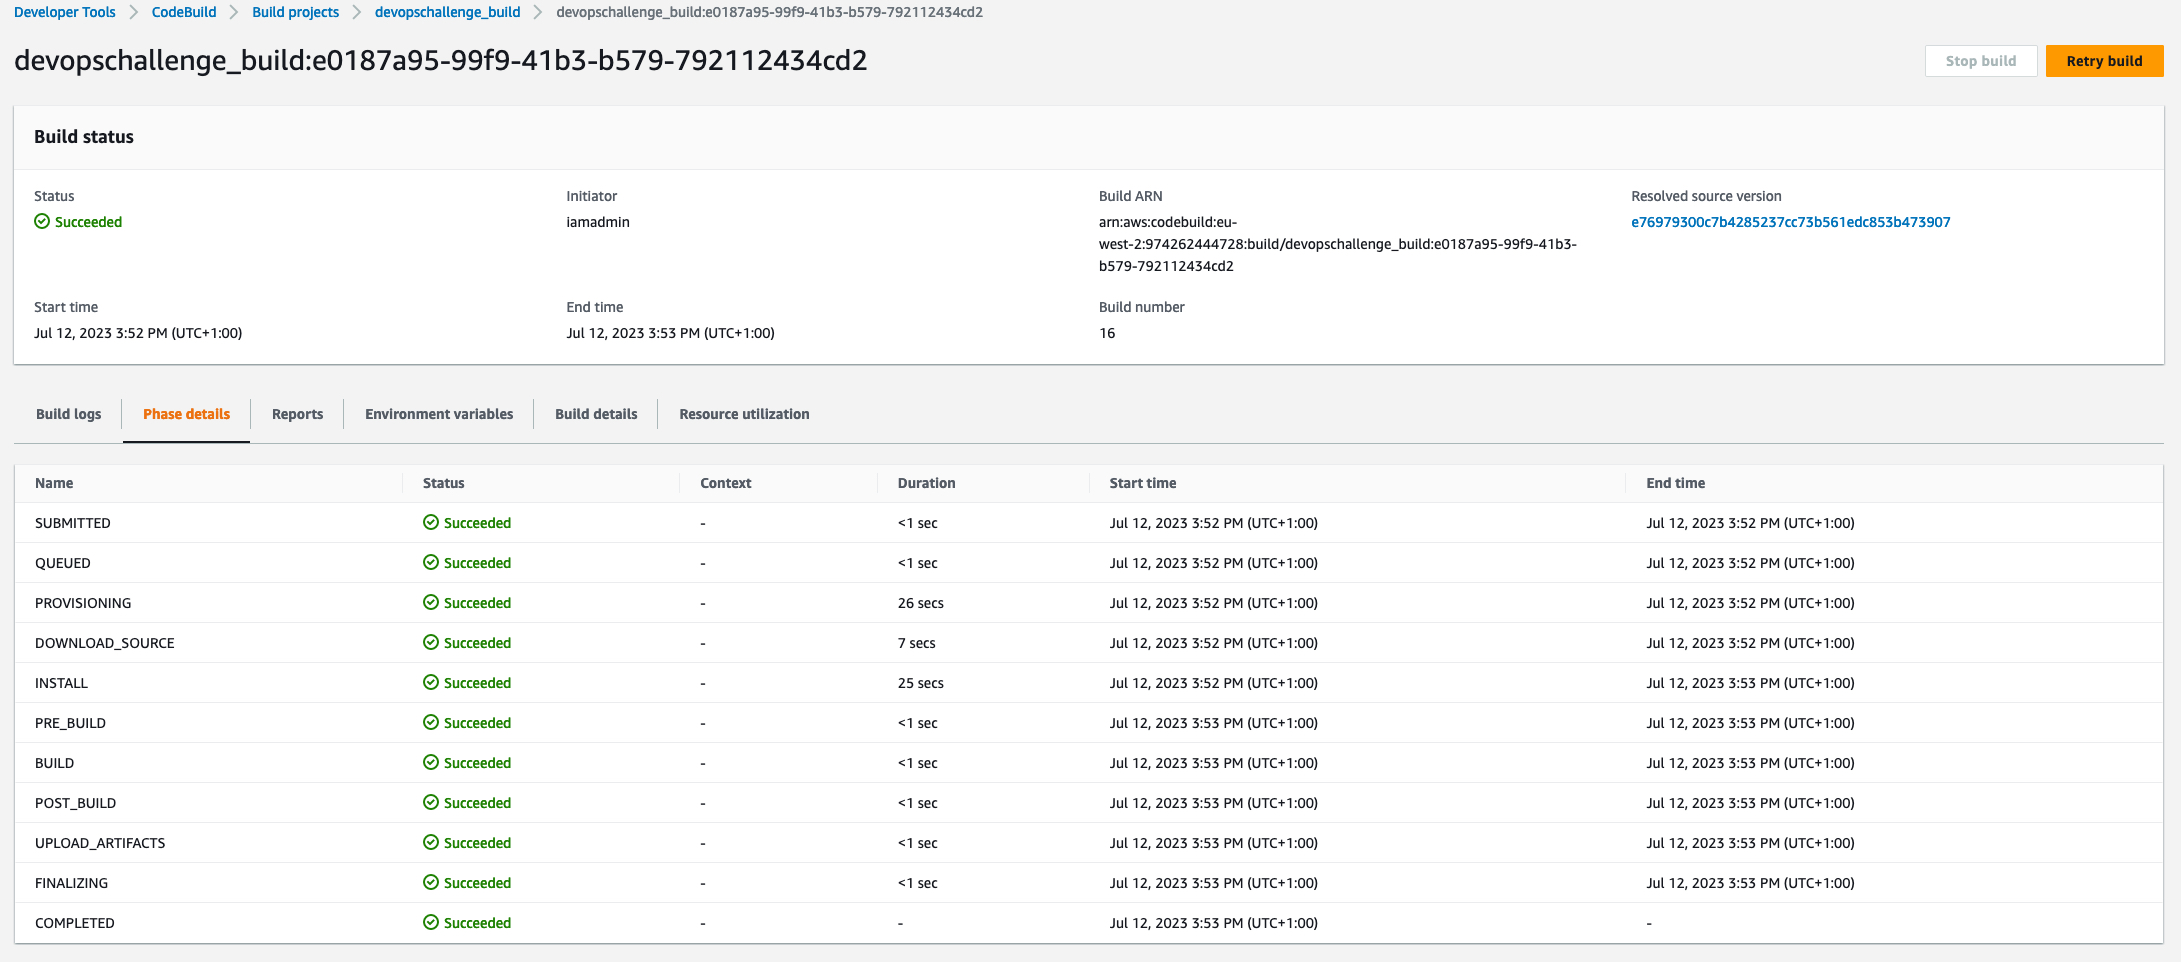
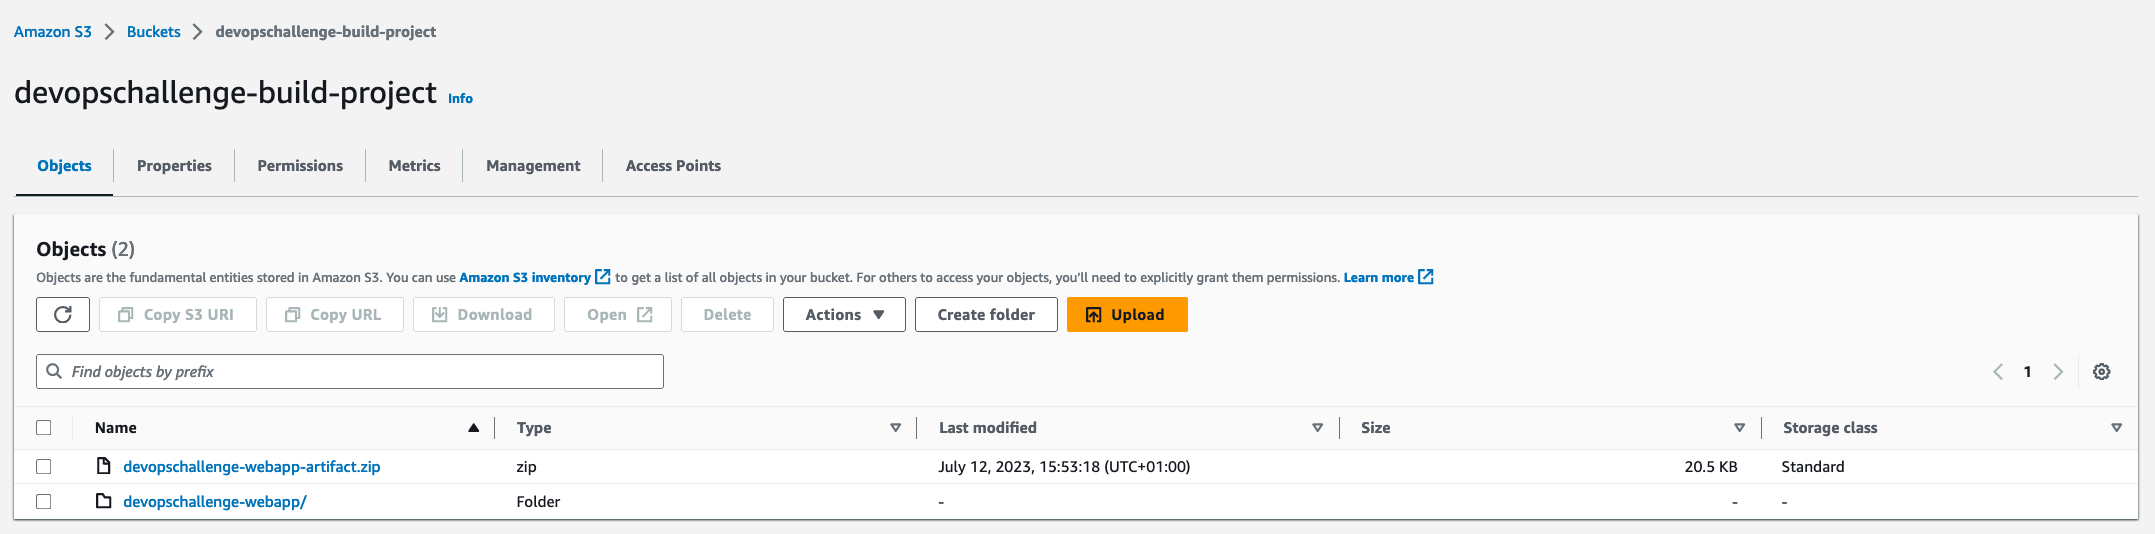
Verify the zip file has been created in the S3 bucket:
Create IAM role for EC2: We need a role to give access to EC2 instances to the relevant services, with the below permission policies:
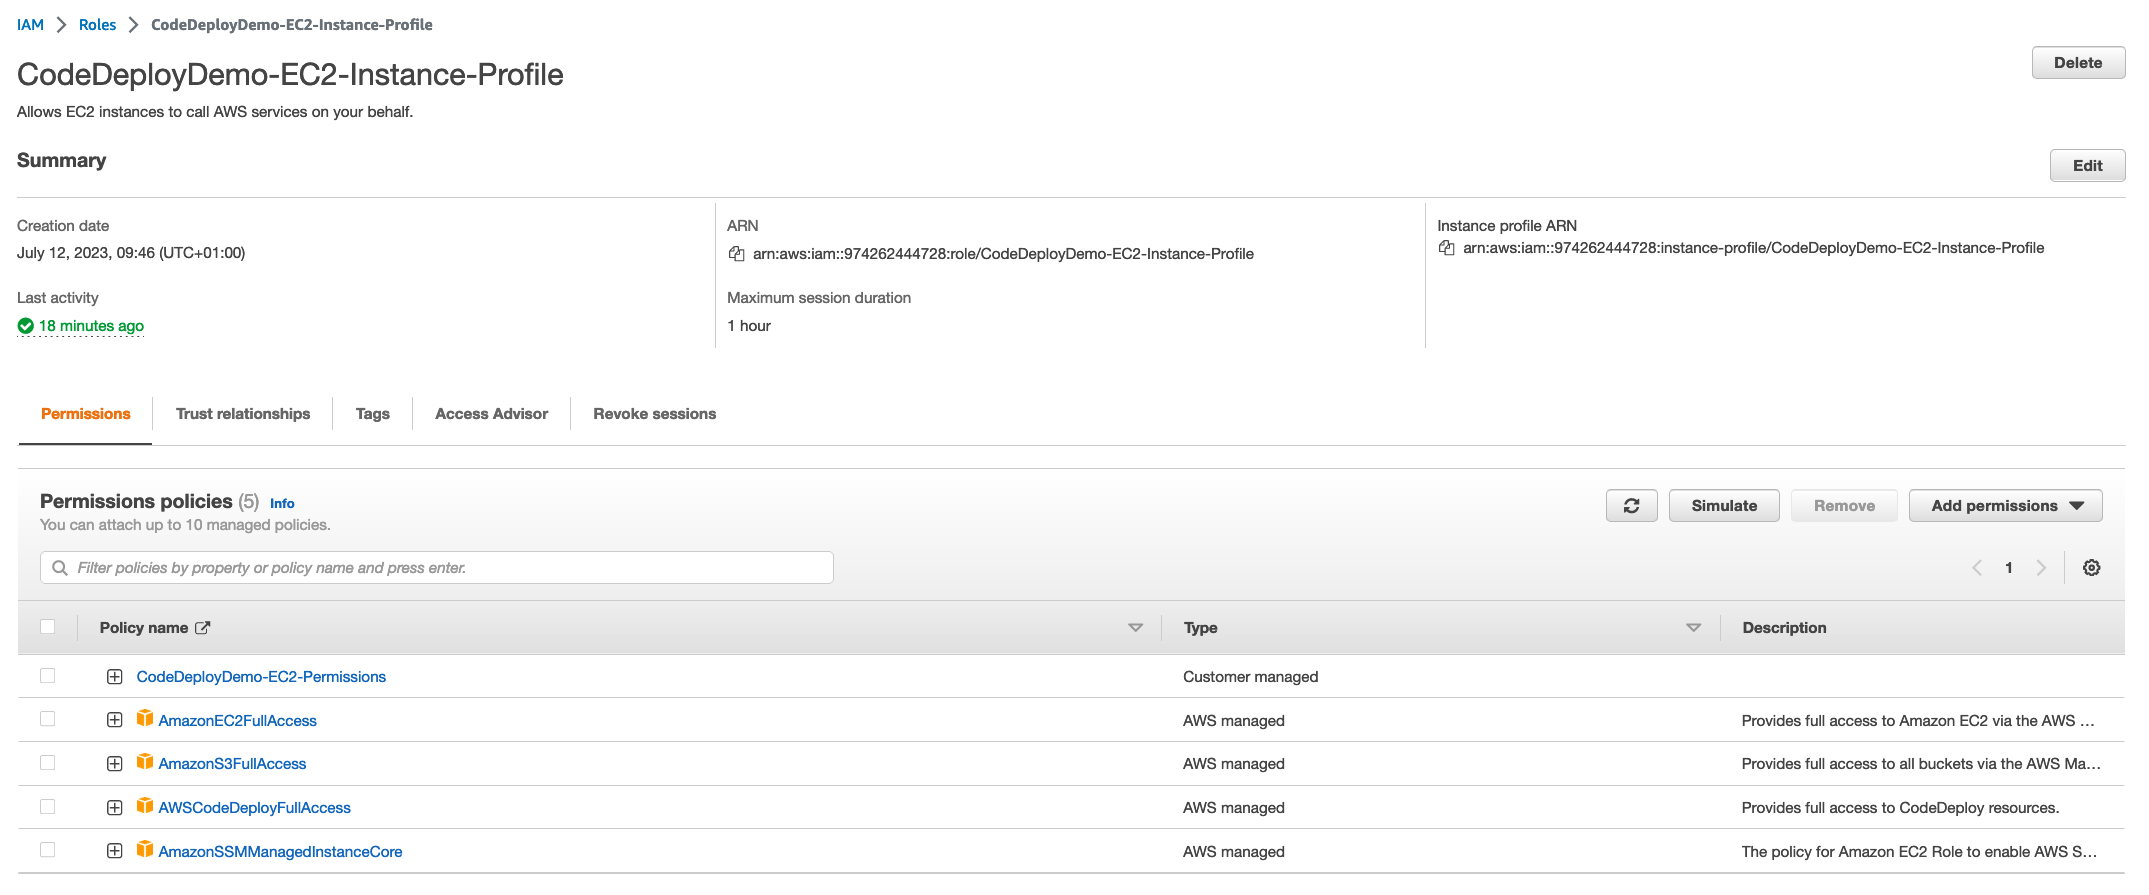
Once created, go to your EC2 instance and assign the IAM role:

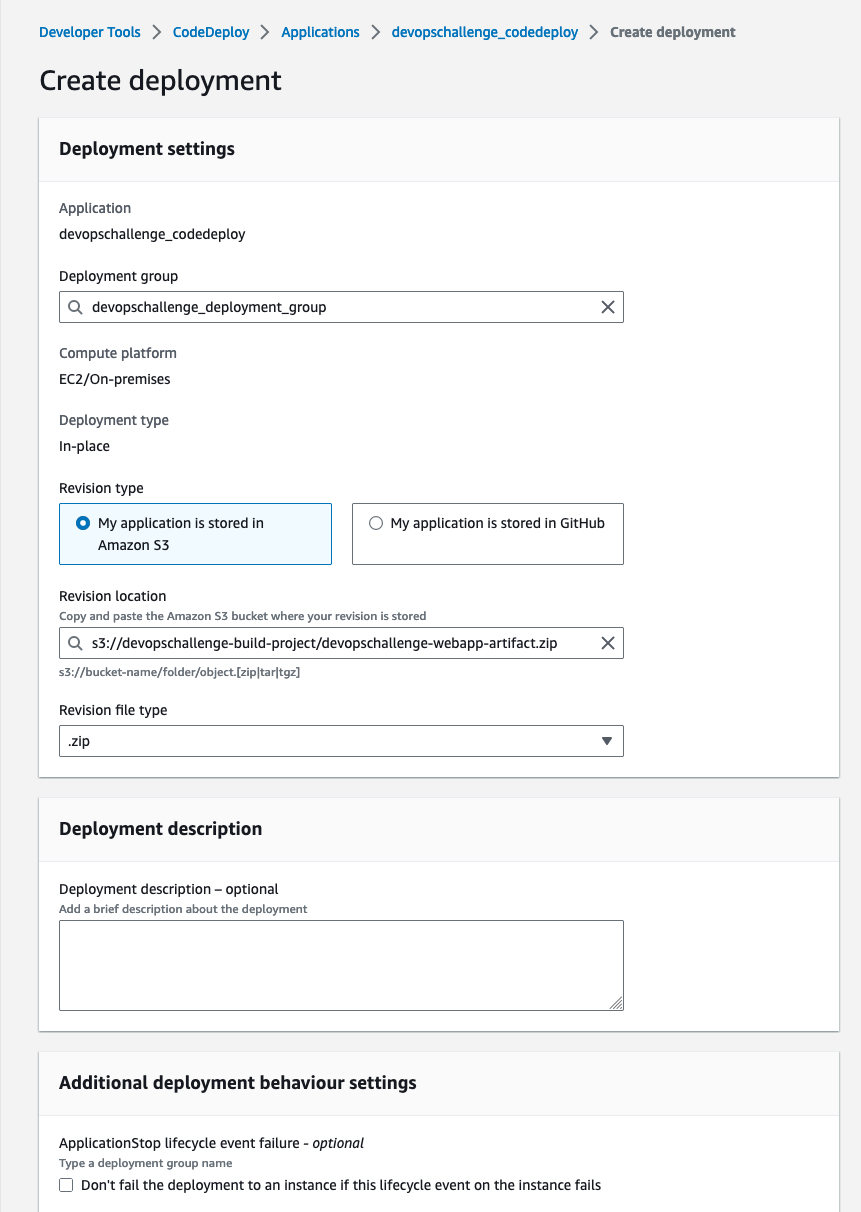
Start the deployment: Go to the CodeDeploy console, select your application, and start a new deployment. Choose the appropriate deployment group and the revision location from your CodeCommit repository.

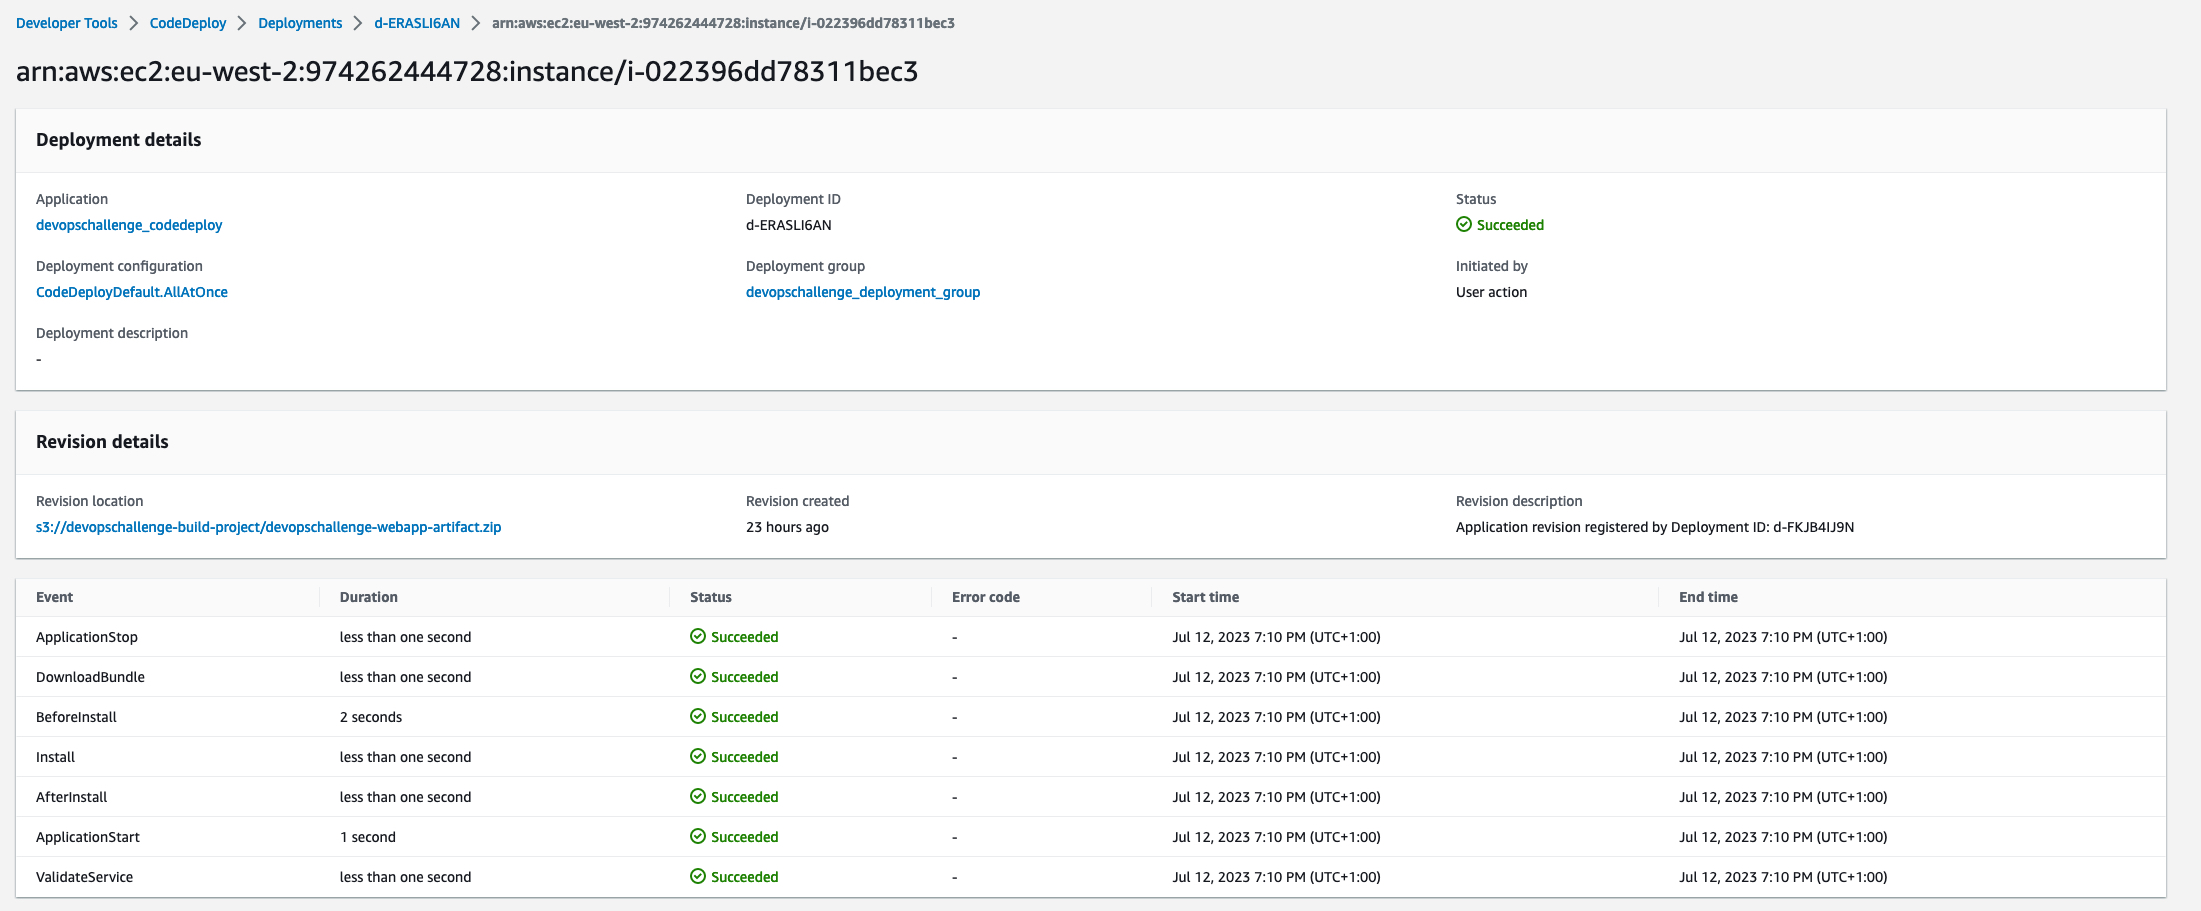
Monitor the deployment: Monitor the deployment progress in the CodeDeploy console. You can view the deployment logs, check the status of each deployment step, and troubleshoot any issues that arise.
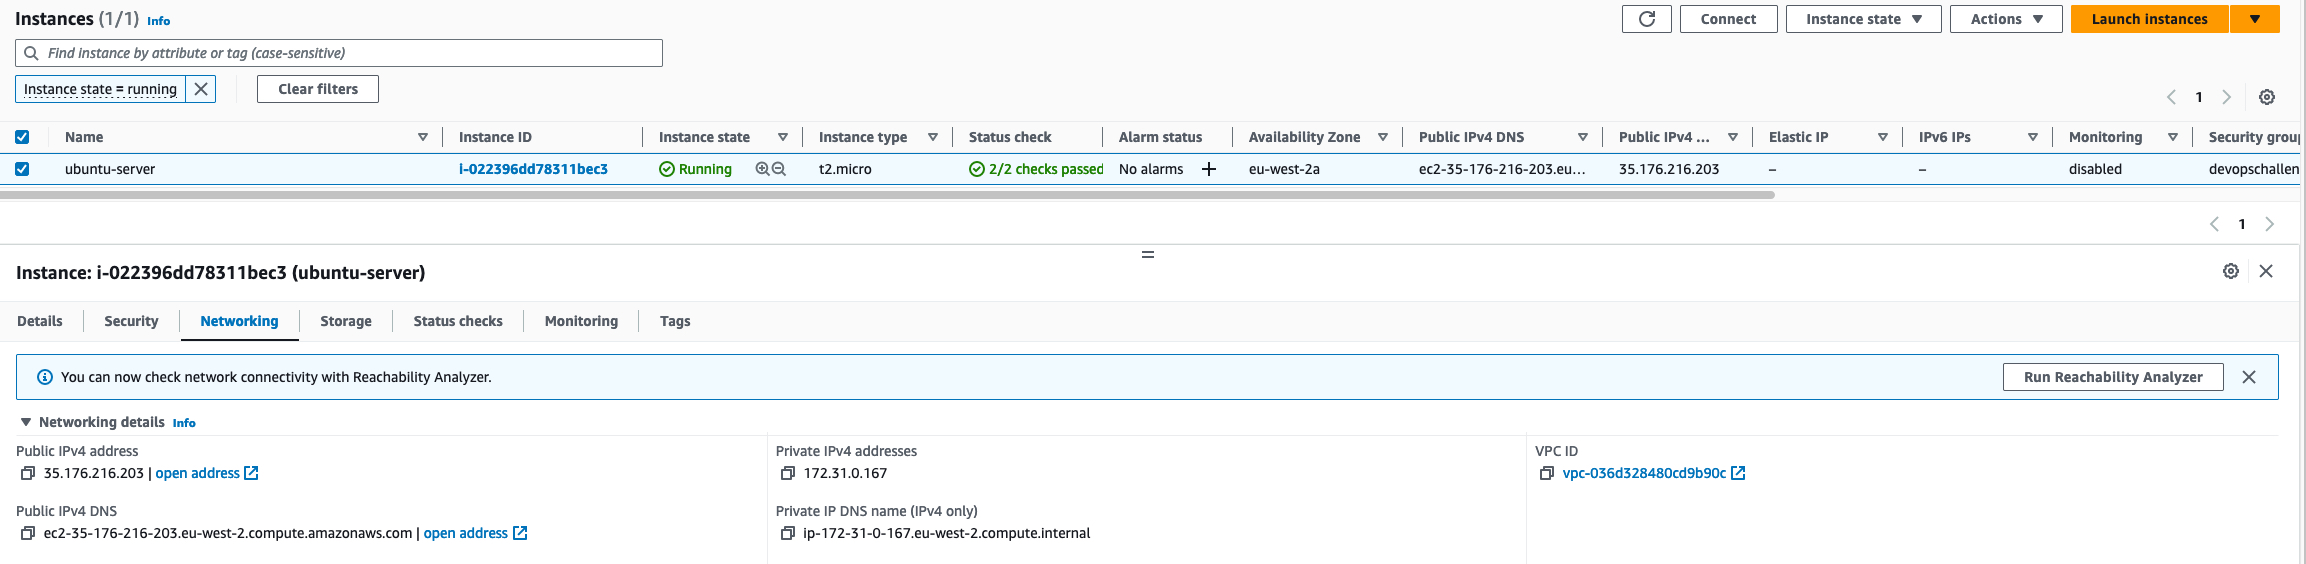
Test the deployment: Copy the EC2 instance public IP address and paste it into your preferred browser. Your HTML website will successfully load

By following these steps, you can successfully deploy your index.html file on an EC2 instance using AWS CodeDeploy. The appspec.yaml file provides the instructions and configuration needed to ensure a smooth deployment process.
We've learned how to deploy applications using AWS CodeDeploy and witnessed the power of automated deployments.
Check out the next steps in the article - CI/CD Pipeline on AWS - CodePipeline - Part 4 🚀 ☁