CI/CD pipeline on AWS - CodeBuild - Part 2 🚀 ☁
Cloud Engineer and DevOps enthusiast, just talking about AWS, Docker, Linux, Kubernetes, Python, and automation.
Welcome to Part 2 of my series on building a comprehensive CI/CD pipeline in AWS. In this article, we will dive deeper into building your CI/CD pipeline on AWS. Specifically, we will explore AWS CodeBuild, a fully managed continuous integration service offered by Amazon Web Services (AWS).

What is CodeBuild?
AWS CodeBuild is a fully managed build service provided by Amazon Web Services (AWS) that automates the process of building, testing, and packaging software applications. It offers a scalable and reliable infrastructure for compiling source code, running tests, and generating deployable artifacts. With seamless integration with other AWS services, CodeBuild allows you to create a complete CI/CD pipeline.
To use CodeBuild effectively, you define a build specification file called buildspec.yaml. This file outlines the build commands, tests, and artifacts to be generated. Here's an example of a buildspec.yaml file:
version: 0.2

phases:
  install:
    runtime-versions:
      java: corretto11
    commands:
      - echo "Installing dependencies..."
      - npm install

  build:
    commands:
      - echo "Building the application..."
      - npm run build

  post_build:
    commands:
      - echo "Running tests..."
      - npm test

artifacts:
  files:
    - '**/*'
  discard-paths: yes
In this example, the buildspec.yaml file defines three phases: install, build, and post_build. The install phase specifies the runtime version and installs the necessary dependencies. The build phase builds the application, and the post_build phase runs the tests. Finally, the artifacts section defines the files to be included in the build output.
By customizing the buildspec.yaml file according to your project's requirements, you can instruct CodeBuild on how to build, test, and package your application. This configuration file is stored alongside your source code in a version control repository, such as AWS CodeCommit.
CodeBuild's features like caching, parallel execution, and integrations with external services help optimize build performance and streamline the development workflow. It provides detailed build and test reports for analysis and issue identification. By leveraging CodeBuild, you can enhance the efficiency and reliability of your software development process, enabling you to deliver high-quality applications with ease and speed.
Task 1: Build a Simple Website with CodeBuild
Let's get hands-on with CodeBuild! Follow these steps to build a simple website using CodeBuild:
Create a Simple index.html File in CodeCommit Repository: Go to your CodeCommit repository and create a new file named
index.html. Populate it with the desired content for your website's homepage. Save the file in the repository.
Clone the repository to your instance: Open your EC2 instance, clone the code and verify the
index.htmlfile is in the repository directory.
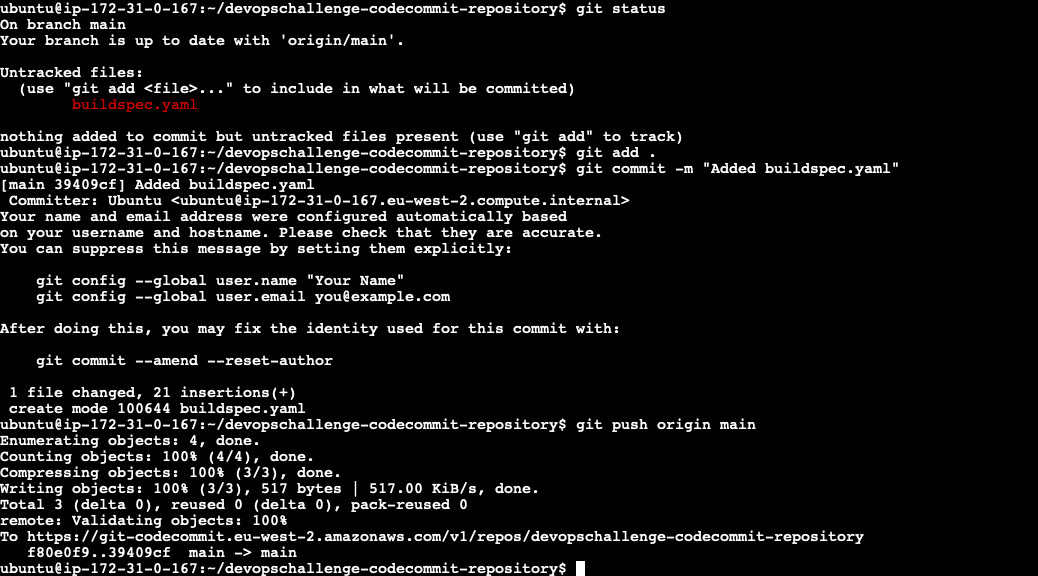
Add buildspec.yaml File to CodeCommit Repository: Create a new file named
buildspec.yamlin your CodeCommit repository. Configure the Buildspec file to execute the necessary build commands, including the installation of dependencies, building the project, running tests, and generating artifacts. Make sure to specify the desired output artifacts and their locations. Once created, push the changes to the CodeCommit Repository.
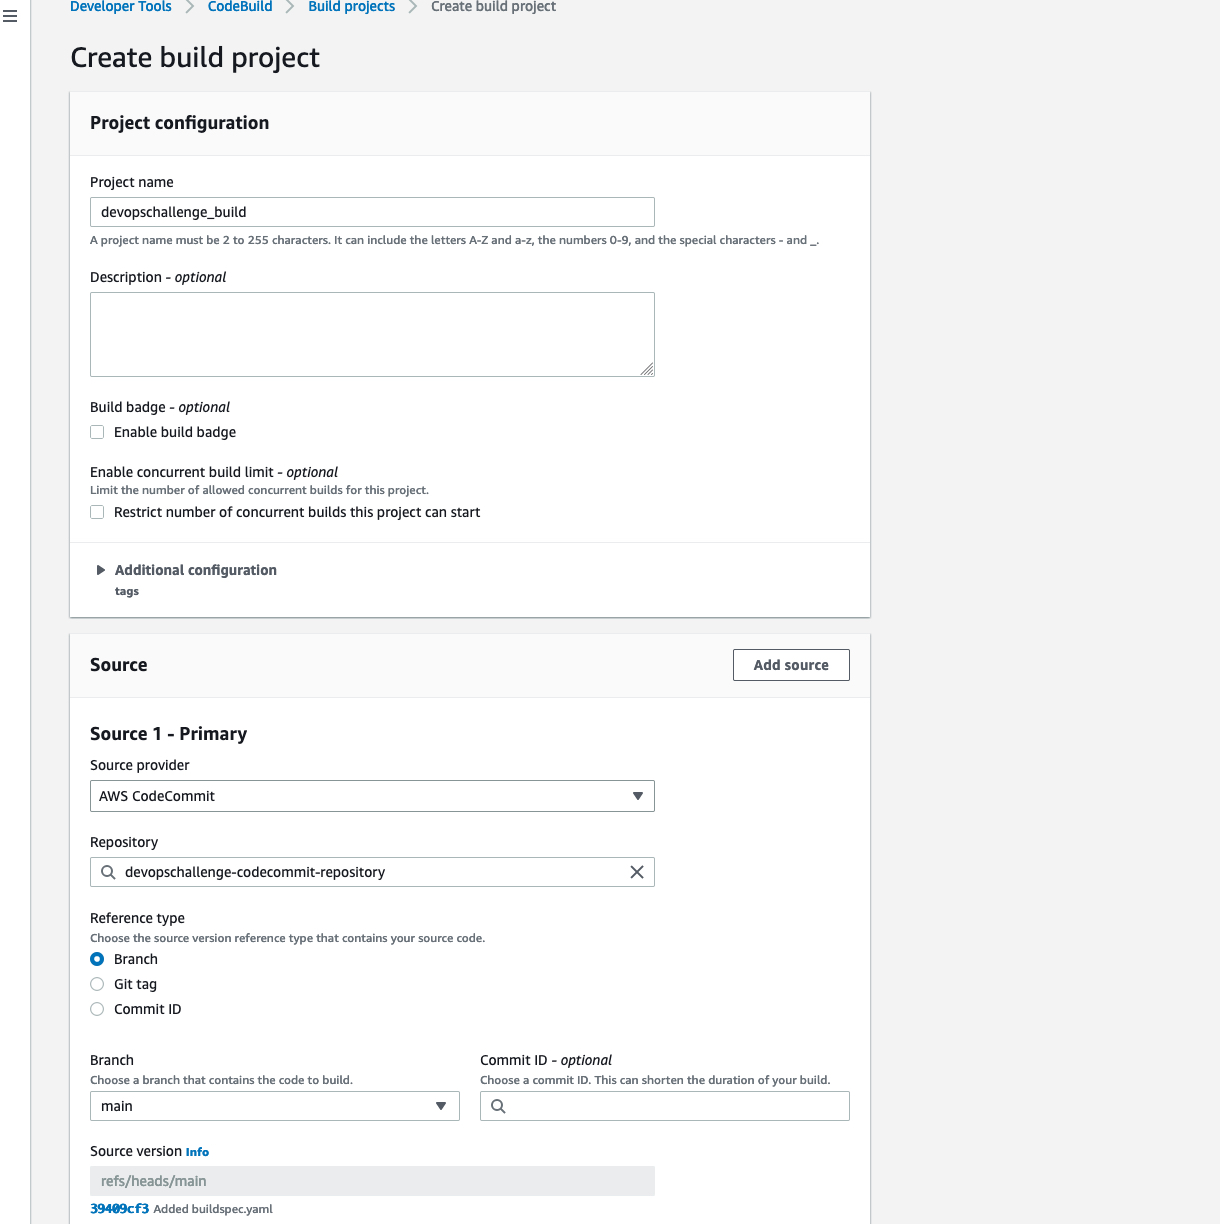
Complete the Build Process: Navigate to the CodeBuild section of AWS and select 'Create build project'. Provide the project details such as name and description and select the repository from which the project will pull the code.

Provide the environment details and the Role name. In this case, I will use Ubuntu.

Select to use a
buildspec fileand create the build project.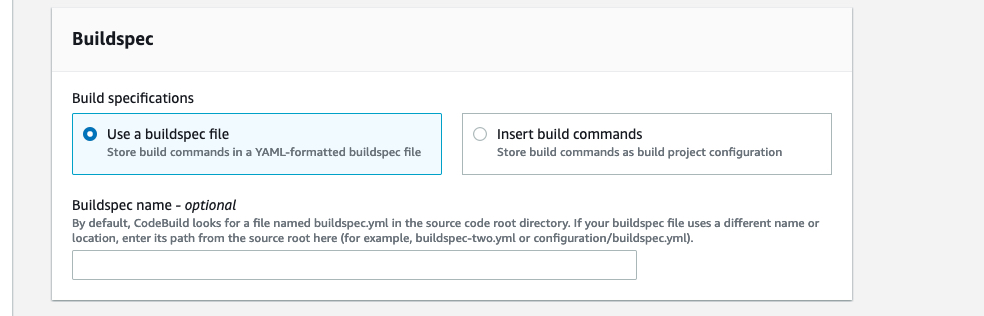
Verify the project build details and click on 'Start build'

Verify the build: Verify the build is successful and the build phases were completed with no errors.


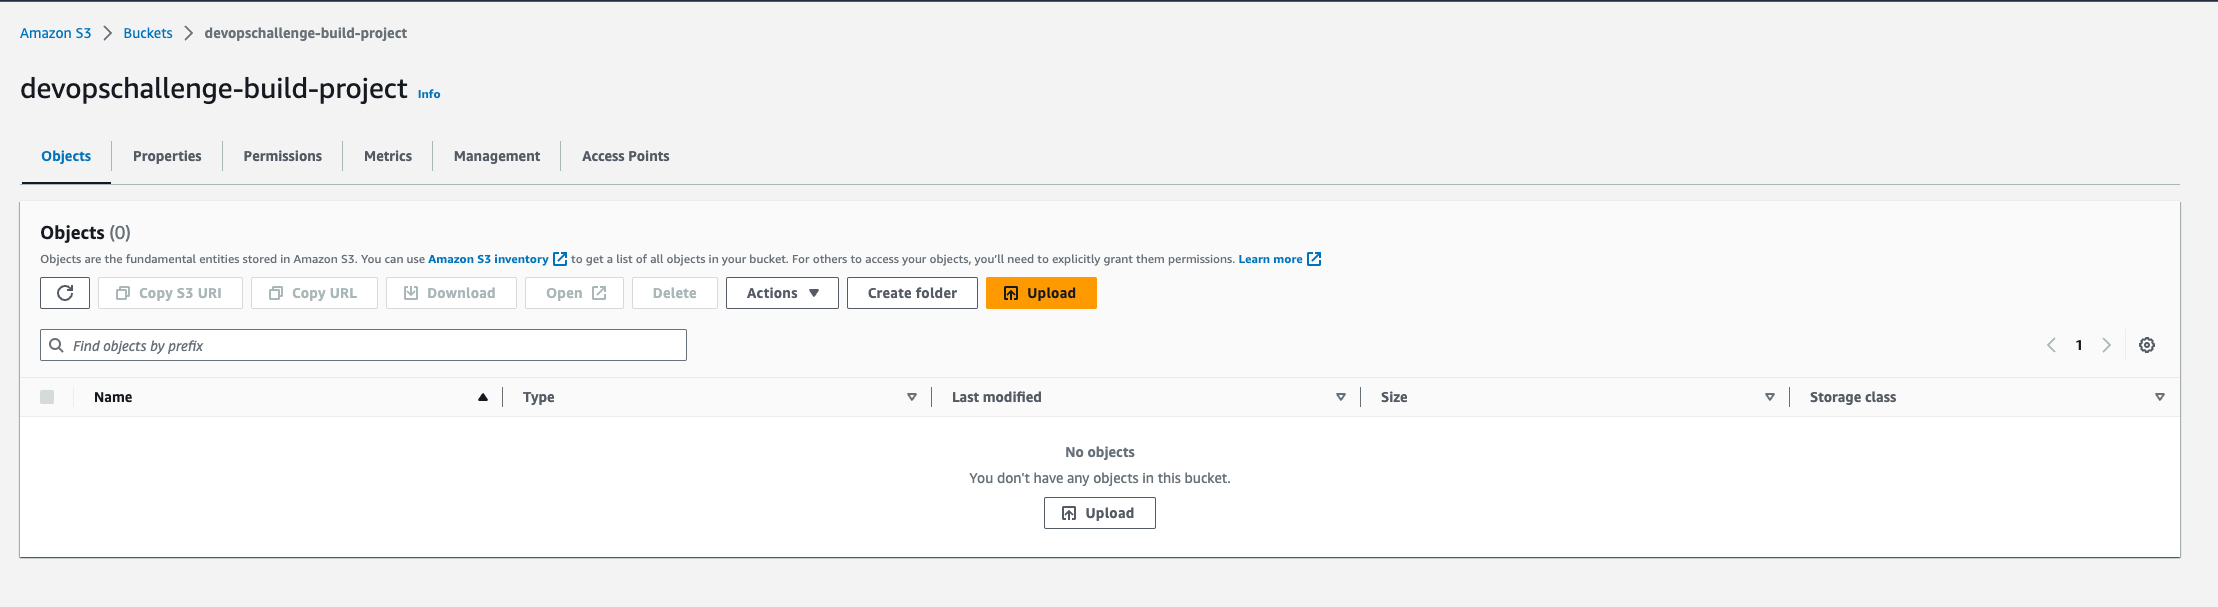
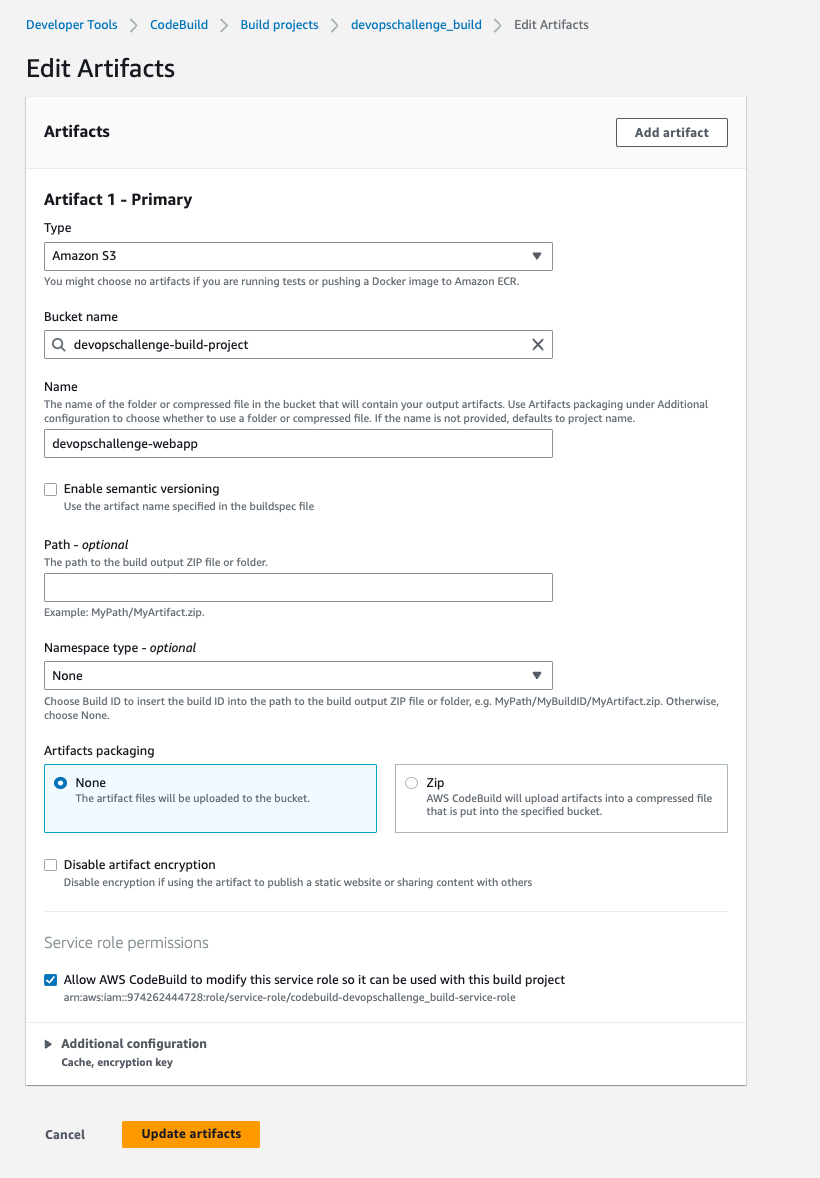
Store the artifact: To store the artifact, we need to create an S3 bucket first. Navigate to the S3 service in the AWS console and provide the details to create the bucket.

Now, we can navigate to the CodeBuild project build, click on edit and select
artifacts. Provide all the necessary details and create the artifact.
Retry build after adding the
artifactssection. You can see the phaseUPLOAD_ARTIFACTSwas successful.
Test the artifact: Navigate to the S3 bucket created earlier and you will see a new folder which contains the artifact created by CodeBuild.

Go inside the folder and open the
index.html.Select the Open button at the top to open the web app in the browser.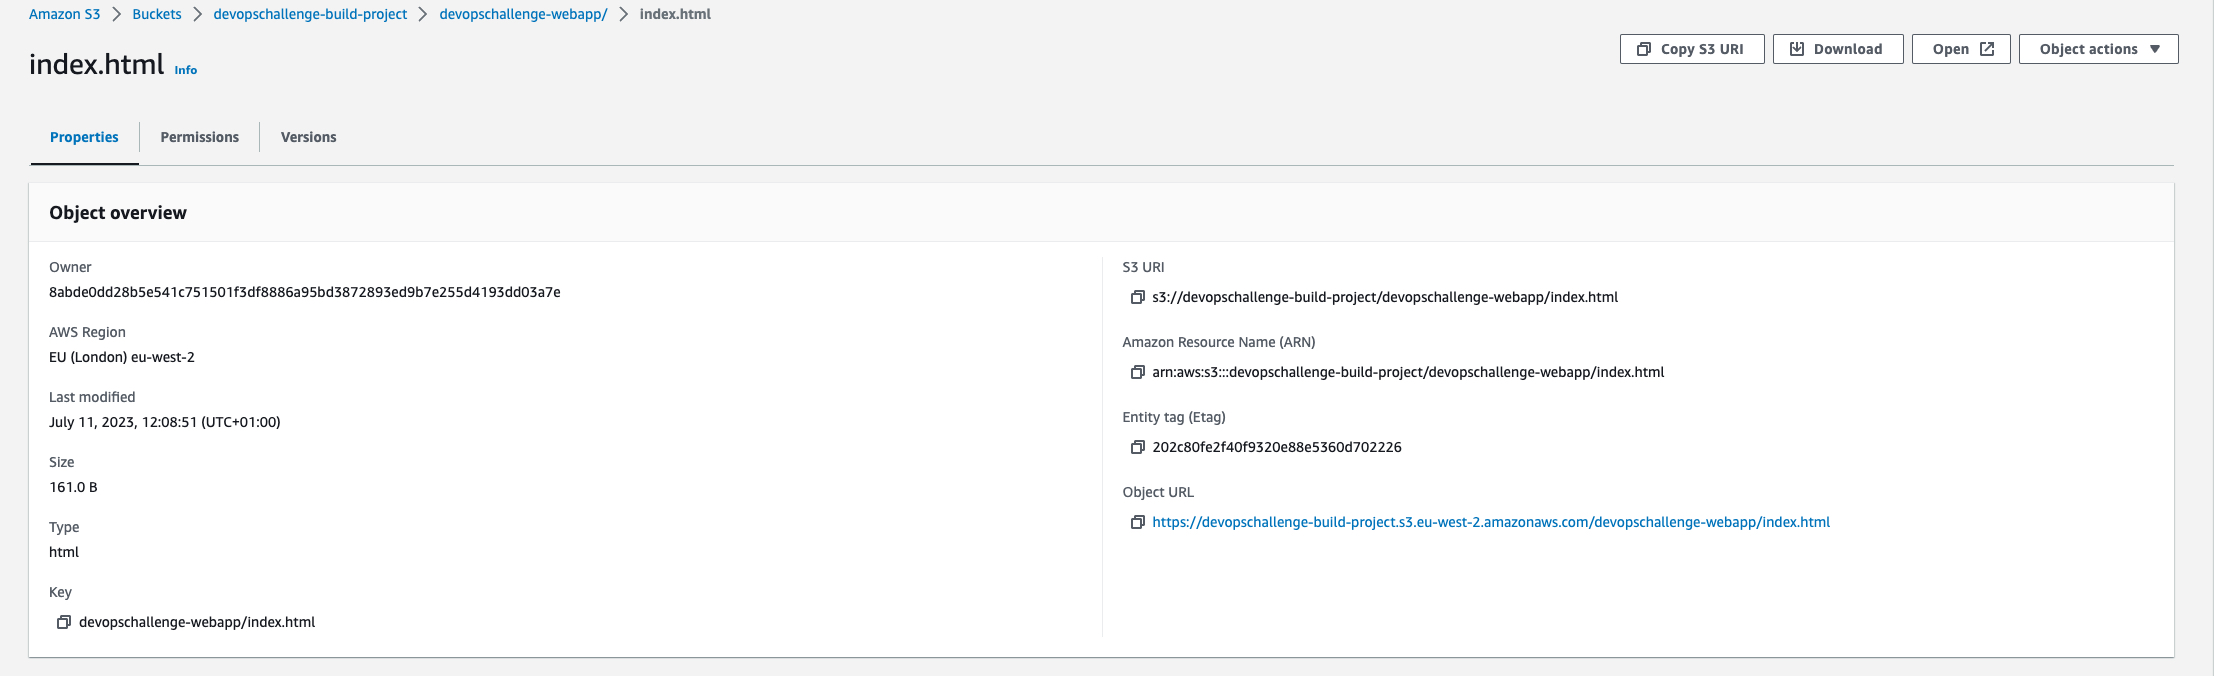

With these steps completed, I have set up my build process using CodeBuild. It will automatically compile your source code, execute the specified build commands, and generate the desired artifacts.
Remember to commit and push the index.html file and the buildspec.yaml file to your CodeCommit repository to trigger the build process.
In this article, we explored AWS CodeBuild and learned how to build a simple website using CodeBuild.
Check out the next steps in the article - CI/CD Pipeline on AWS - CodeDeploy - Part 3 🚀 ☁