Cloud Resume Challenge Part 2 - Website visitors counter backed with API Gateway, Lambda, and DynamoDB

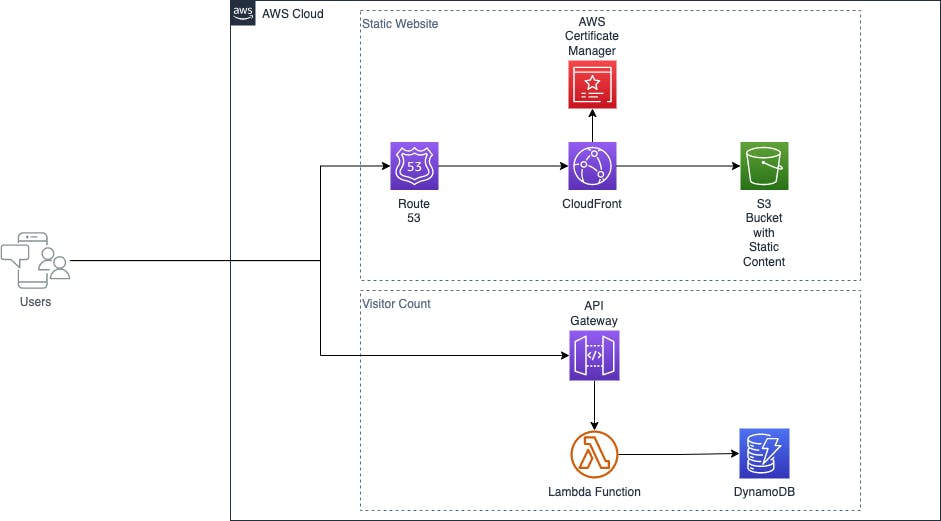
Welcome to the second part of our Cloud Resume Challenge series! In this instalment, we will be showcasing how to build a website visitors counter using the powerful combination of API Gateway, Lambda, and DynamoDB. This step-by-step guide will walk you through the process of setting up a serverless architecture, handling incoming traffic, and storing data in a managed NoSQL database. Whether you're new to cloud computing or an experienced professional, this tutorial is an excellent opportunity to expand your skill set and take your cloud resume to the next level. So without further ado, let's dive in!
Step 1: Set up DynamoDB
Log in to the AWS Management Console and navigate to the DynamoDB service.
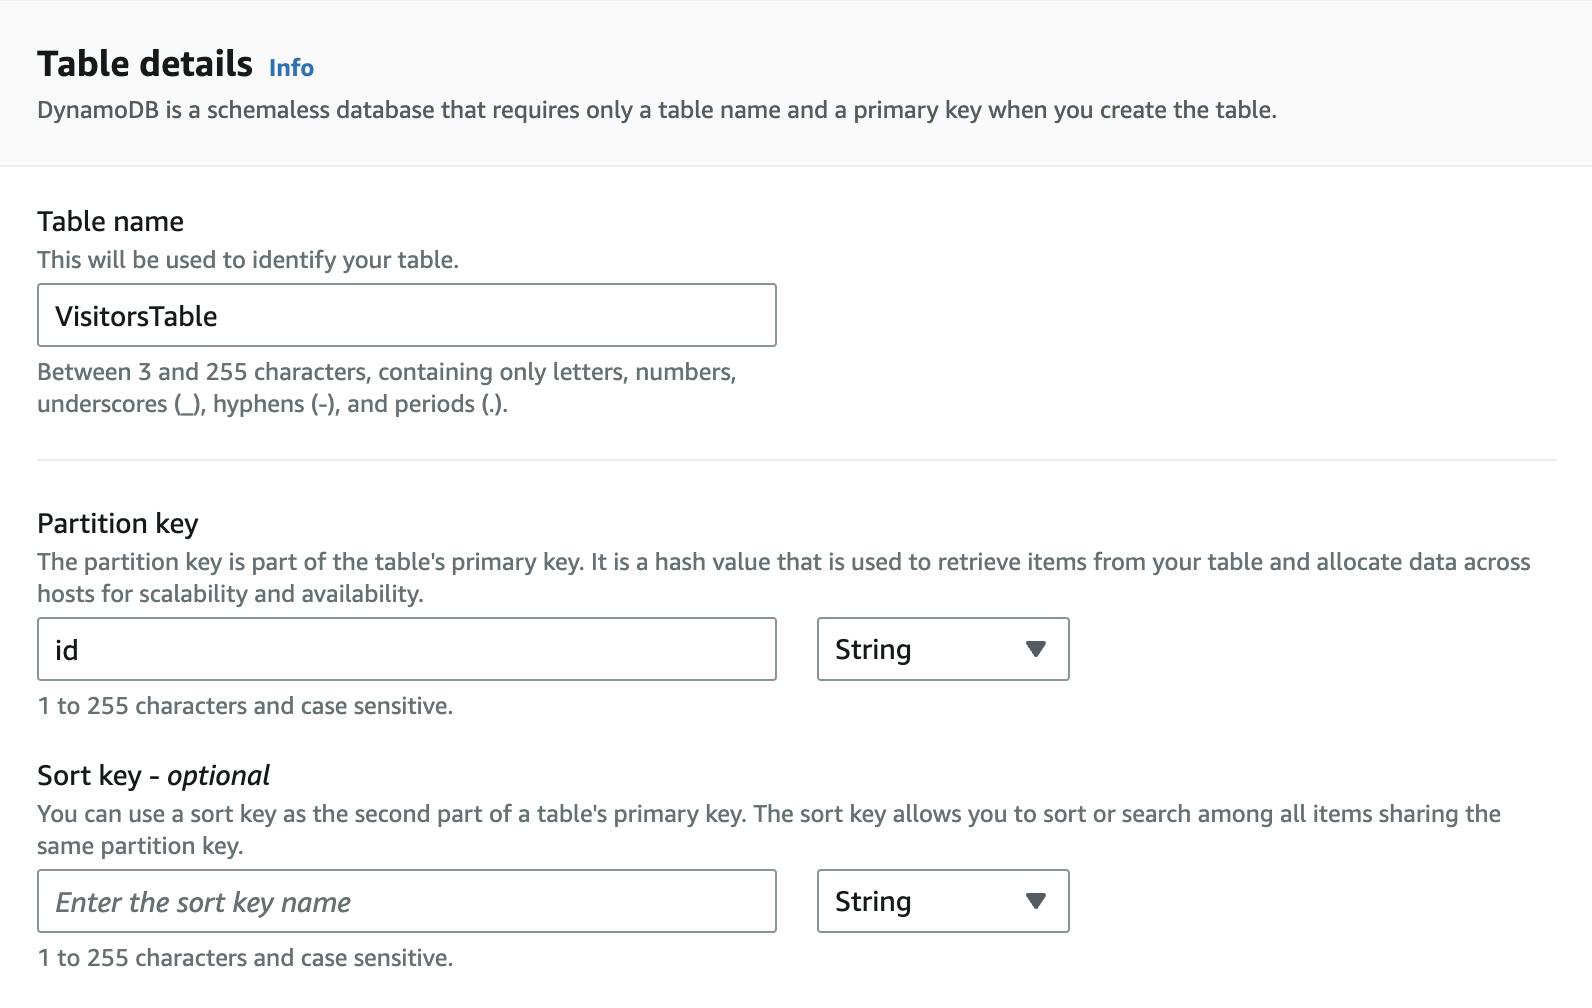
Click on the "Create table" button and enter the following information:
Table name: "VisitorsTable"
Primary key: "id" (type: String)
Click on the "Create" button to create the table.

Go to the "Items" tab and click on the "Create item" button.
Enter the following information for the item:
"id": "visitor_count"
"visitors": 0 (type: Number)
Click on the "Save" button to save the item.

Step 2: Create a Lambda function
Log in to the AWS Management Console and navigate to the Lambda service.
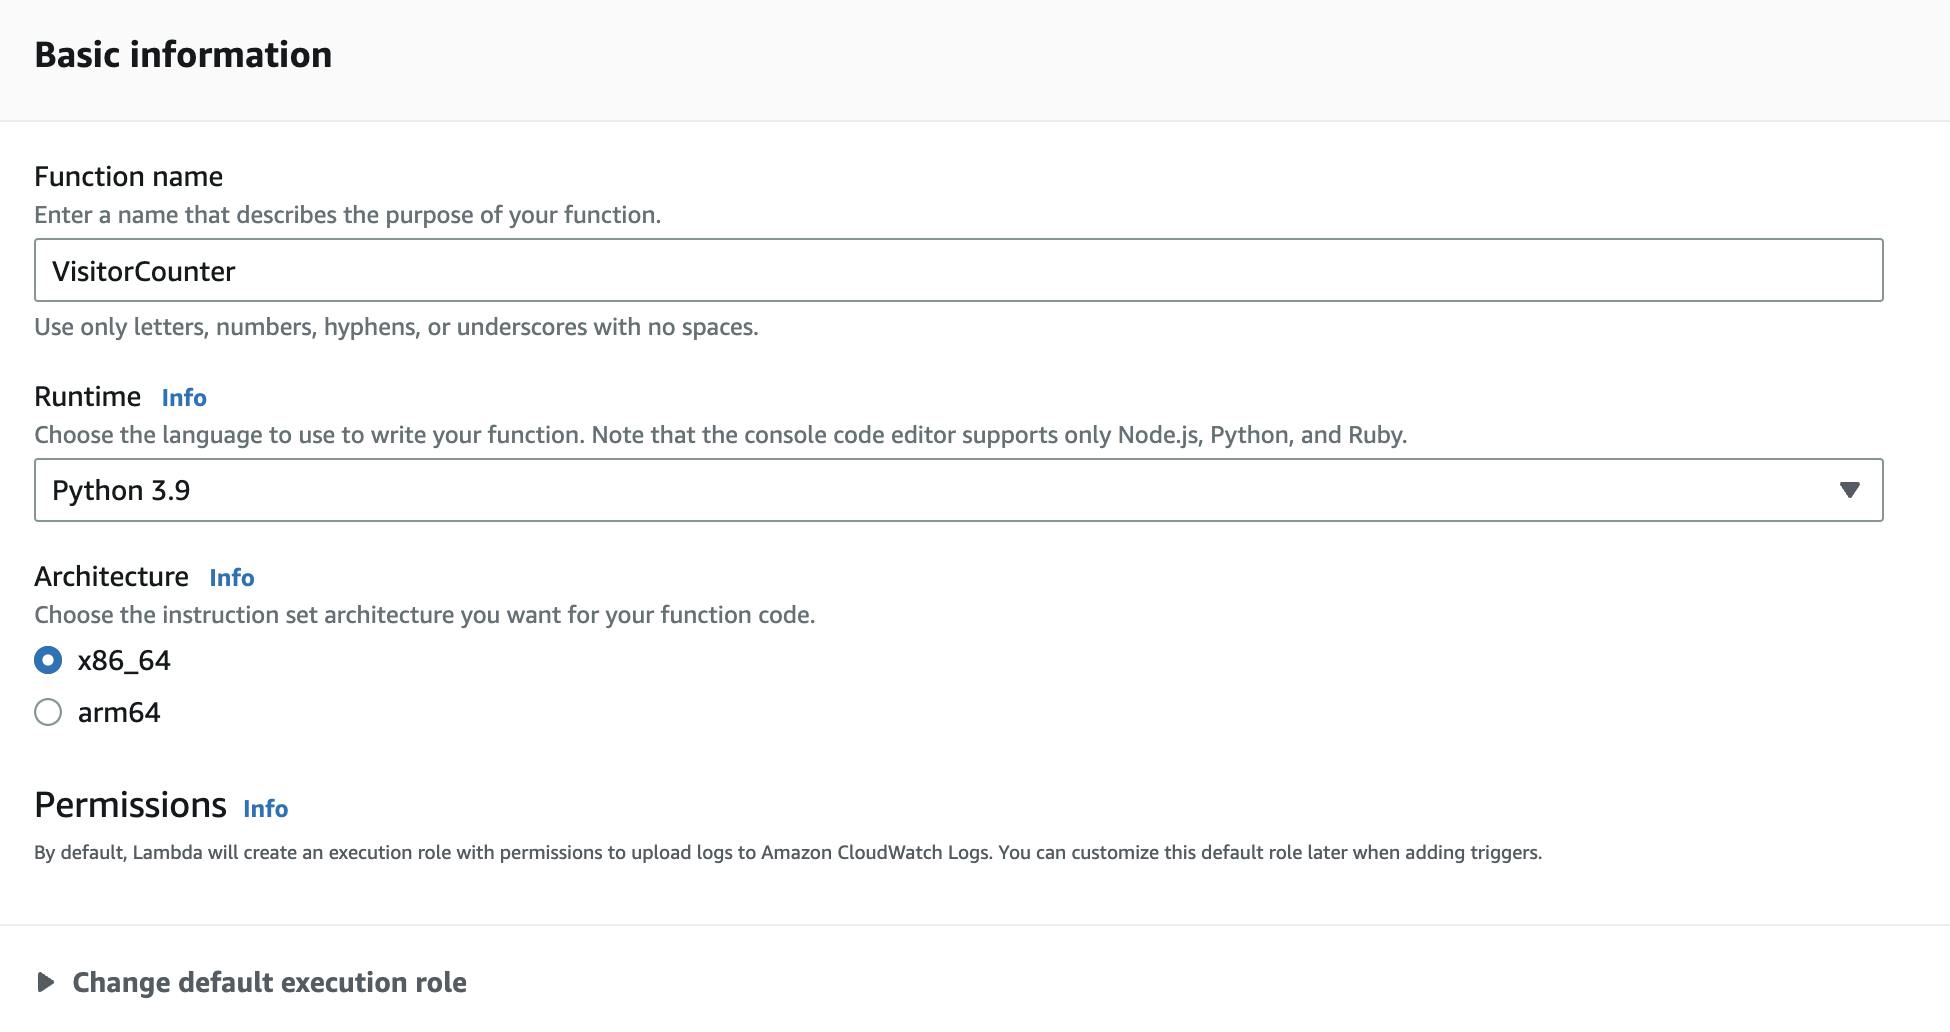
Click on the "Create function" button and select "Author from scratch".
Enter the following information:
Function name: "VisitorCounter"
Runtime: Choose the desired programming language (in my case, Python 3.9)
Create a new execution role or use an existing one
Click on the "Create function" button.

In the "Function code" section, paste the following Python code:
import json
import boto3
import os

# Initialize dynamodb boto3 object
dynamodb = boto3.resource('dynamodb')
# Set dynamodb table name variable from env
ddbTableName = os.environ['databaseName']
table = dynamodb.Table(ddbTableName)


def lambda_handler(event, context):
    try:
        # Try to update the item
        ddbResponse = table.update_item(
            Key={
                'id': 'visitor_count'
            },
            UpdateExpression='SET visitor_count = visitor_count + :value',
            ExpressionAttributeValues={
                ':value':1
            },
            ReturnValues="UPDATED_NEW"
        )
    except:
        # If the item doesn't exist, create it
        table.put_item(
            Item={
                'id': 'visitor_count',
                'visitor_count': 1
            }
        )
        ddbResponse = table.get_item(
            Key={
                'id': 'visitor_count'
            }
        )


    # Format dynamodb response into variable
    responseBody = json.dumps({"count": int(ddbResponse["Attributes"]["visitor_count"])})

    # Create api response object
    apiResponse = {
        "isBase64Encoded": False,
        "statusCode": 200,
        'headers': {
            'Access-Control-Allow-Headers': 'Content-Type',
            'Access-Control-Allow-Origin': '*',
            'Access-Control-Allow-Methods': 'OPTIONS,POST,GET'
        },
        "body": responseBody
    }


    # Return api response object

    return apiResponse
In the "Environment variables" section, add the following environment variable:
Key: "databaseName"
Value: "VisitorsTable"
In the "Designer" section, click on the "Add triggers" button and add an API Gateway trigger.
API: "Create a new API"
Security: "Open" (for testing purposes)
API Type: HTTP API
Security: Open
Tick the ‘Cross-origin resource sharing (CORS) box
Click on the "Add" button to add the trigger.
Step 3: Set up API Gateway
Log in to the AWS Management Console and navigate to the API Gateway service.
Navigate to the "VisitorCounter" API created in the previous step.
Add your website’s URL to the ‘Access-Control-Allow-Origin-
Note the "Invoke URL" for the API, which will be used in the next step.
Step 4: Integrate with the website
- Make an AJAX call on the website to the API Gateway endpoint using the "Invoke URL" obtained previously to activate the Lambda function and get the updated visitor count.
// GET API REQUEST
async function get_visitors() {
    // call post api request function
    //await post_visitor();
    try {
        let response = await fetch('https://cv6b7x3ici.execute-api.eu-west-2.amazonaws.com/default/VisitorCounter', {
            method: 'GET',
        });
        let data = await response.json()
        document.getElementById("visitors").innerHTML = data['count'];
        console.log(data);
        return data;
    } catch (err) {
        console.error(err);
    }
}


get_visitors();
- Display the visitor count on the website.
<p>You are visitor number: <span id="visitors"></span></p>
Step 5: Test the solution
- Refresh the website to verify that the visitor count is being incremented and displayed

