#90DaysOfDevOps Challenge - Day 85 - DevOps Project 6 - Deploying a Node.js App on AWS ECS Fargate and ECR
Cloud Engineer and DevOps enthusiast, just talking about AWS, Docker, Linux, Kubernetes, Python, and automation.
Welcome to Day 85 of the #90DaysOfDevOps Challenge. Today, we'll embark on an exciting project where we will deploy a Node.js app using AWS ECS Fargate and AWS ECR. This project will allow us to leverage the power of Amazon ECS (Elastic Container Service) and ECR (Elastic Container Registry) to efficiently manage and deploy containerized applications.
Project Description
In this project, our goal is to deploy a Node.js application on AWS ECS Fargate and store its Docker image in AWS ECR. Amazon ECS (Elastic Container Service) is a fully managed container orchestration service that enables you to easily run, scale, and secure Docker containers on AWS. AWS Fargate is a serverless compute engine for containers, allowing you to focus on deploying your applications without having to manage the underlying infrastructure.
Before we start, you can read more about the tech stack we'll be using in this link. It will provide you with a better understanding of the AWS ECS and ECR services and their capabilities.
Hands-on Project: Deploying a Node.js App on AWS ECS Fargate and ECR
Step 1: Create EC2 Instance and Install AWS CLI and Docker
Create an EC2 instance and Install the AWS Command Line Interface (CLI) and Docker. I will use the below script and provide it via User Data to install at boot.
#!/bin/bash

echo "AWS CLI Installation"
echo "------------------------------------------------------------------"
sudo apt install -y unzip
curl "https://awscli.amazonaws.com/awscli-exe-linux-x86_64.zip" -o "awscliv2.zip"
unzip awscliv2.zip
sudo ./aws/install
echo "Docker installation"
echo "------------------------------------------------------------------"
sudo apt update
sudo apt install -y apt-transport-https ca-certificates curl software-properties-common
curl -fsSL https://download.docker.com/linux/ubuntu/gpg | sudo gpg --dearmor -o /usr/share/keyrings/docker-archive-keyring.gpg
echo "deb [arch=amd64 signed-by=/usr/share/keyrings/docker-archive-keyring.gpg] https://download.docker.com/linux/ubuntu $(lsb_release -cs) stable" | sudo tee /etc/apt/sources.list.d/docker.list > /dev/null
sudo apt update
sudo apt install -y docker-ce docker-ce-cli containerd.io
sudo systemctl start docker
sudo systemctl enable docker
sudo usermod -aG docker ubuntu
sudo reboot

Step 2: Clone the GitHub Repository
Start by obtaining the Node.js application from the GitHub repository provided. Clone it to your AWS EC2 instance where we will be configuring AWS ECR.
git clone https://github.com/estebanmorenoit/node-todo-cicd.git

Step 3: Configure AWS ECR
Navigate to the AWS Elastic Container Registry (ECR) and create a repository. Choose the repository type and name it accordingly. Select the necessary operating systems and versions that align with the Fargate setup.
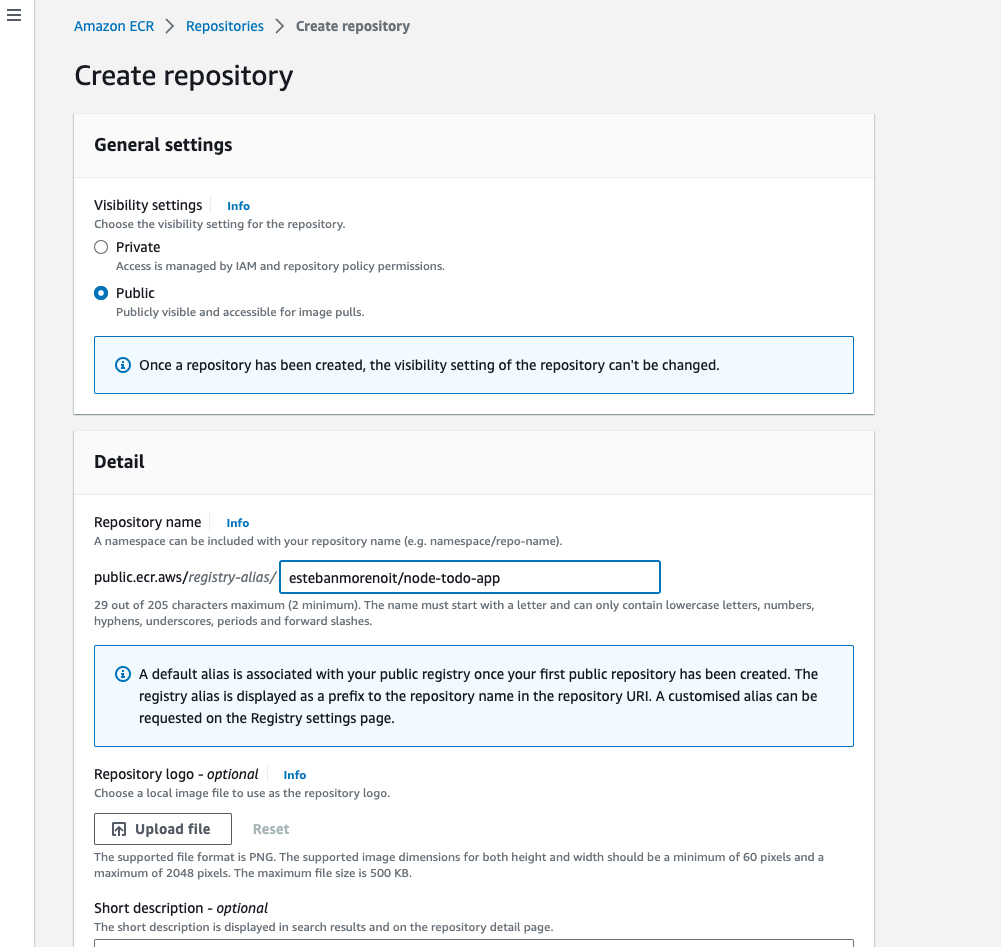
Verify the repository has been successfully created.

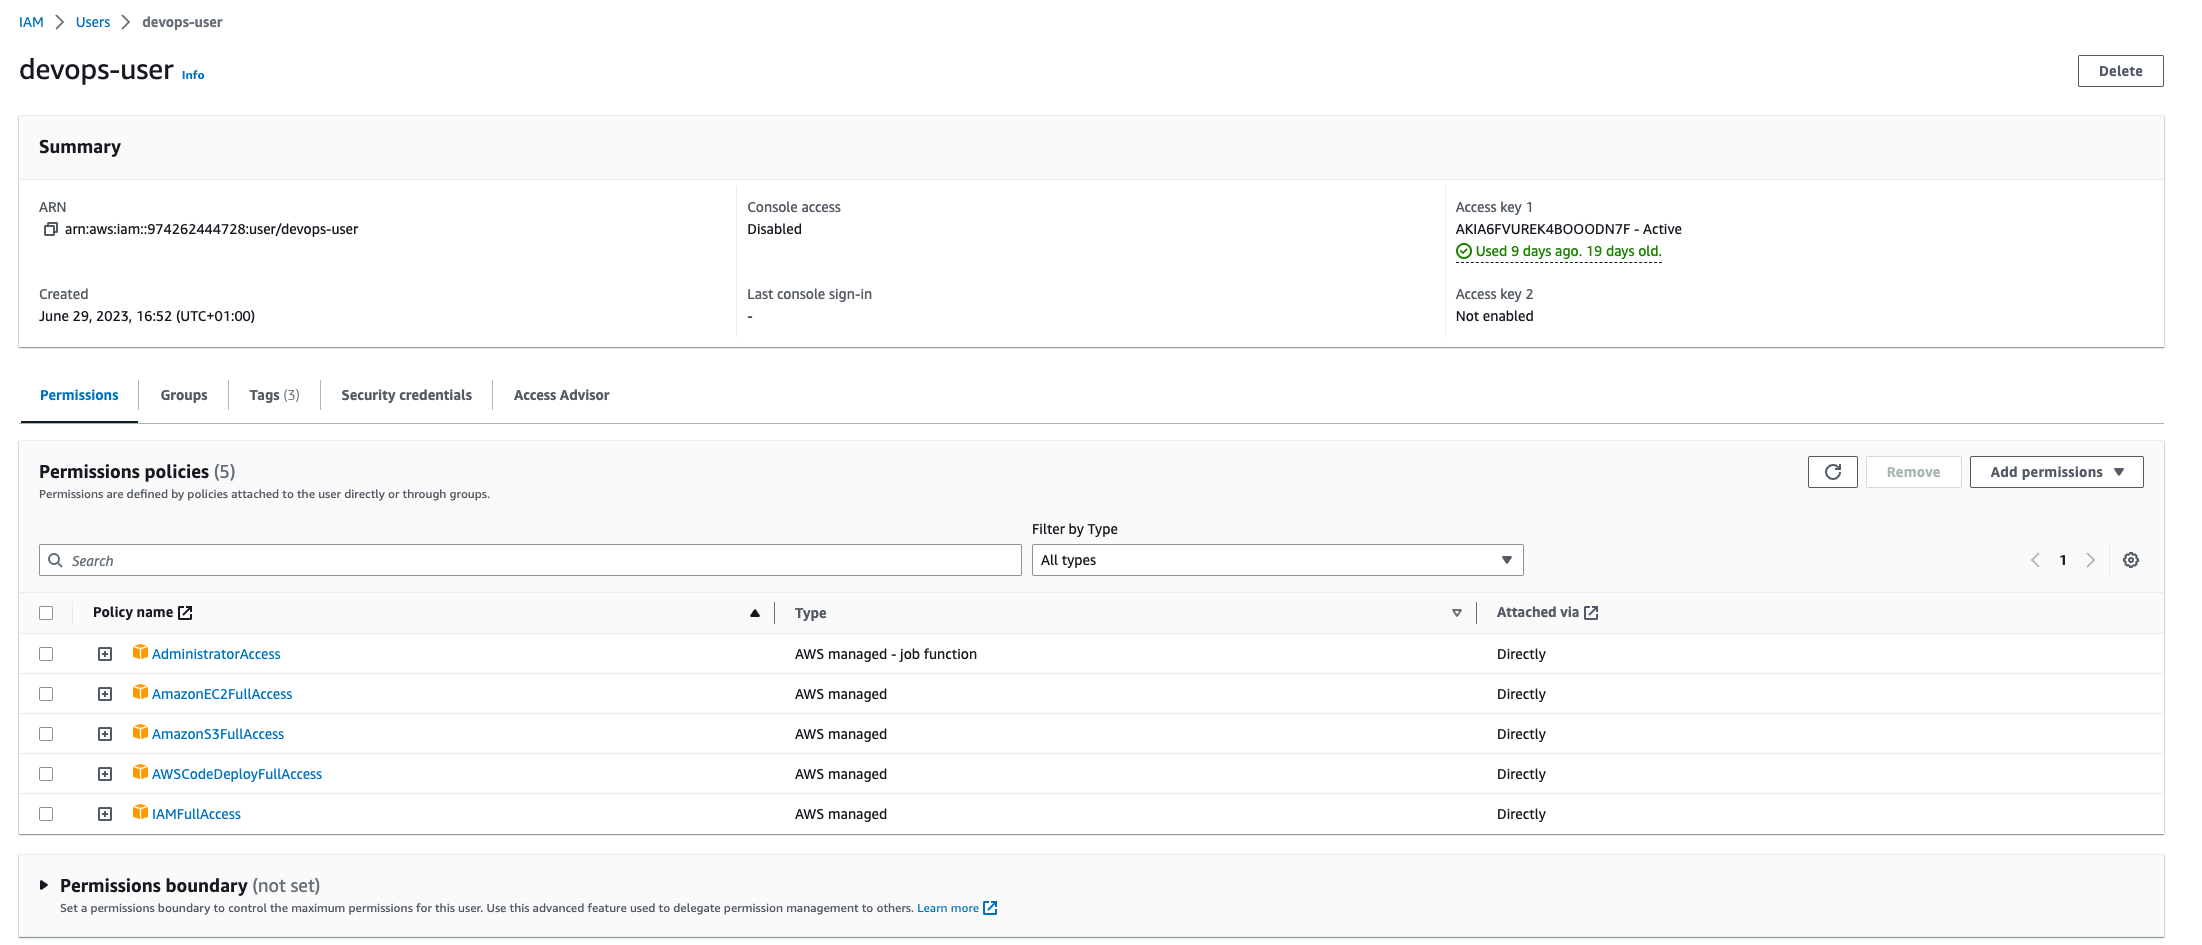
Step 4: Set Up IAM
Create an IAM user in the AWS Management Console and attach the required policies for our project.
Step 5: Configure AWS CLI
Install the AWS Command Line Interface (CLI) on the AWS EC2 instance where the Node.js app resides. Connect the EC2 instance to the AWS Management Console using the AWS CLI.
aws configure

Step 6: Push the Image to ECR
Navigate to the ECR repository created earlier and select "View push commands".

Use the following steps to authenticate and push an image to your repository. For additional registry authentication methods, including the Amazon ECR credential helper, see the Amazon ECR Official Documentation.
Retrieve an authentication token and authenticate your Docker client to your registry. Use the AWS CLI:
aws ecr-public get-login-password --region us-east-1 | docker login --username AWS --password-stdin public.ecr.aws/r2k5e4z9
Build your Docker image using the following command. For information on building a Docker file from scratch, see the instructions here. You can skip this step if your image has already been built:
docker build -t estebanmorenoit/node-todo-app .
After the build is completed, tag your image so you can push the image to this repository:
docker tag estebanmorenoit/node-todo-app:latest public.ecr.aws/r2k5e4z9/estebanmorenoit/node-todo-app:latest
Run the following command to push this image to your newly created AWS repository:
docker push public.ecr.aws/r2k5e4z9/estebanmorenoit/node-todo-app:latest
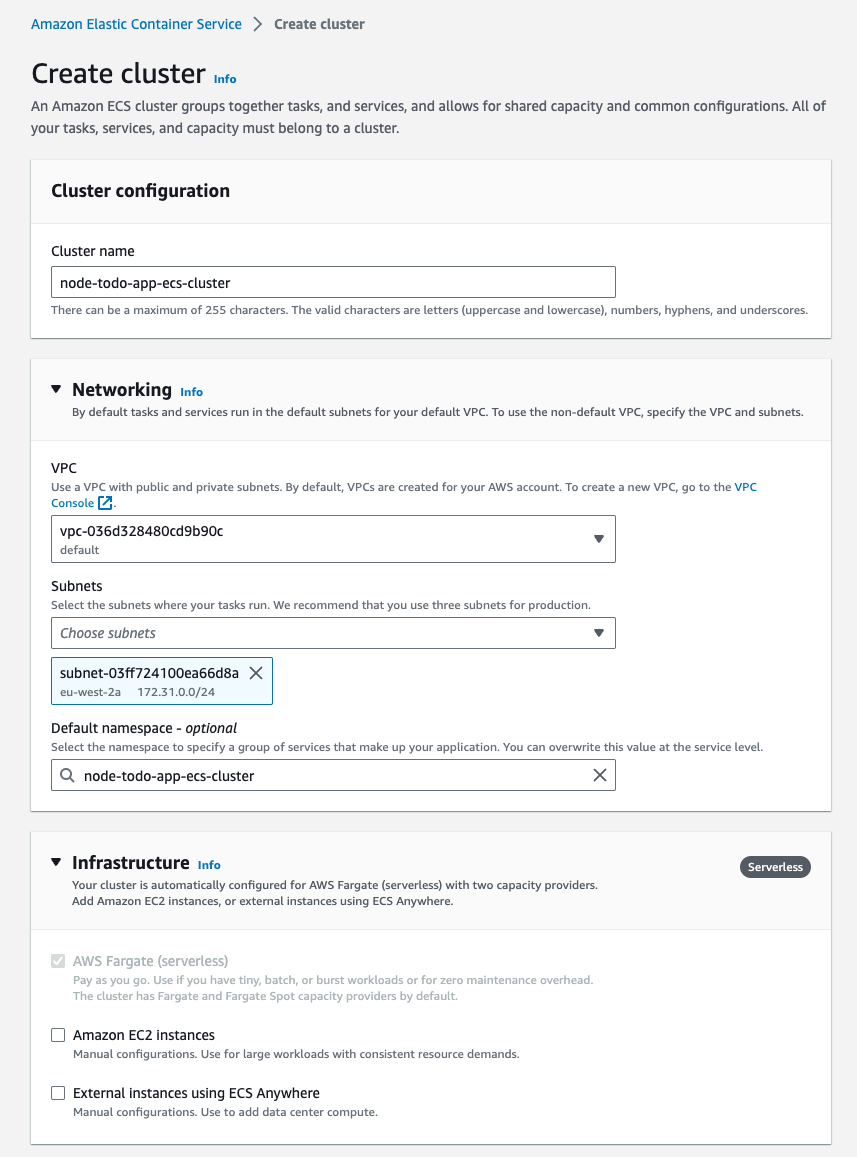
Step 7: Configure AWS ECS
Move on to the AWS Elastic Container Service (ECS) repository in the AWS console. Create a cluster with a relevant name, and choose the Virtual Private Cloud (VPC) and subnet where you want your application to be available.
To avoid the cost impact of multiple EC2 instances, we will use AWS Fargate, which is a serverless technique for managing applications without spinning off instances. Select AWS Fargate as the launch type for the cluster to run on.
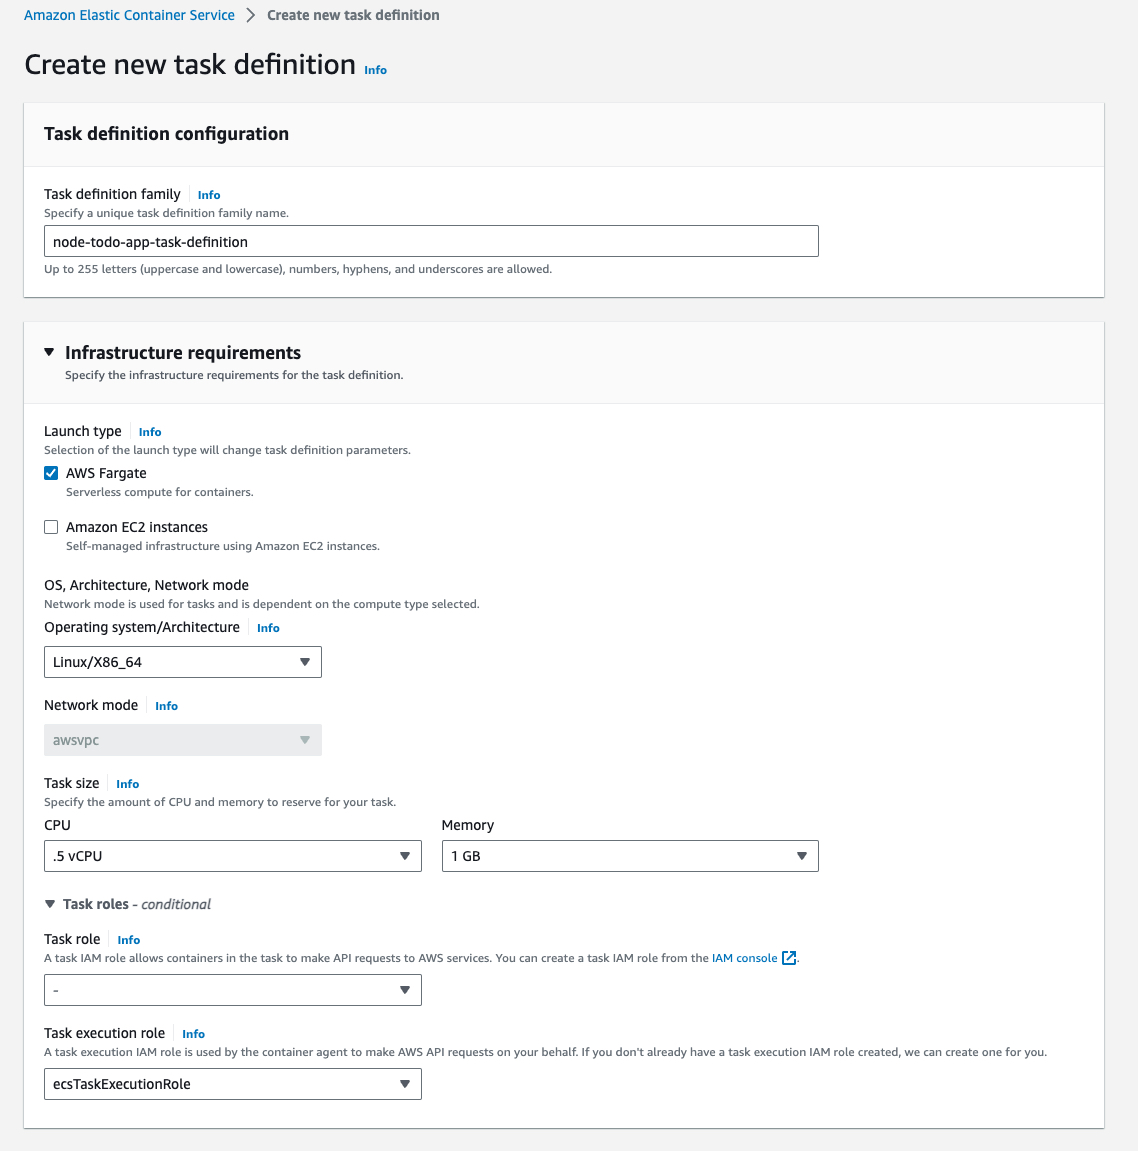
Step 8: Create Task Definition
Create a task definition for your cluster. Provide the task name, container image details, and the ports for the application to run on. Make sure you have exposed a port in your Dockerfile.

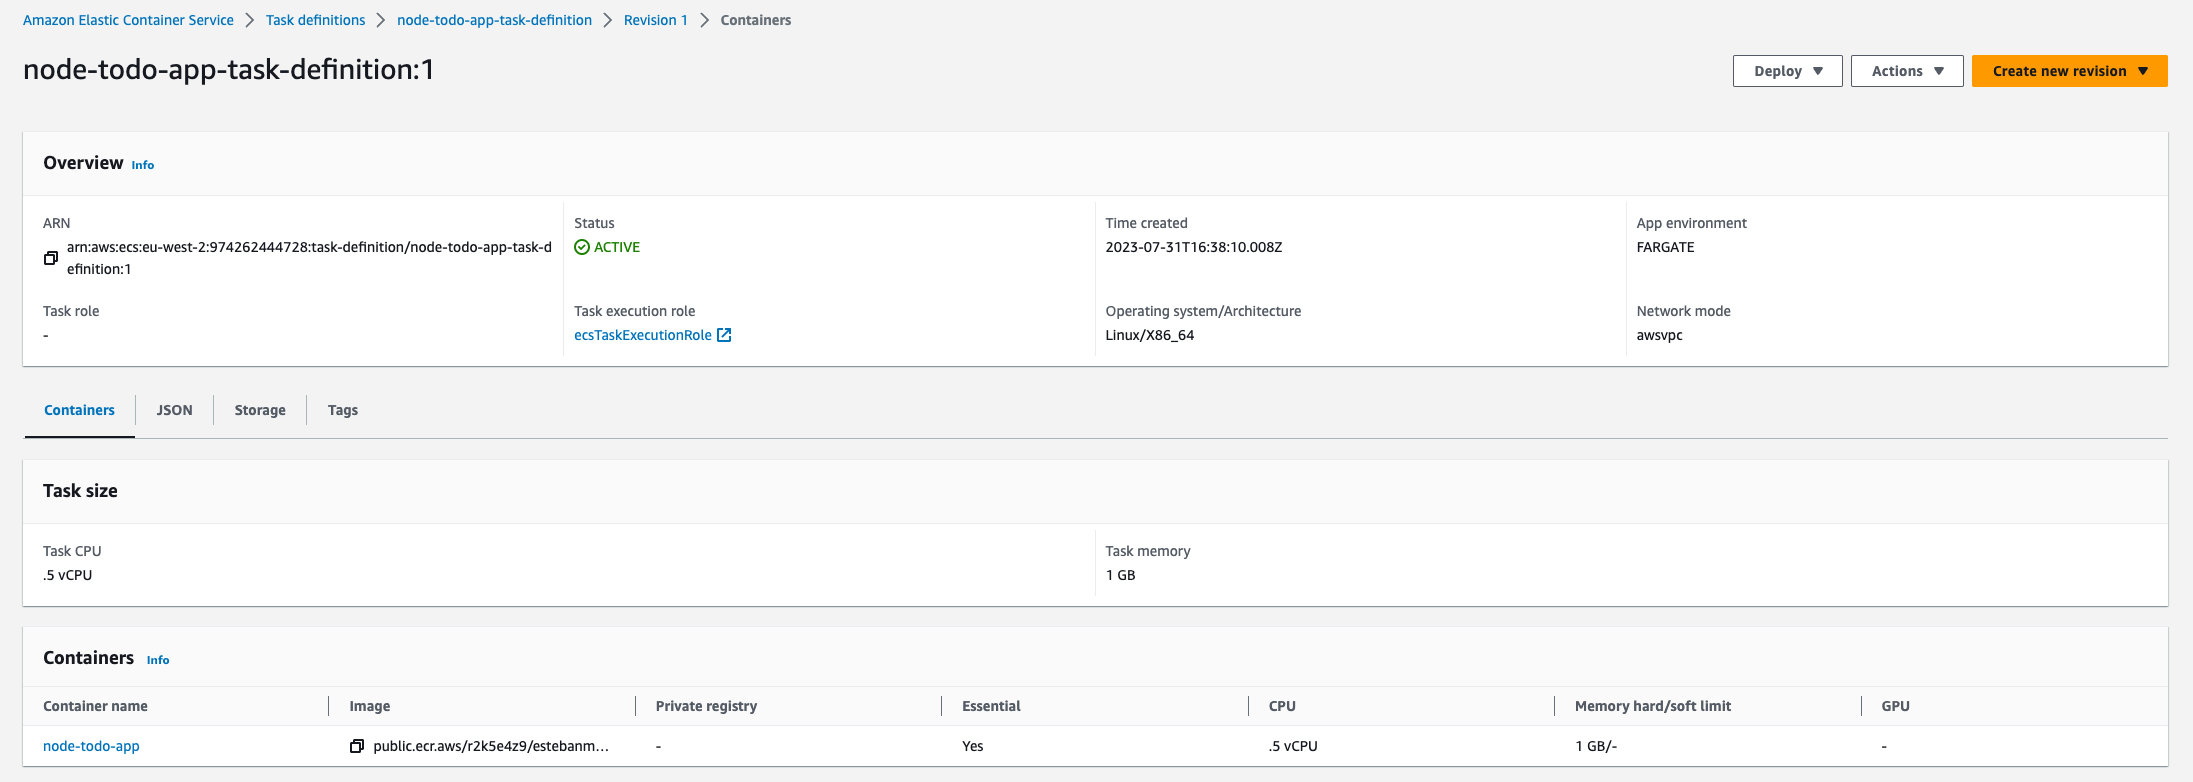
Step 9: Review and Create a Task
Review all the details and create the task definition. Once created, the task will be ready for deployment.
Step 10: Deploy and Run the Task
Click on the "Deploy" button, and then choose "Run task" to deploy the task on the cluster. Select the cluster, and set the launch type to Fargate. Confirm the deployment.

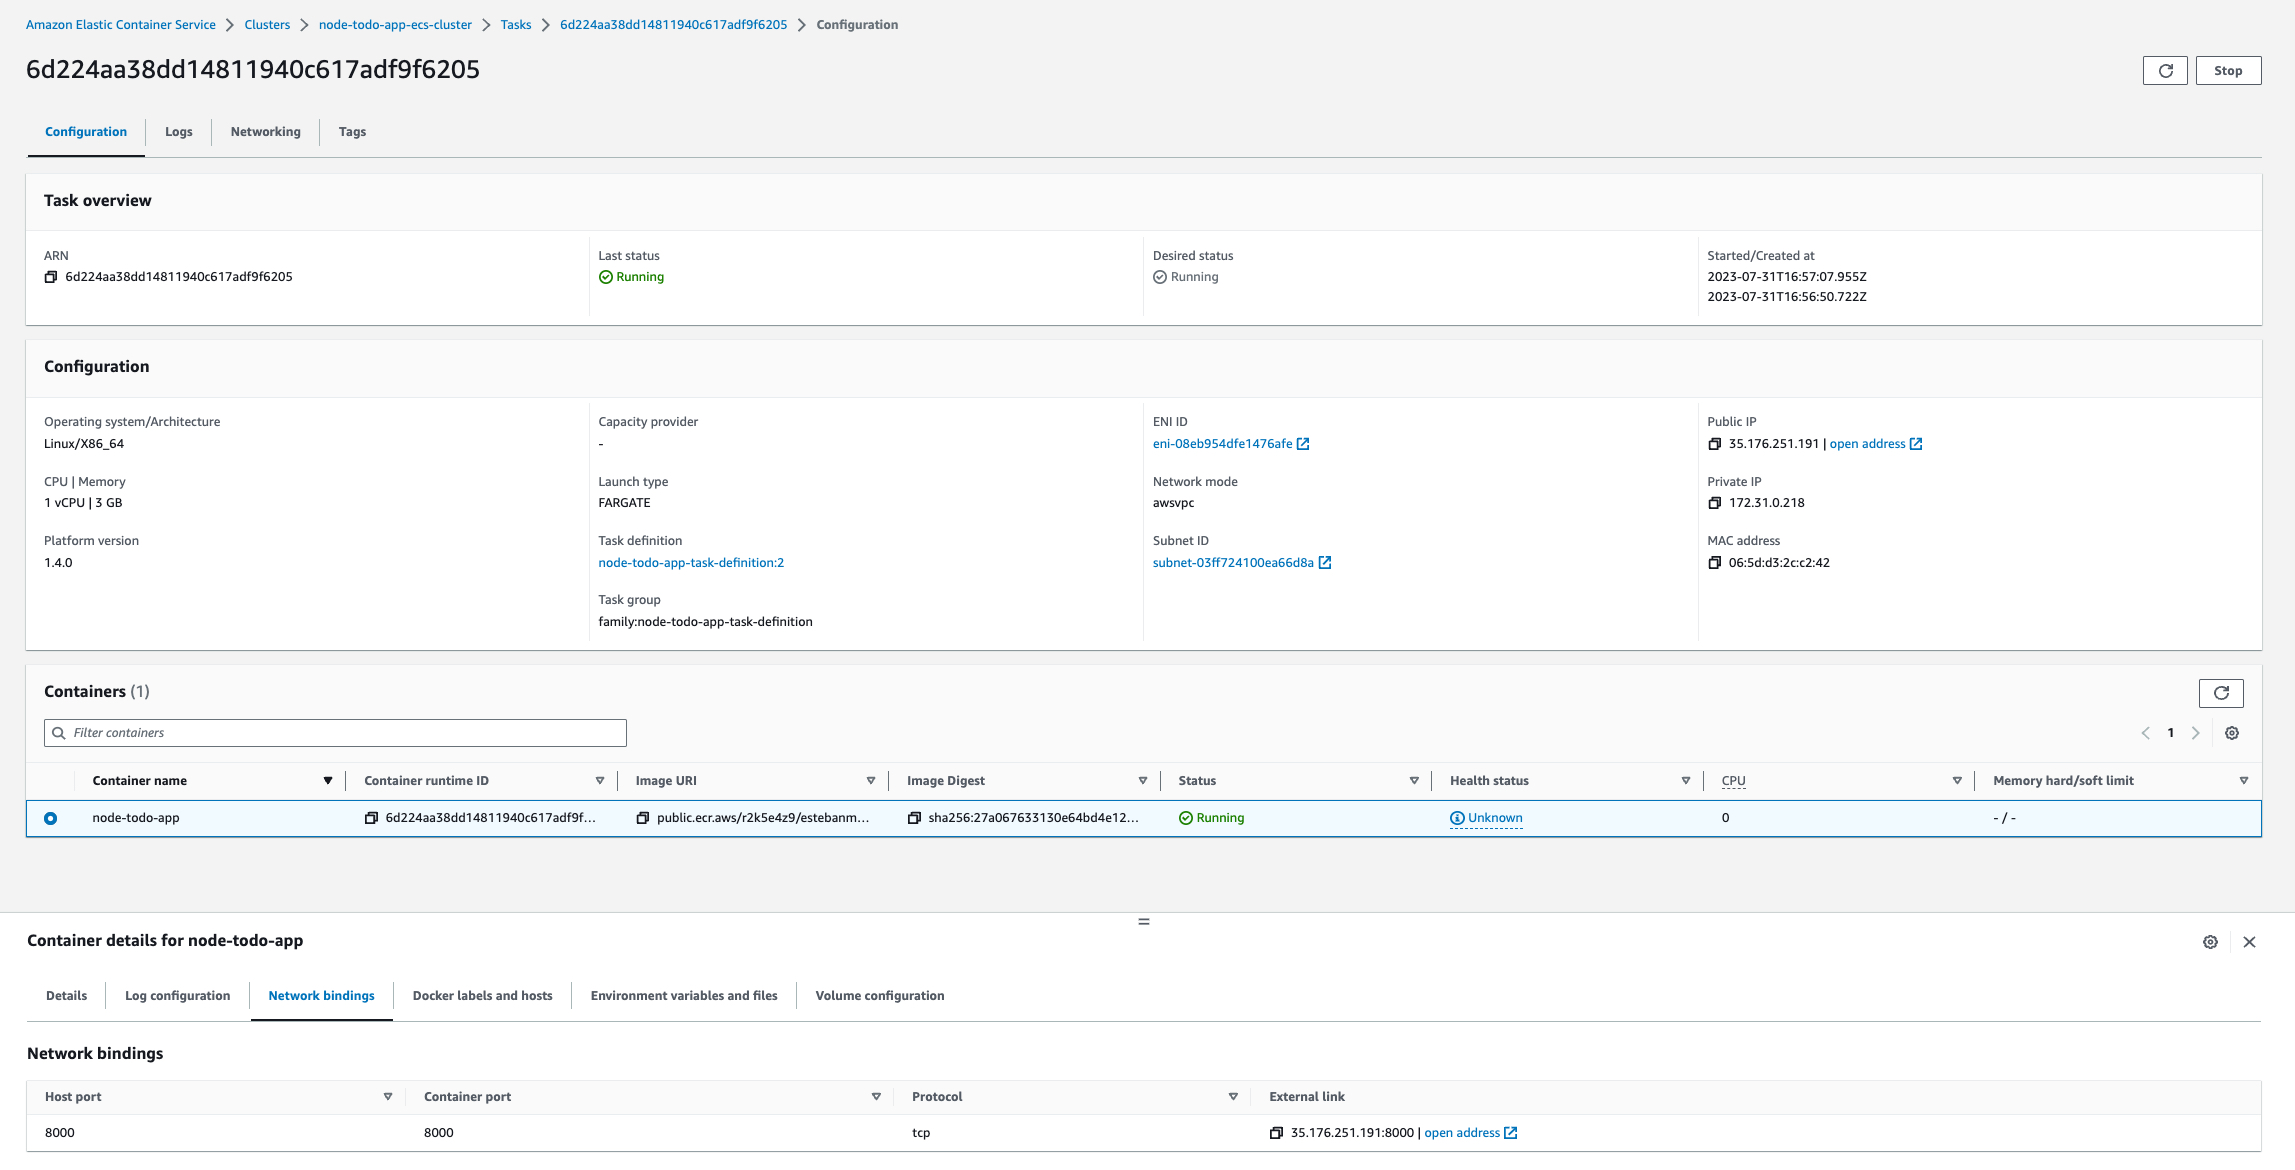
Verify the task is up and running.
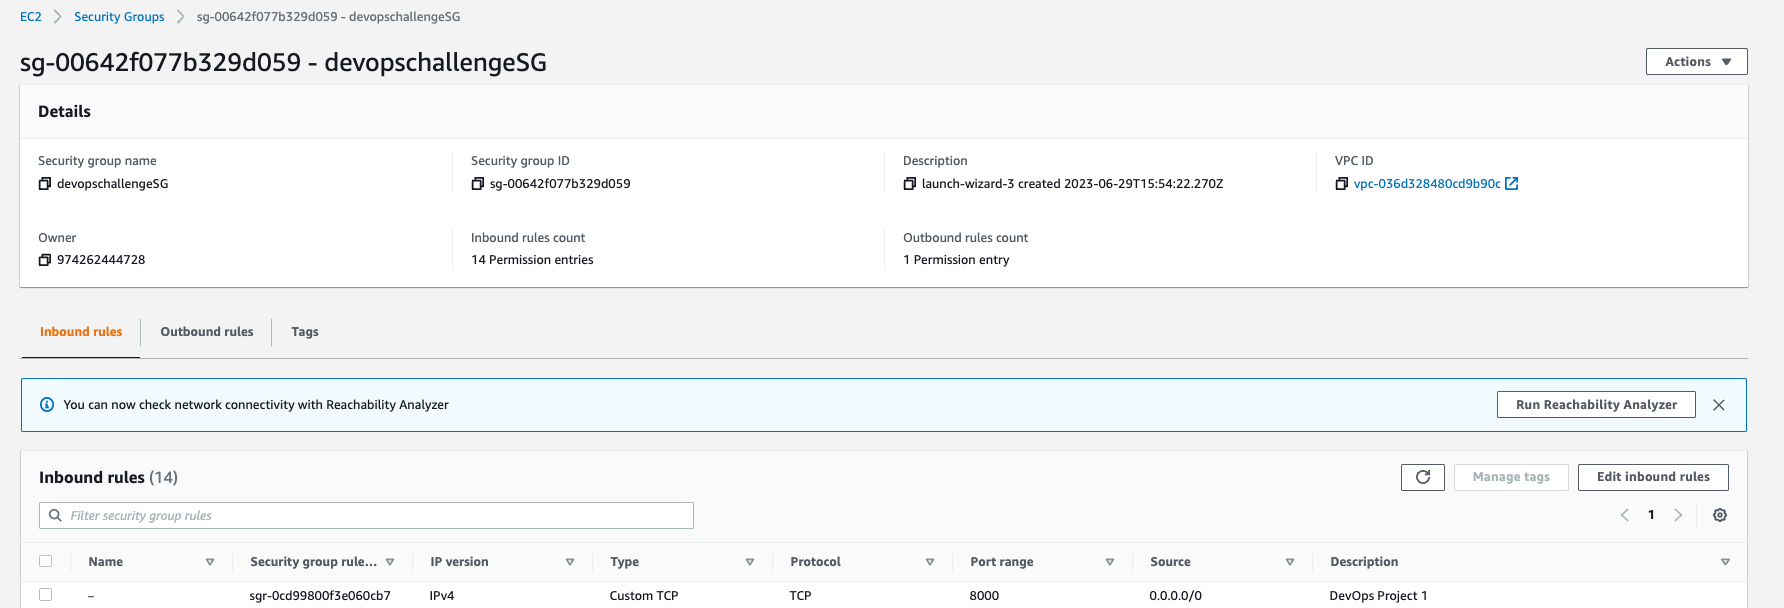
Step 11: Open the Port in the Security Group
Ensure port 8000 is open in the Security Group used in our task.
Step 12: Project Live Execution
Finally, navigate to the task that was created, and take note of the public IP. Your Node.js app is now live and accessible!

Congratulations on completing Day 85 of the #90DaysOfDevOps challenge! In this project, we successfully deployed a Node.js app on AWS ECS Fargate and ECR, leveraging the power of AWS cloud services. This project showcased how to efficiently manage containerized applications with AWS services, ensuring high availability and scalability while reducing operational overhead. Stay tuned for tomorrow's challenge, where we'll dive into another exciting project!